Configure Incremental Authorization on your Machine | Machines
1
Video guide
2
On the dashboard of your Nayax Core management suite click on the Operators tab
Image Attached
On the Dashboard of your Nayax Core management suite click on the operations tab
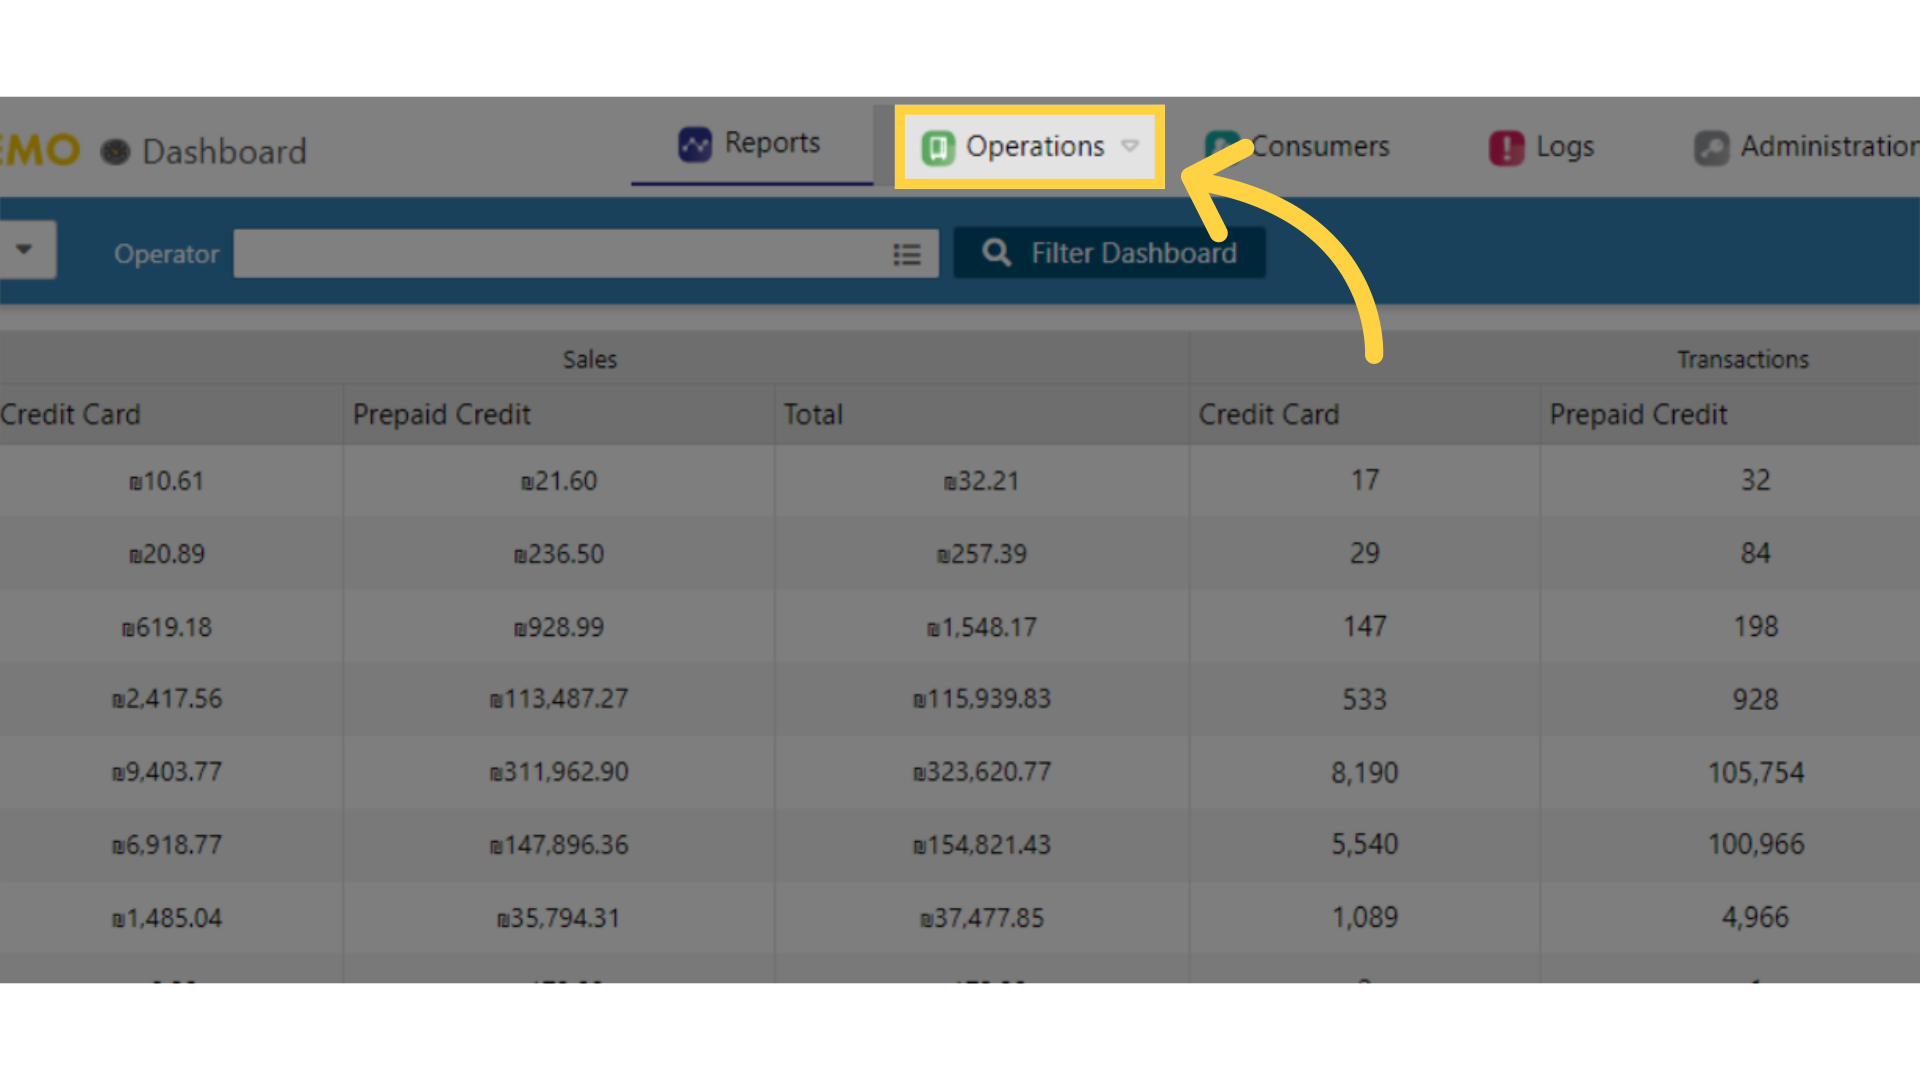
3
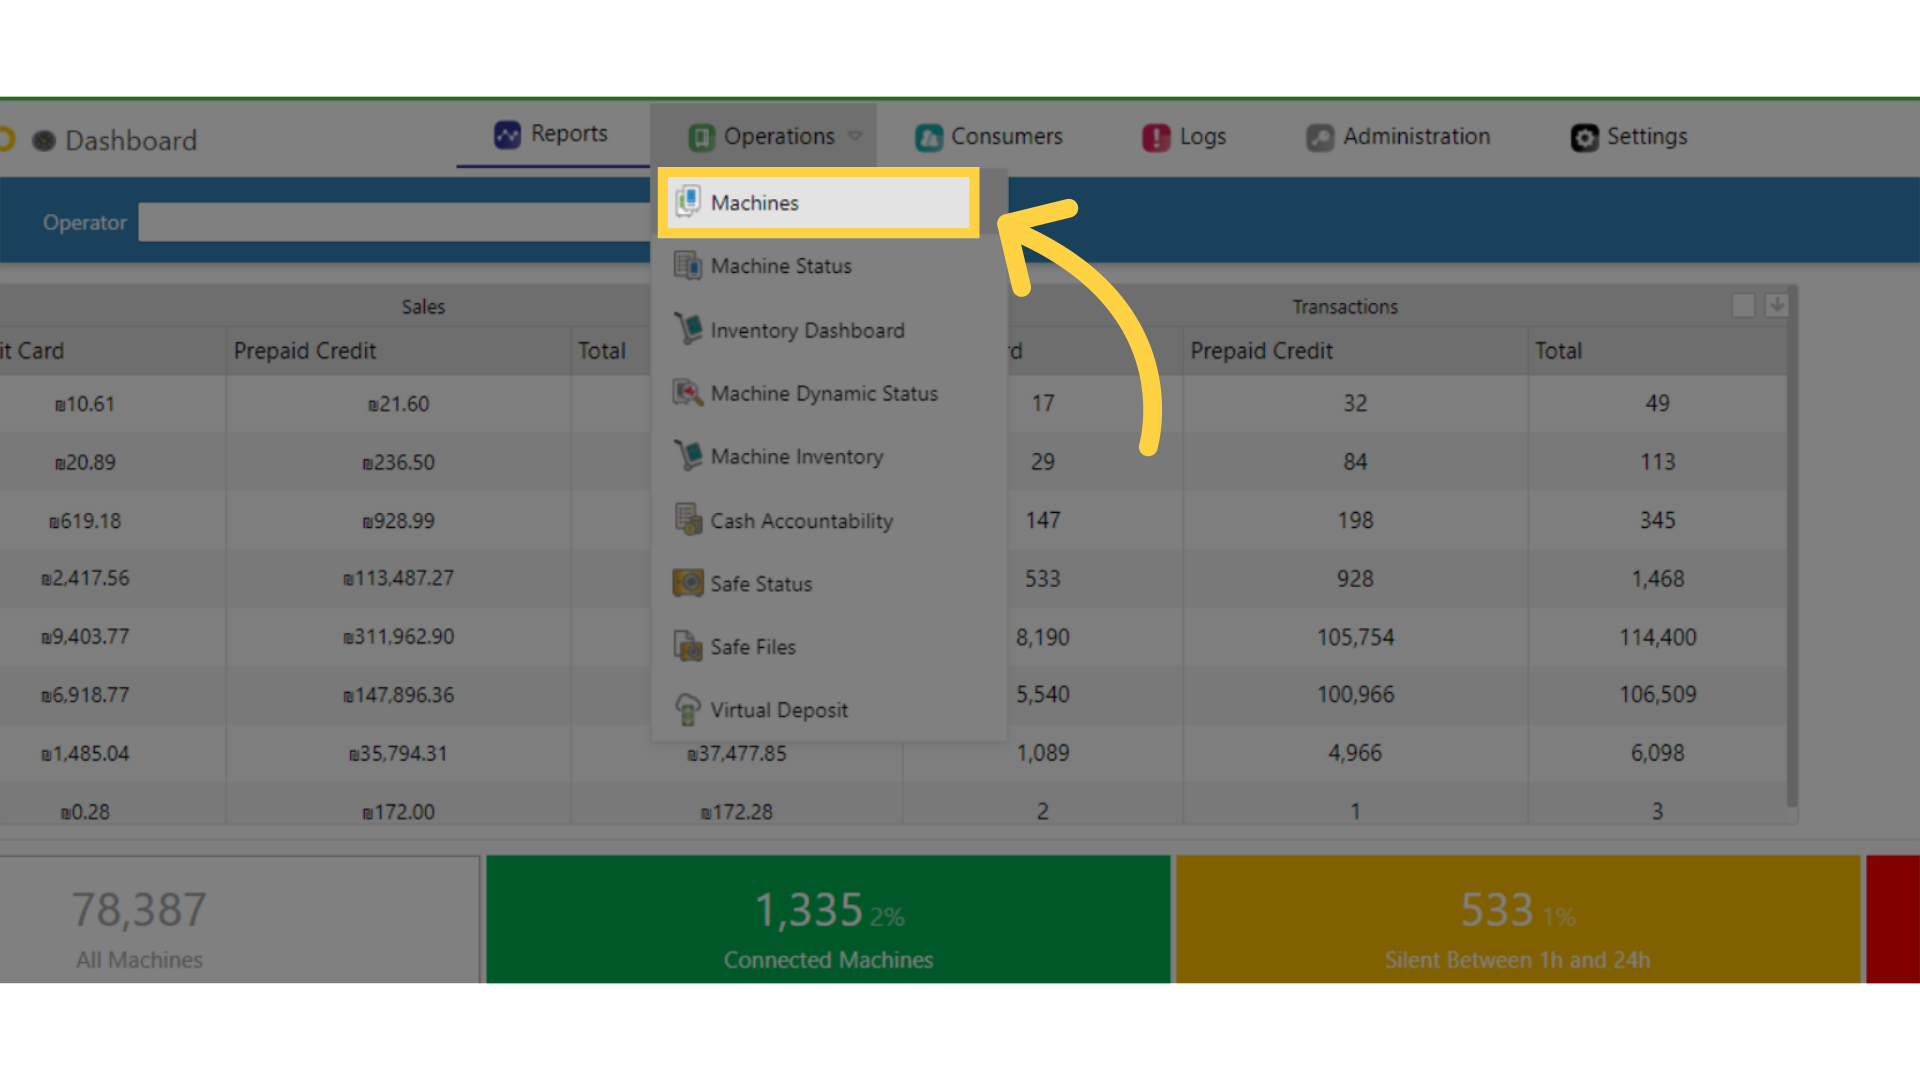
Click on machines from the drop down menu
Image Attached
Click on machines from the drop down menu
4
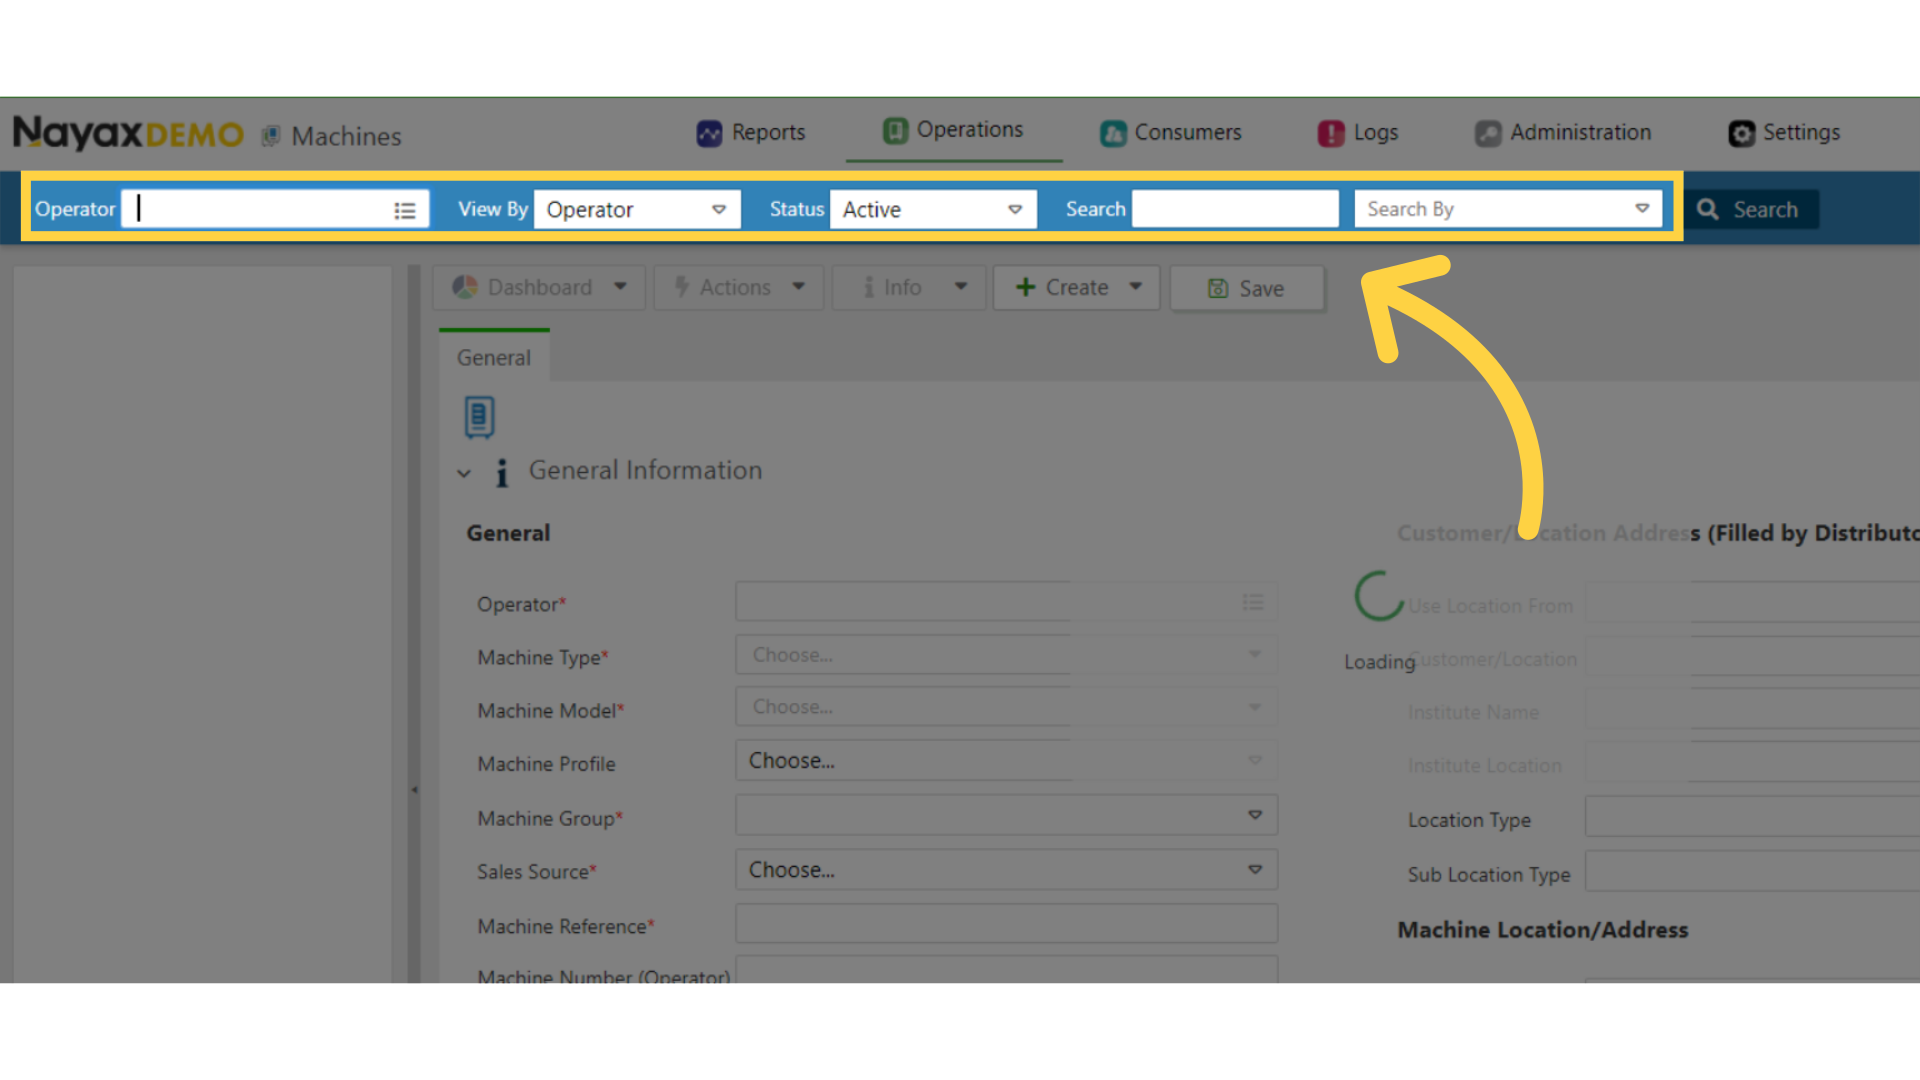
Fill in your operator's name and other fields
Image Attached
Fill in your operator's name and other fields.
5
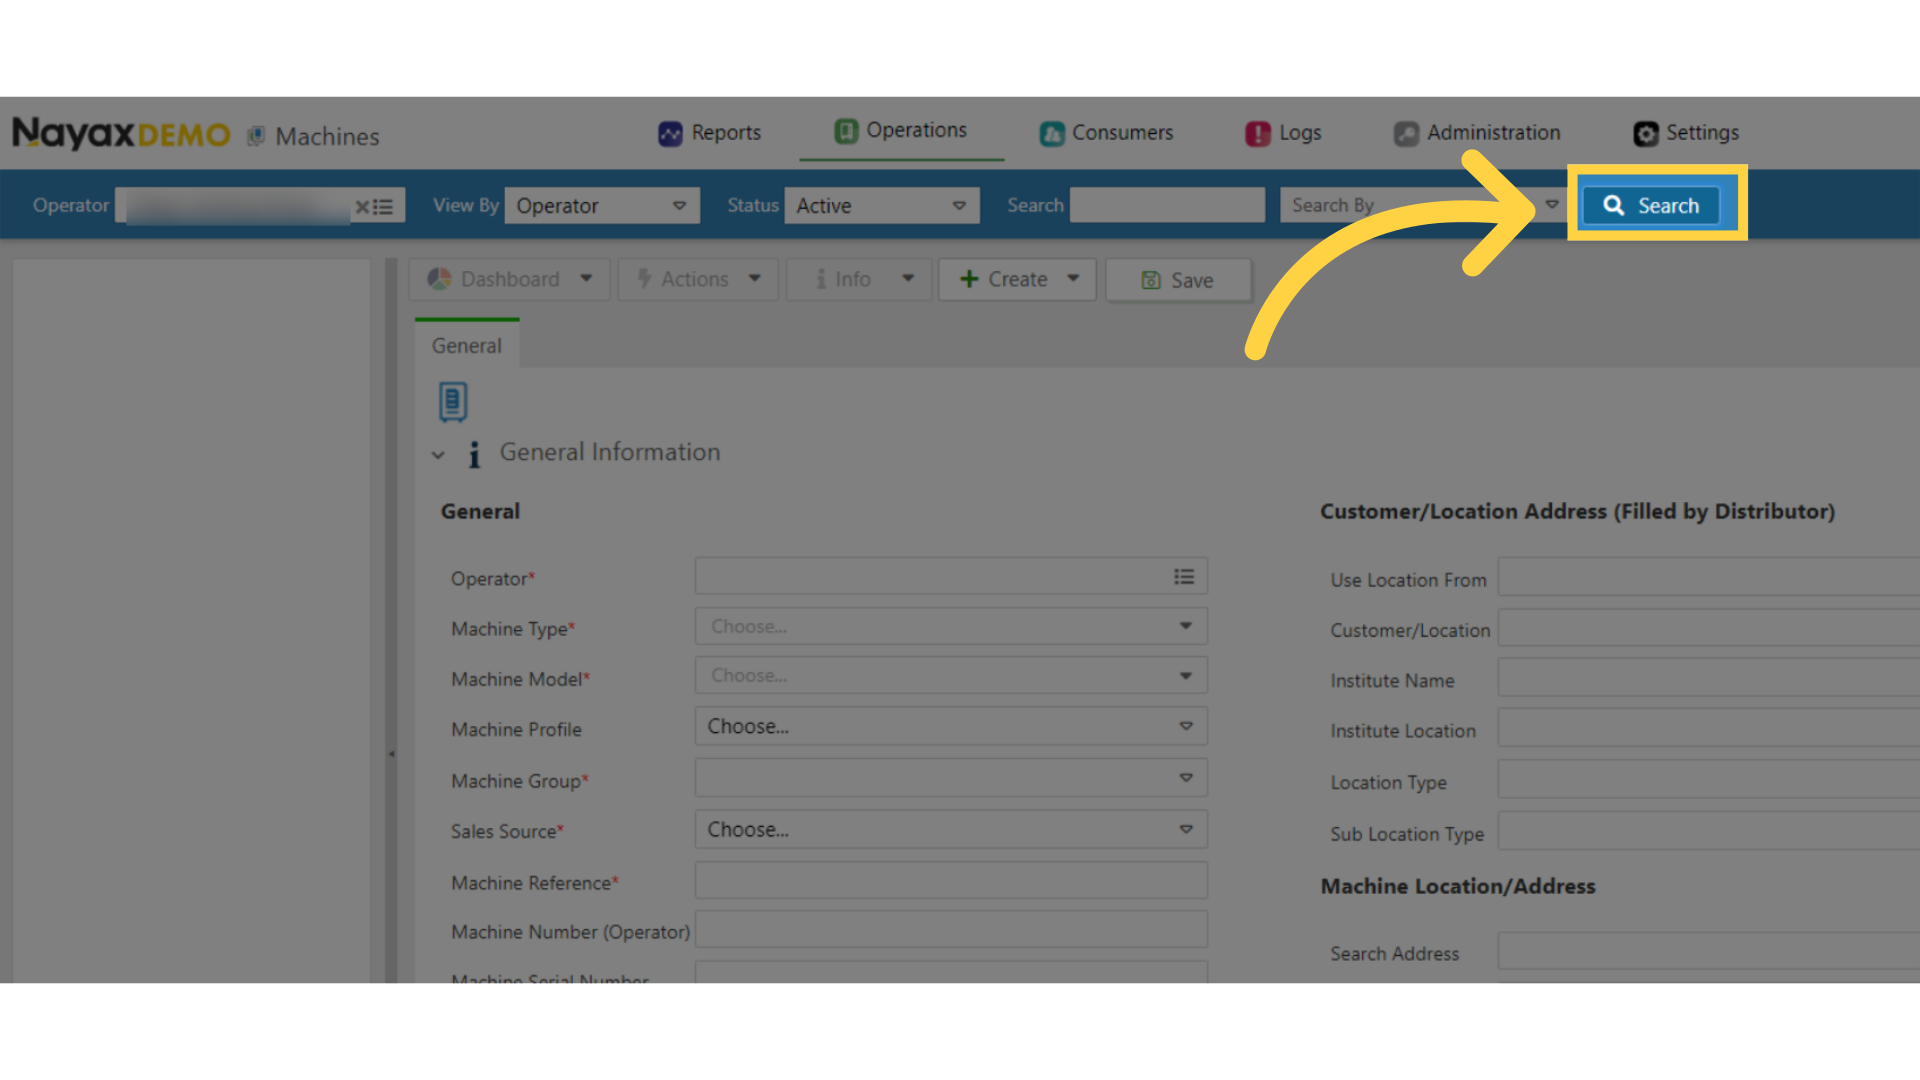
Click search
Image Attached
Click search
6
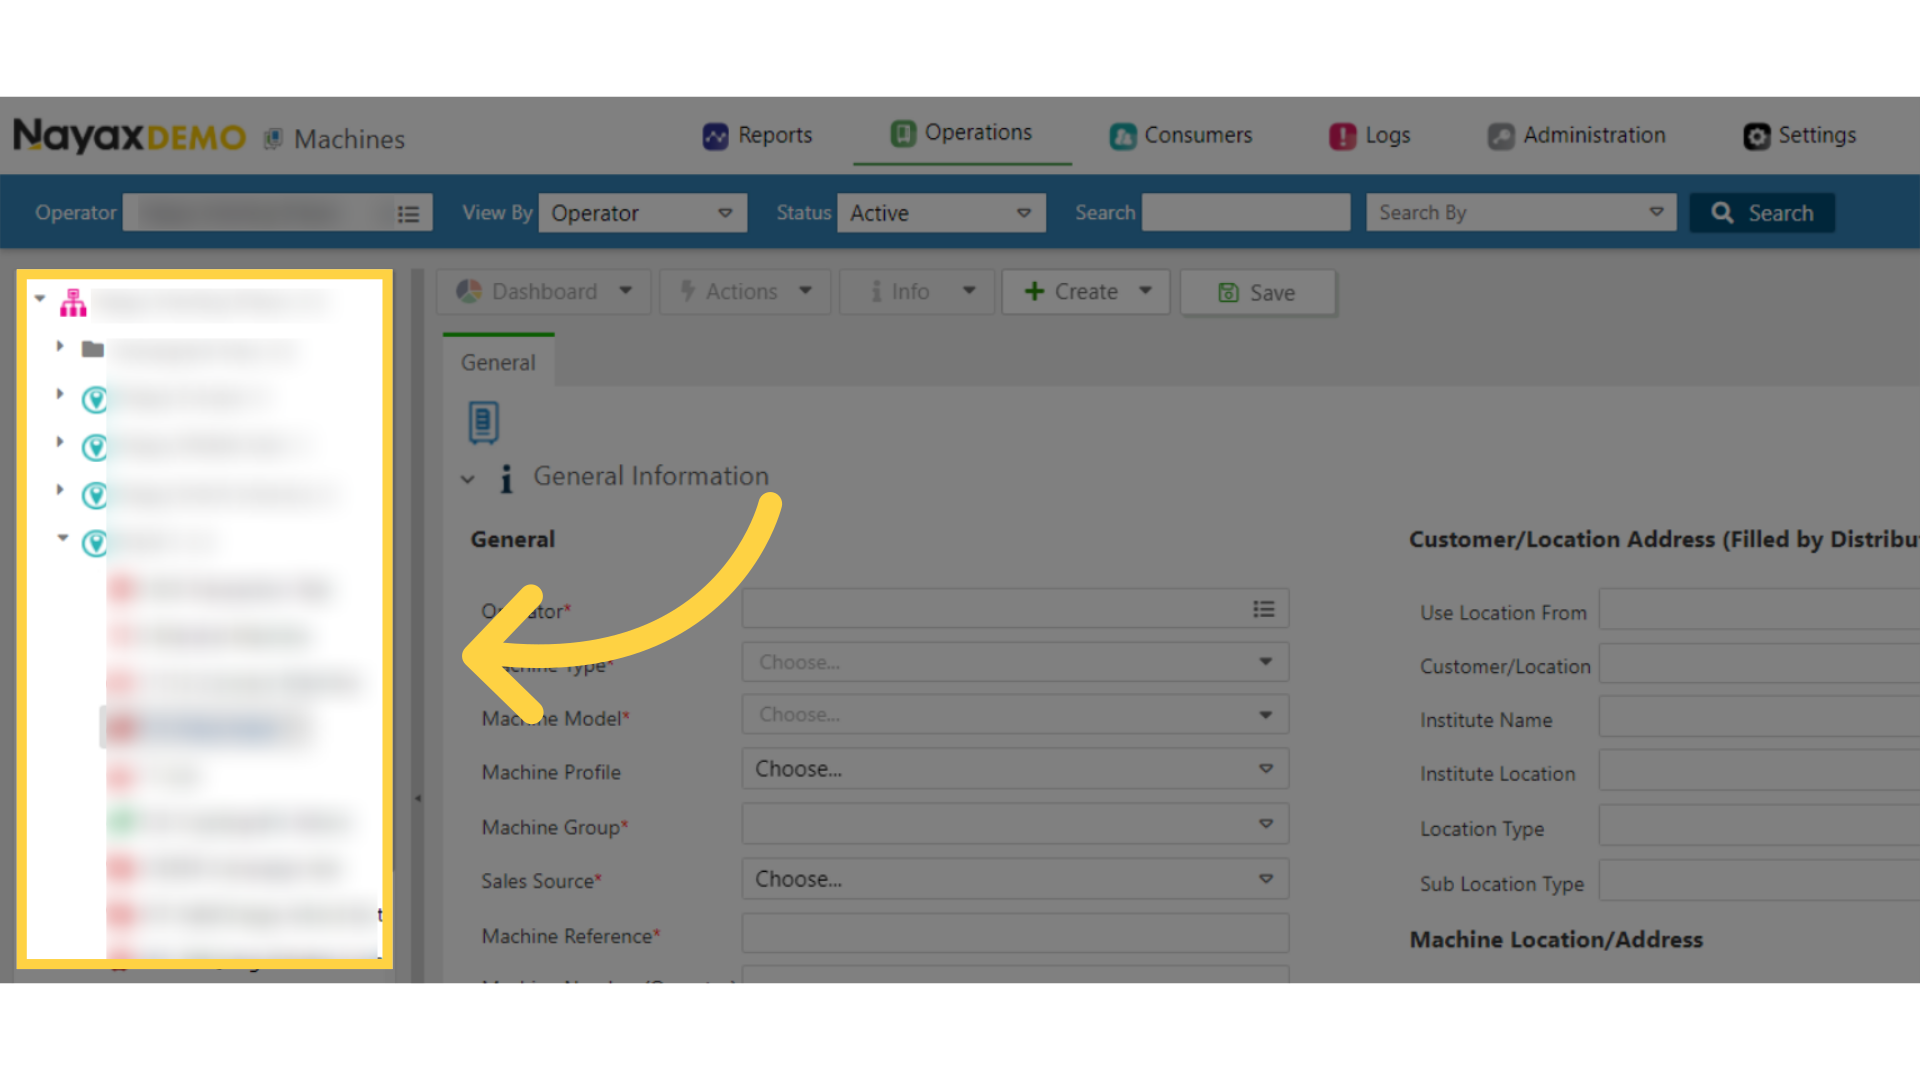
Locate and click on the operator machine from the hierarchy
Image Attached
Locate and click on the operator machine from the hierarchy.
7
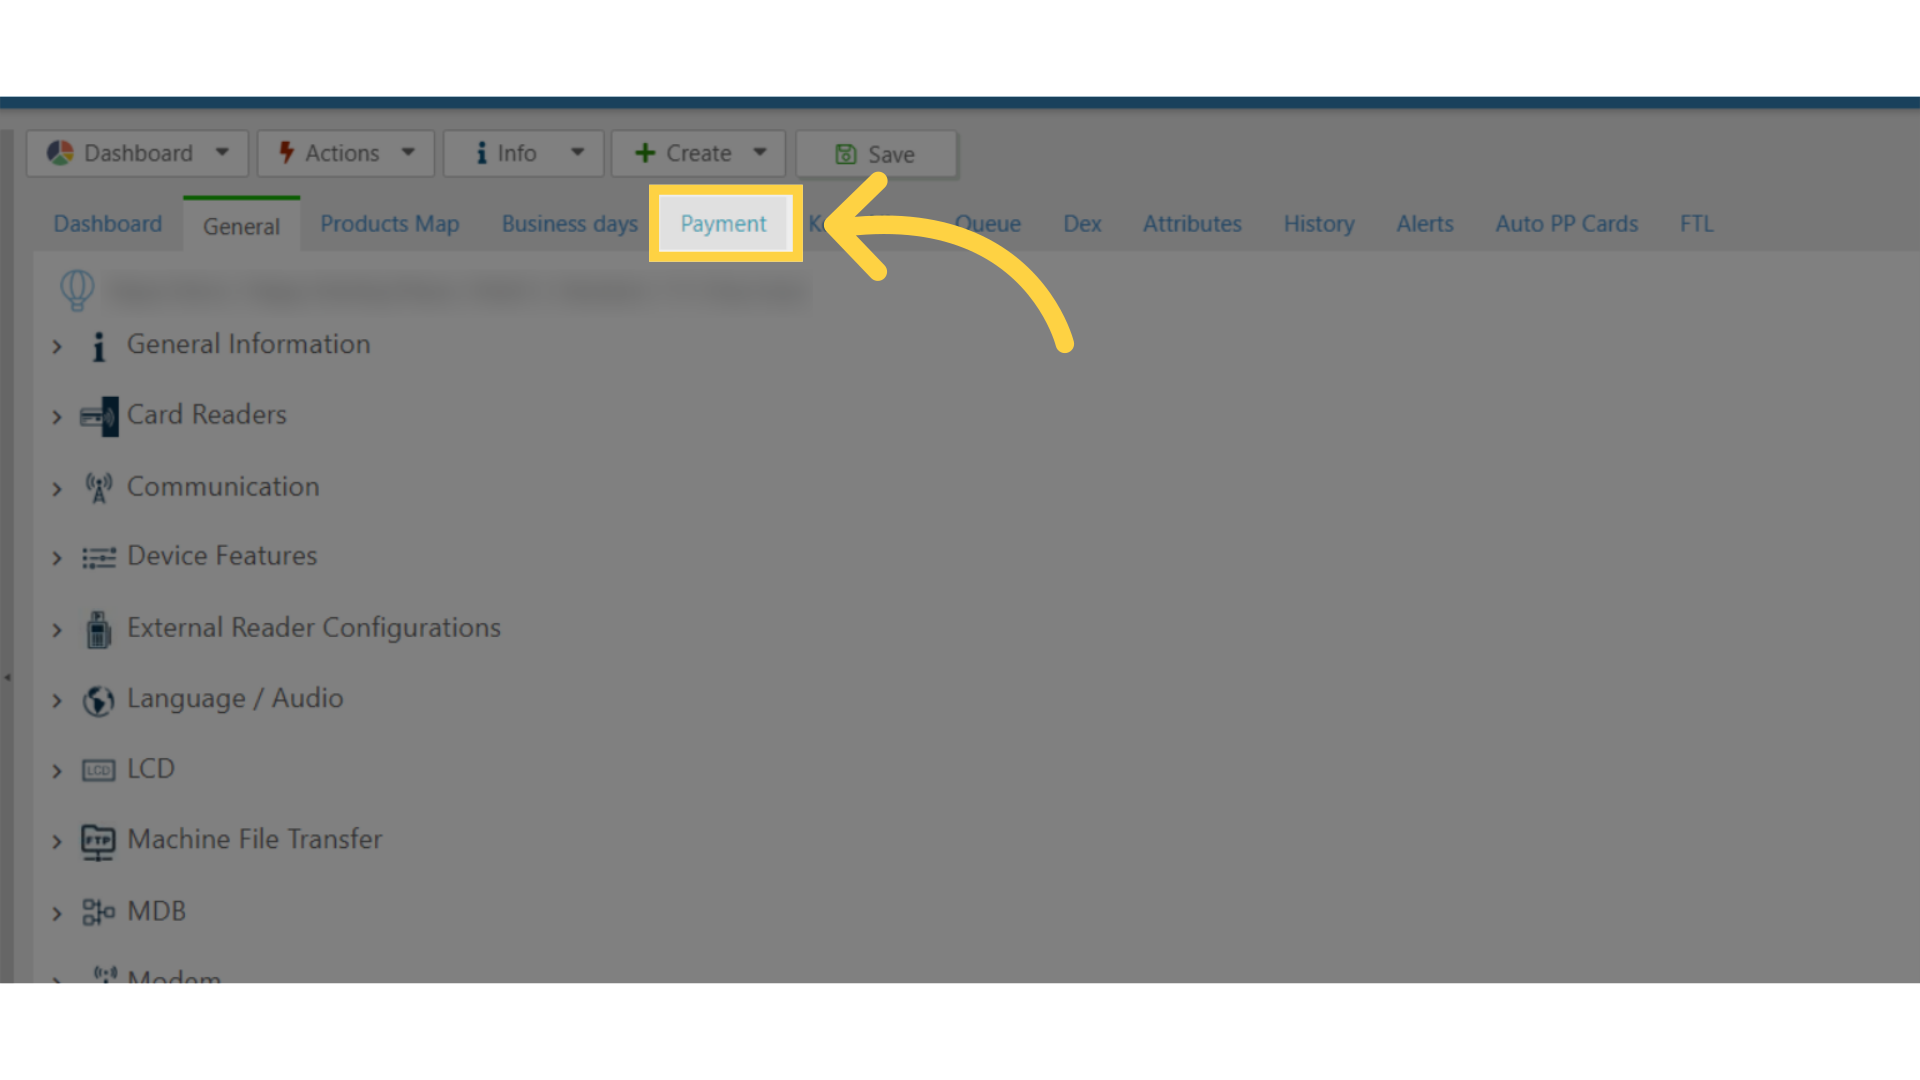
Click payment tab
Image Attached
Click on payment tab from the main section.
8
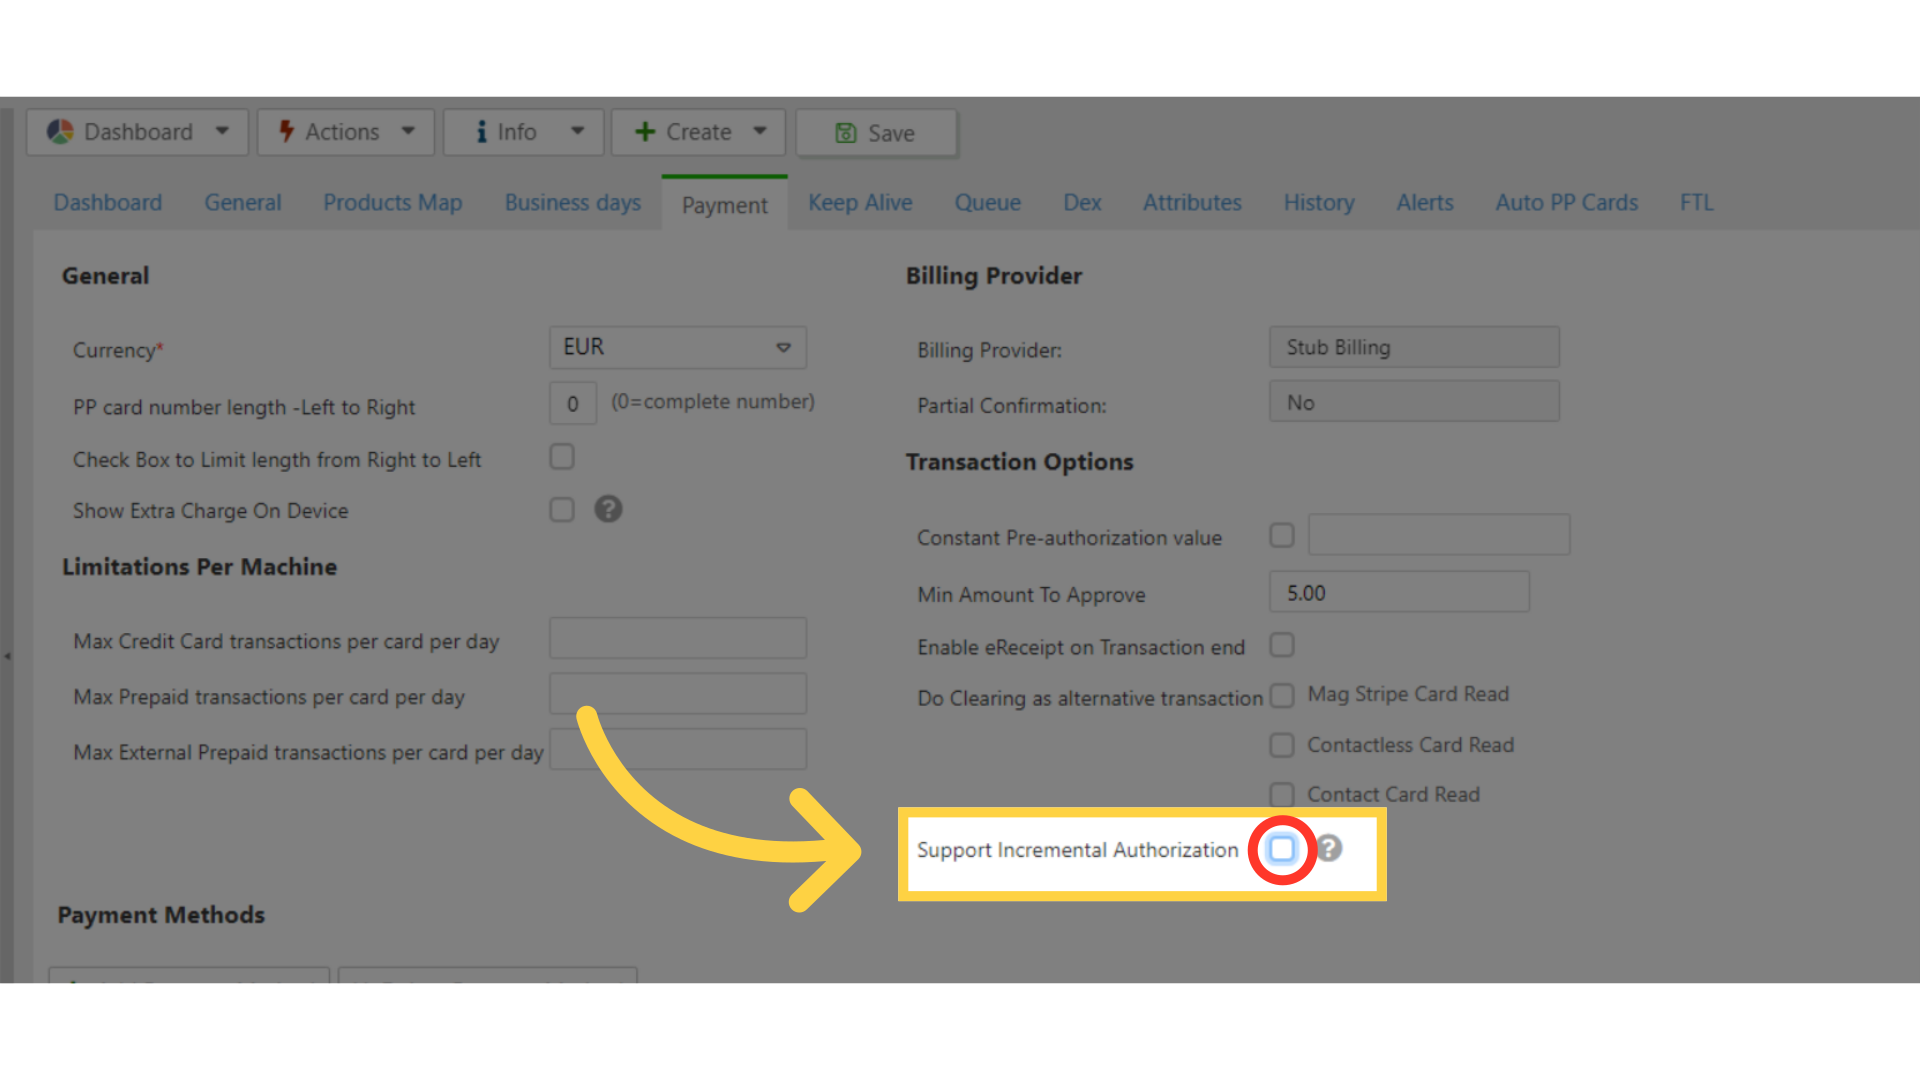
Scroll down to support incremental authorization
Image Attached
Scroll to support incremental authorization and click on the checkbox as highlighted in RED on the visual.
It is important to note that if you do not see this option, contact your local support team to add this permission.
9
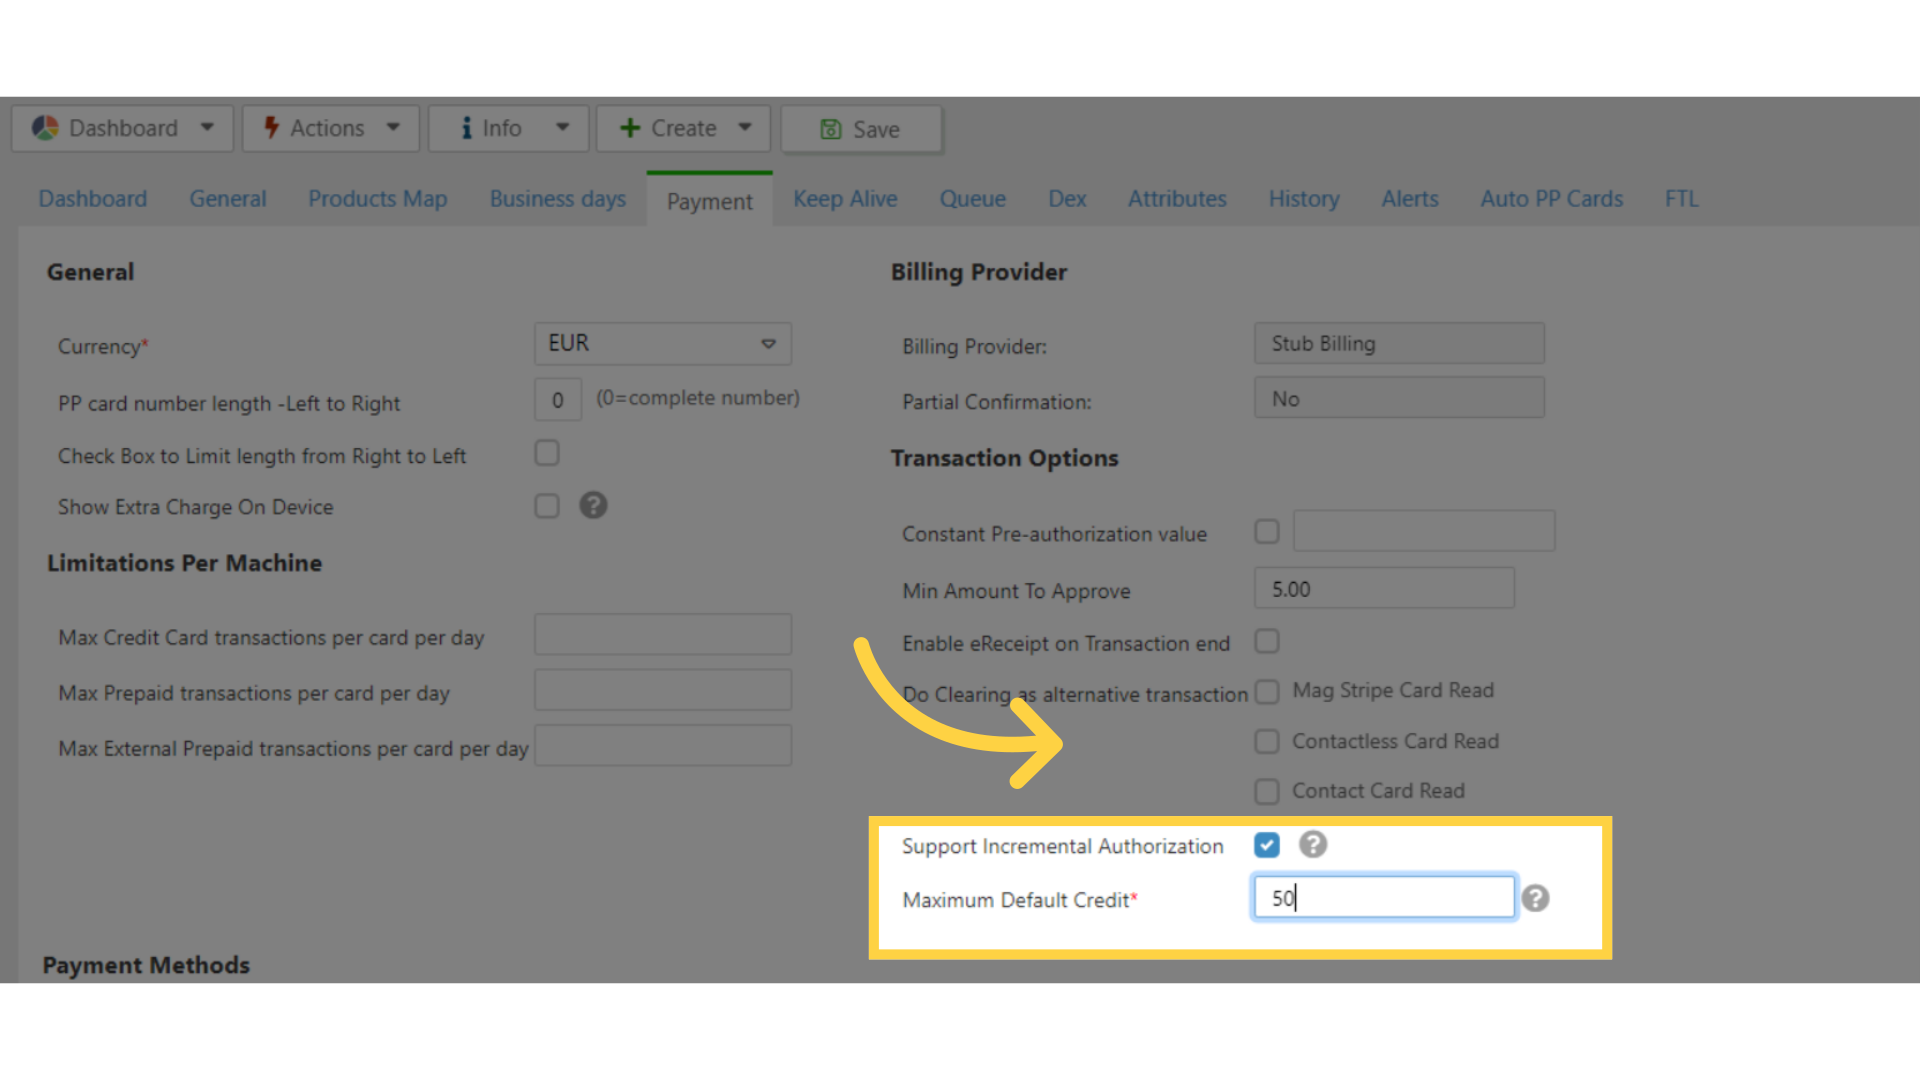
Fill in default credit amount
Image Attached
A field will appear for you to set a default credit, enter an numeric amount.
For Example: Enter 50 for $50
10
Click save
Image Attached
Click save to save the changes made.
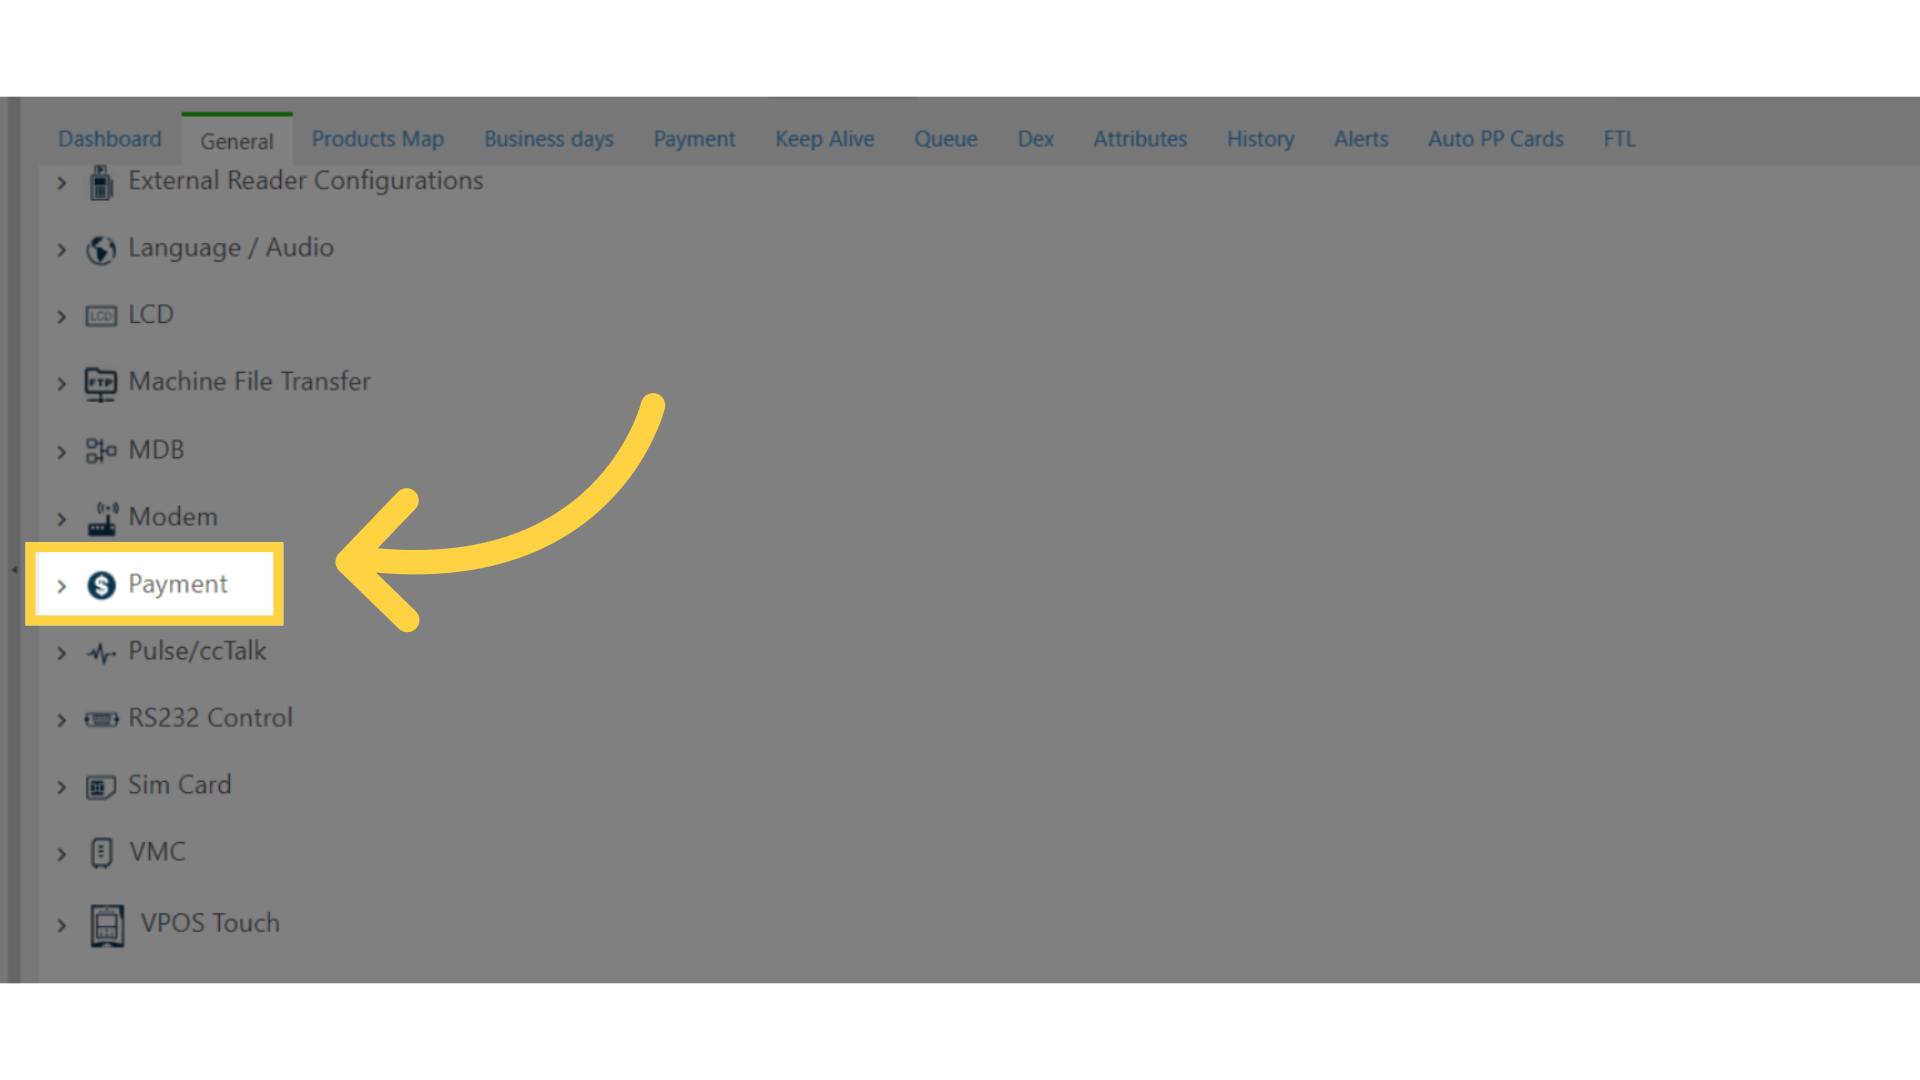
11
Click payment tab
Image Attached
The main general section will open and scroll to Payment and click to open.
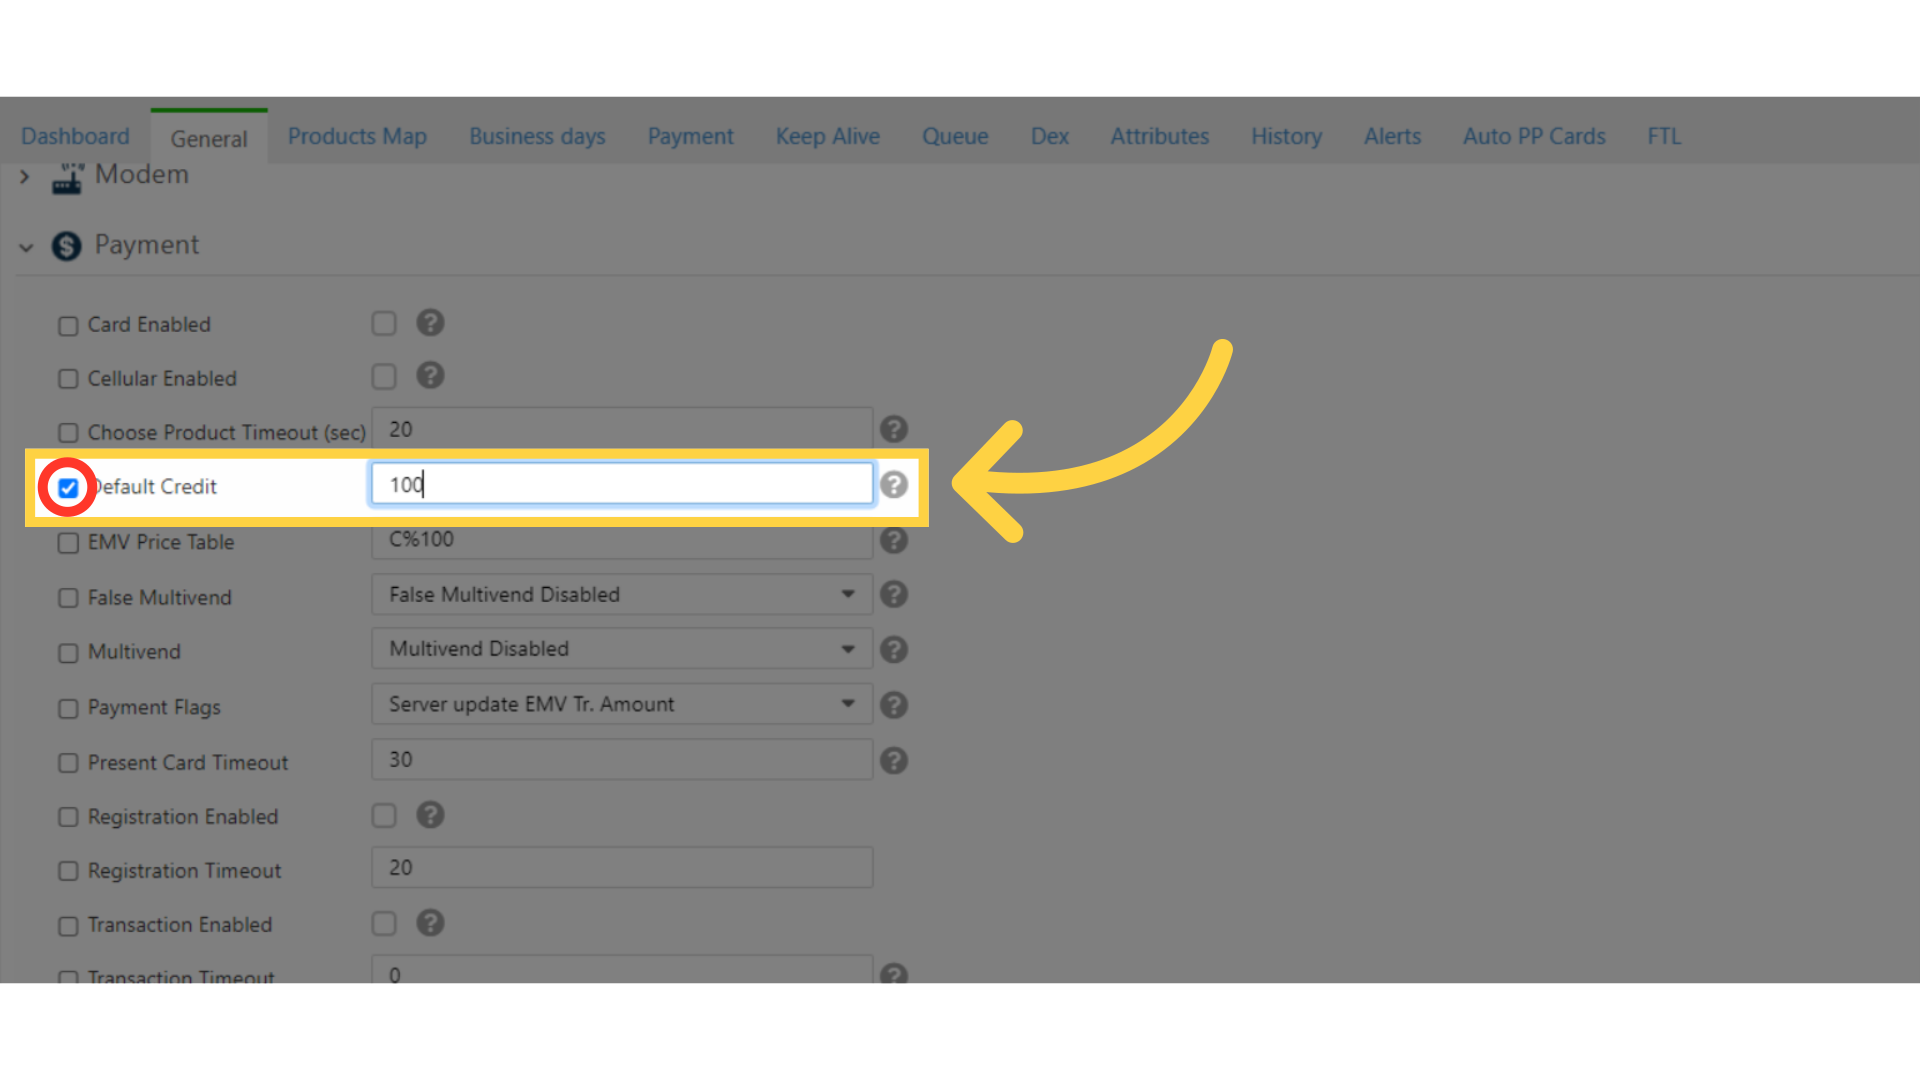
12
Scroll to Default Credit
Image Attached
Scroll down to default credit and click on the checkbox as highlighted in RED on the visual, then define the amount.
For example: for $1 type 100
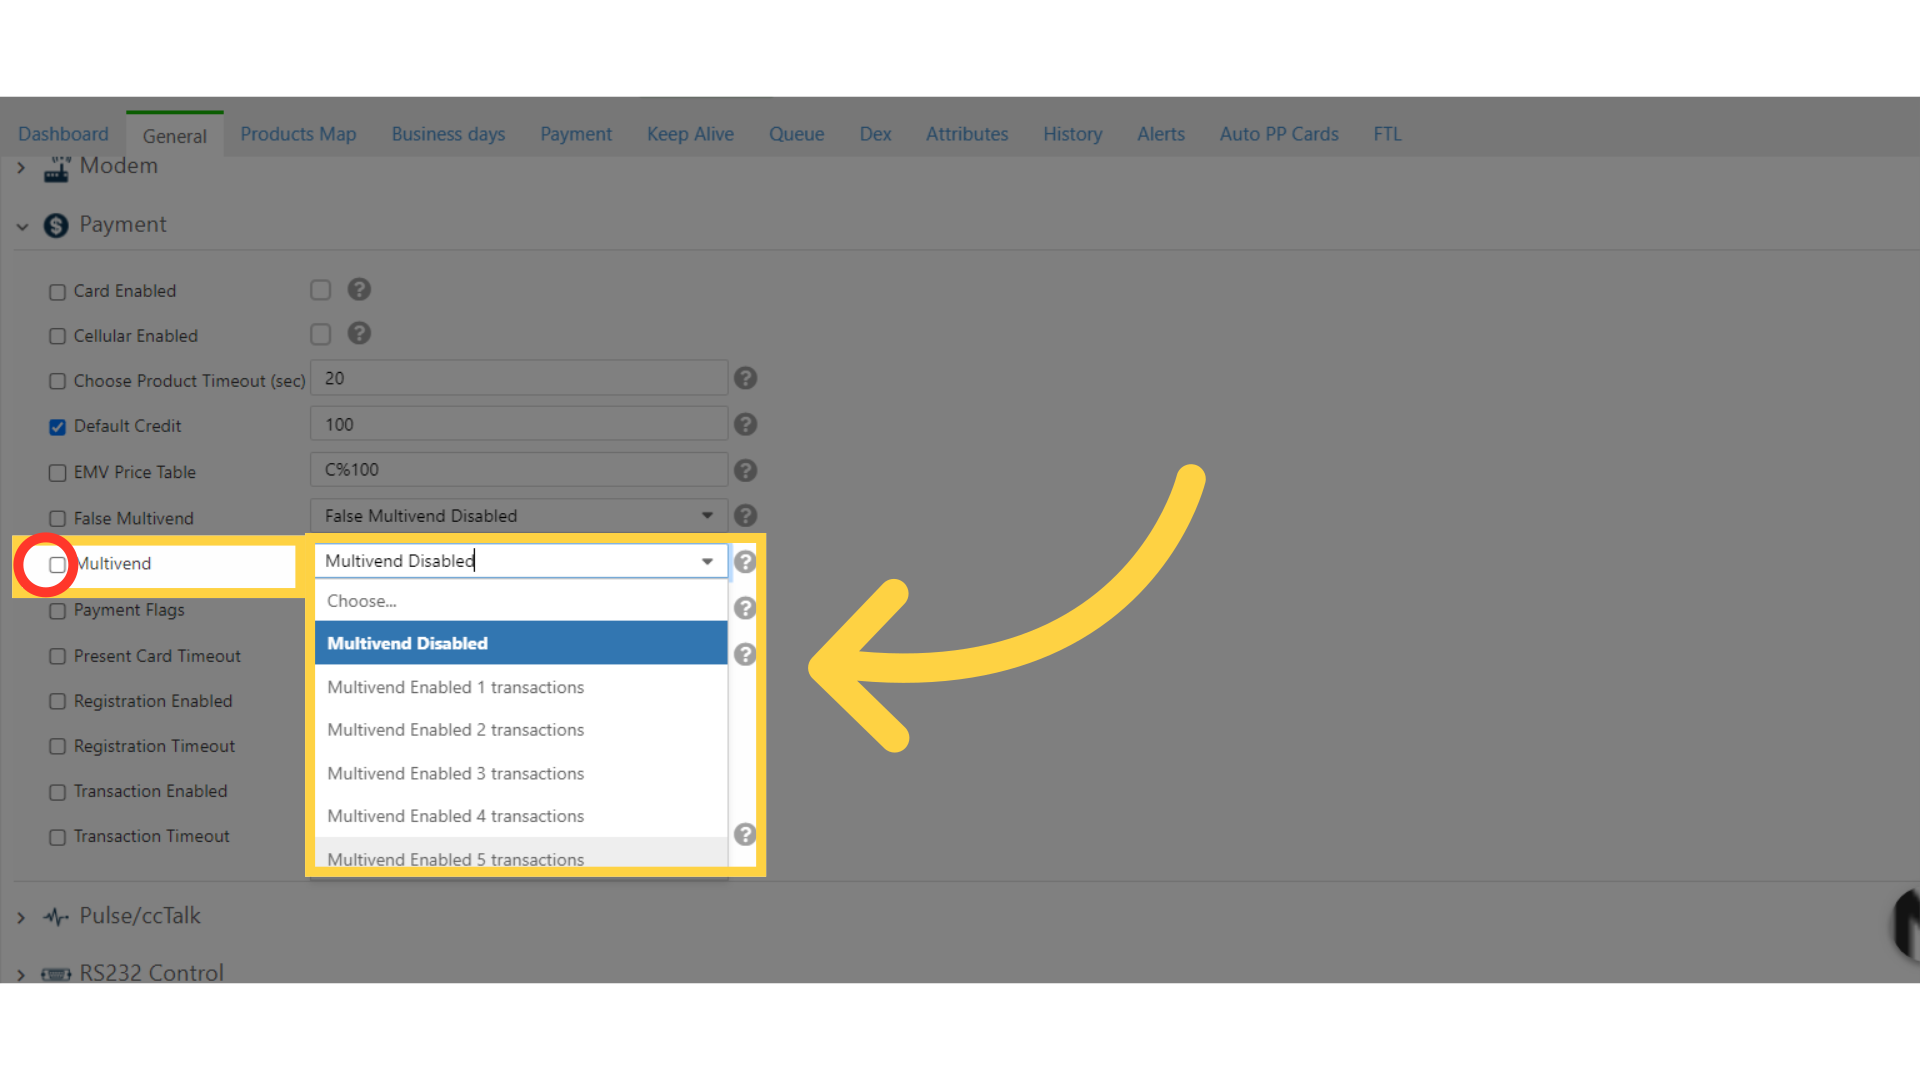
13
Select to Enable Multivend
Image AttachedScroll down to the machine attribute Multivend and click on the checkbox as highlighted in RED on the visual, then select the relevant value on the multi-vend field to enable the selection of multiple products.
Please note: The minimum for Incremental Authorization is 2.
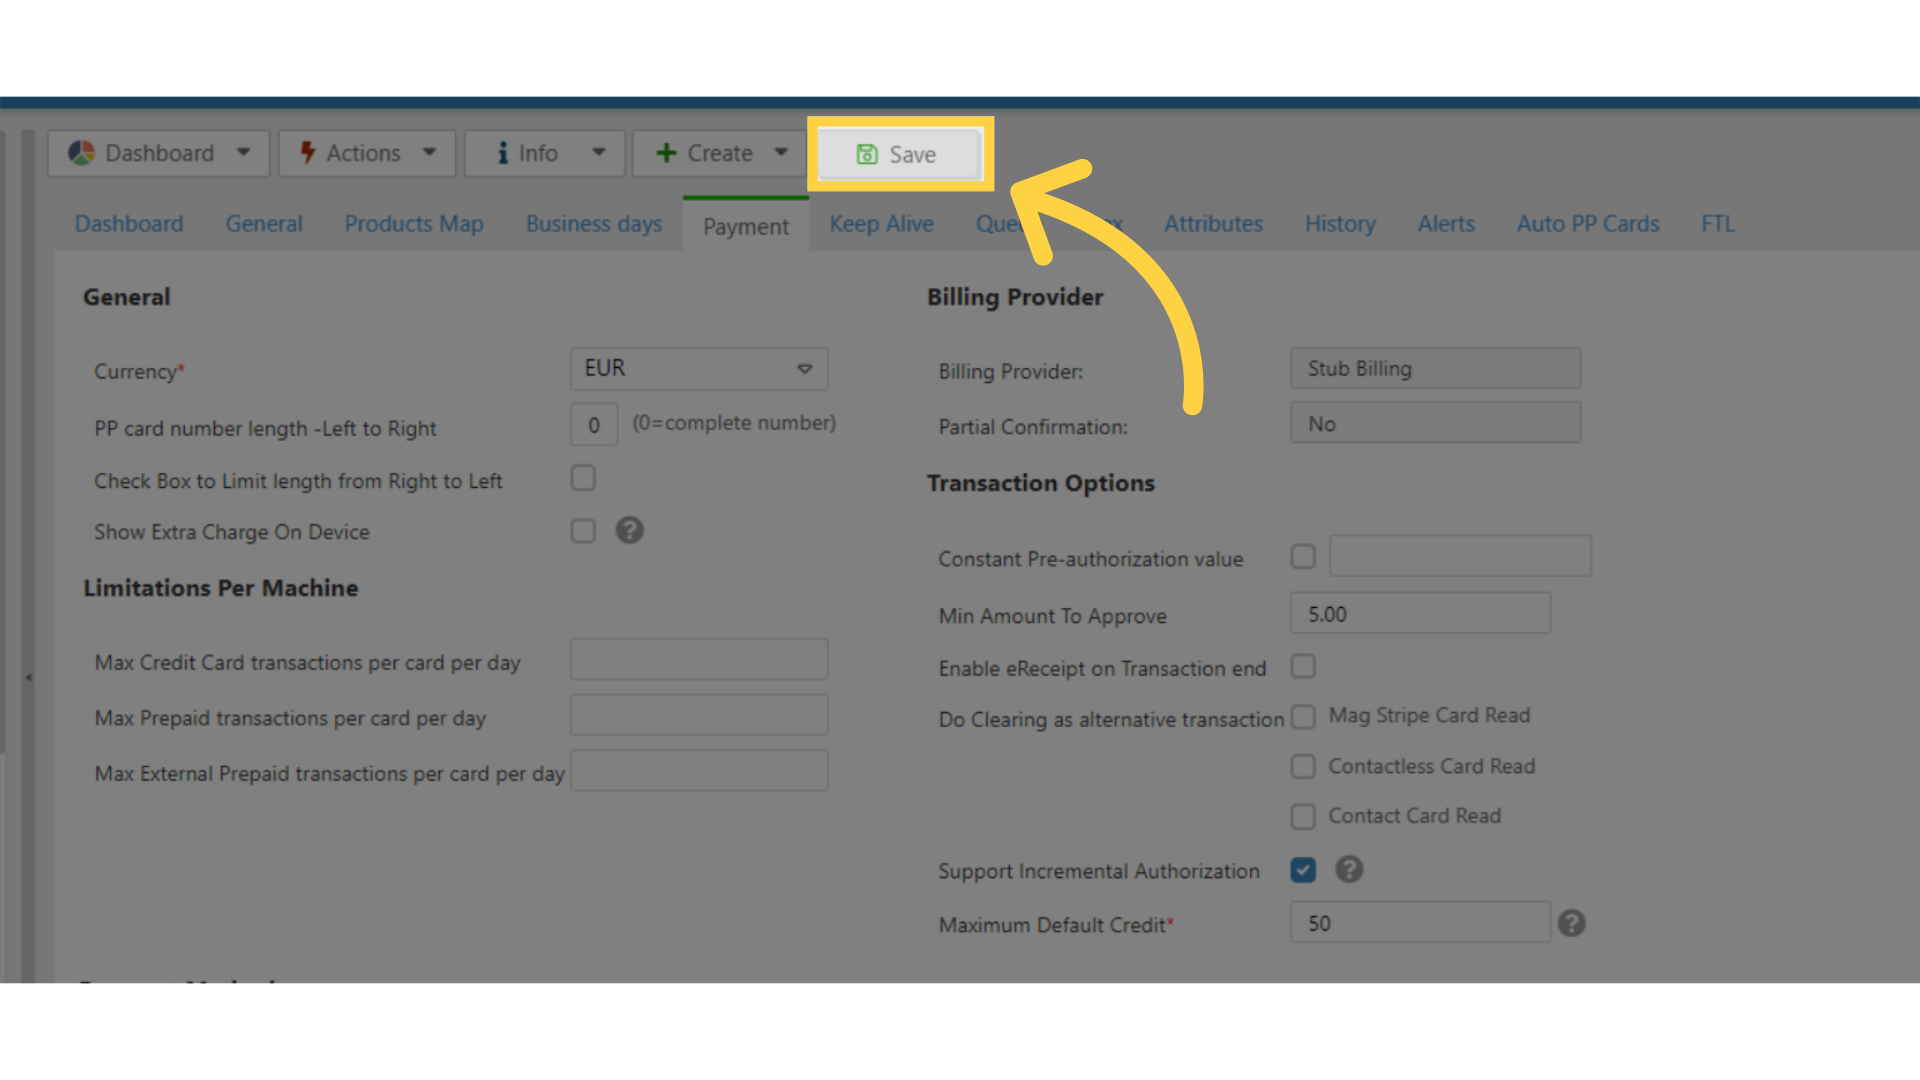
14
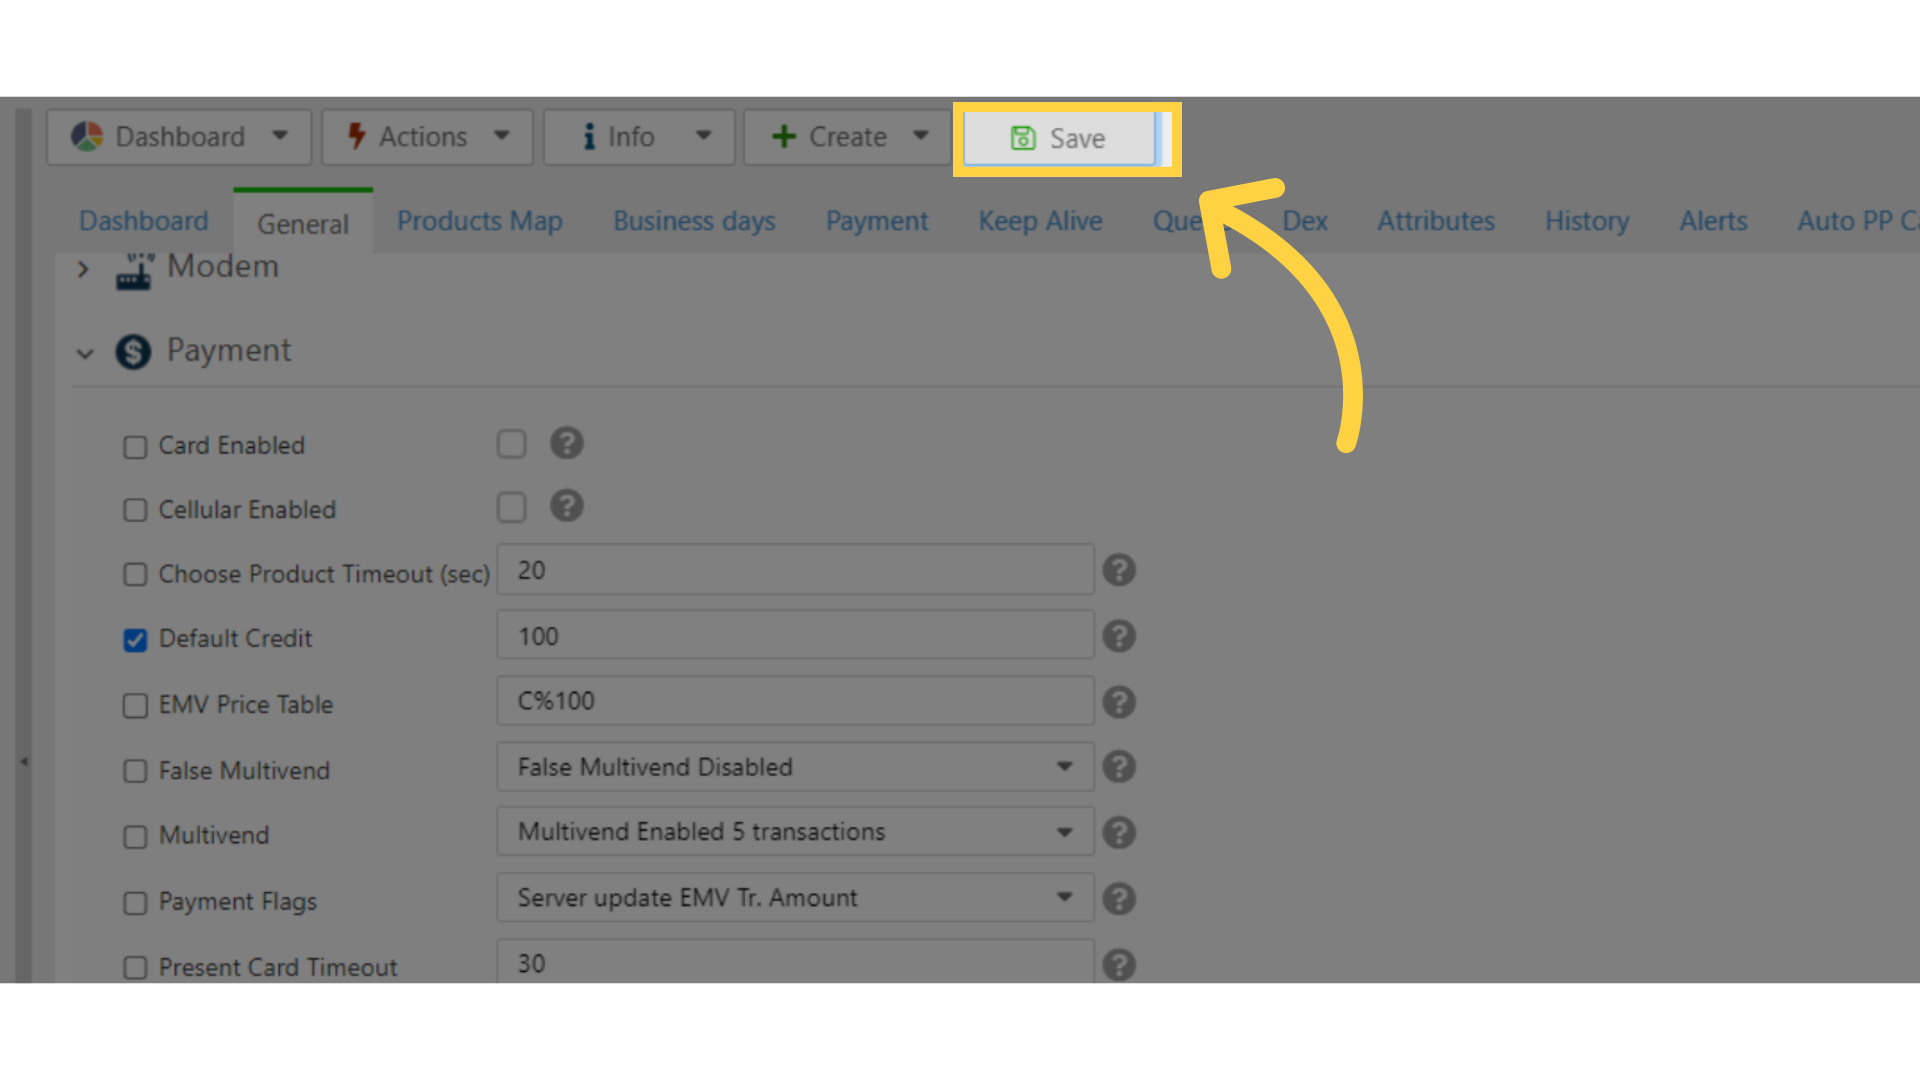
Click save
Image Attached
Save the changes.
15
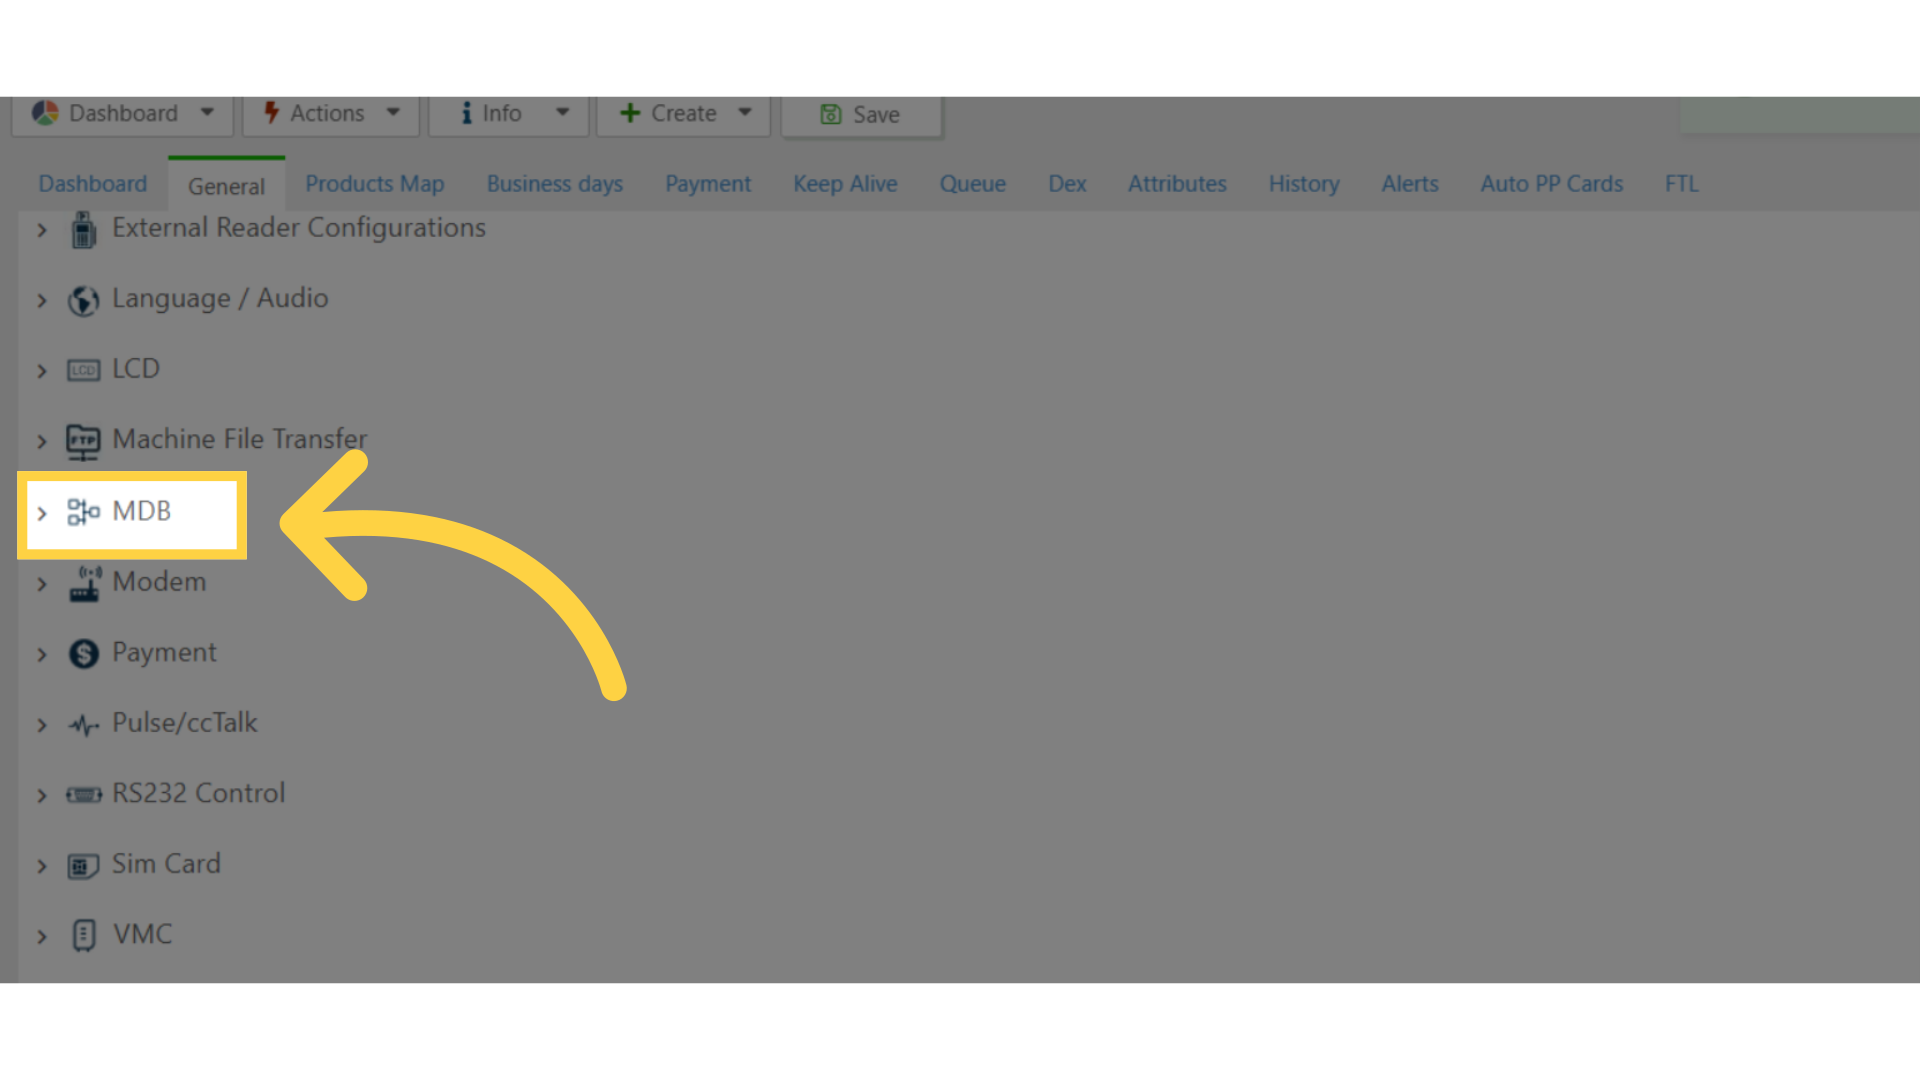
Click MDB Tab
Image Attached
Back from the main section scroll and click on the MDB tab.
16
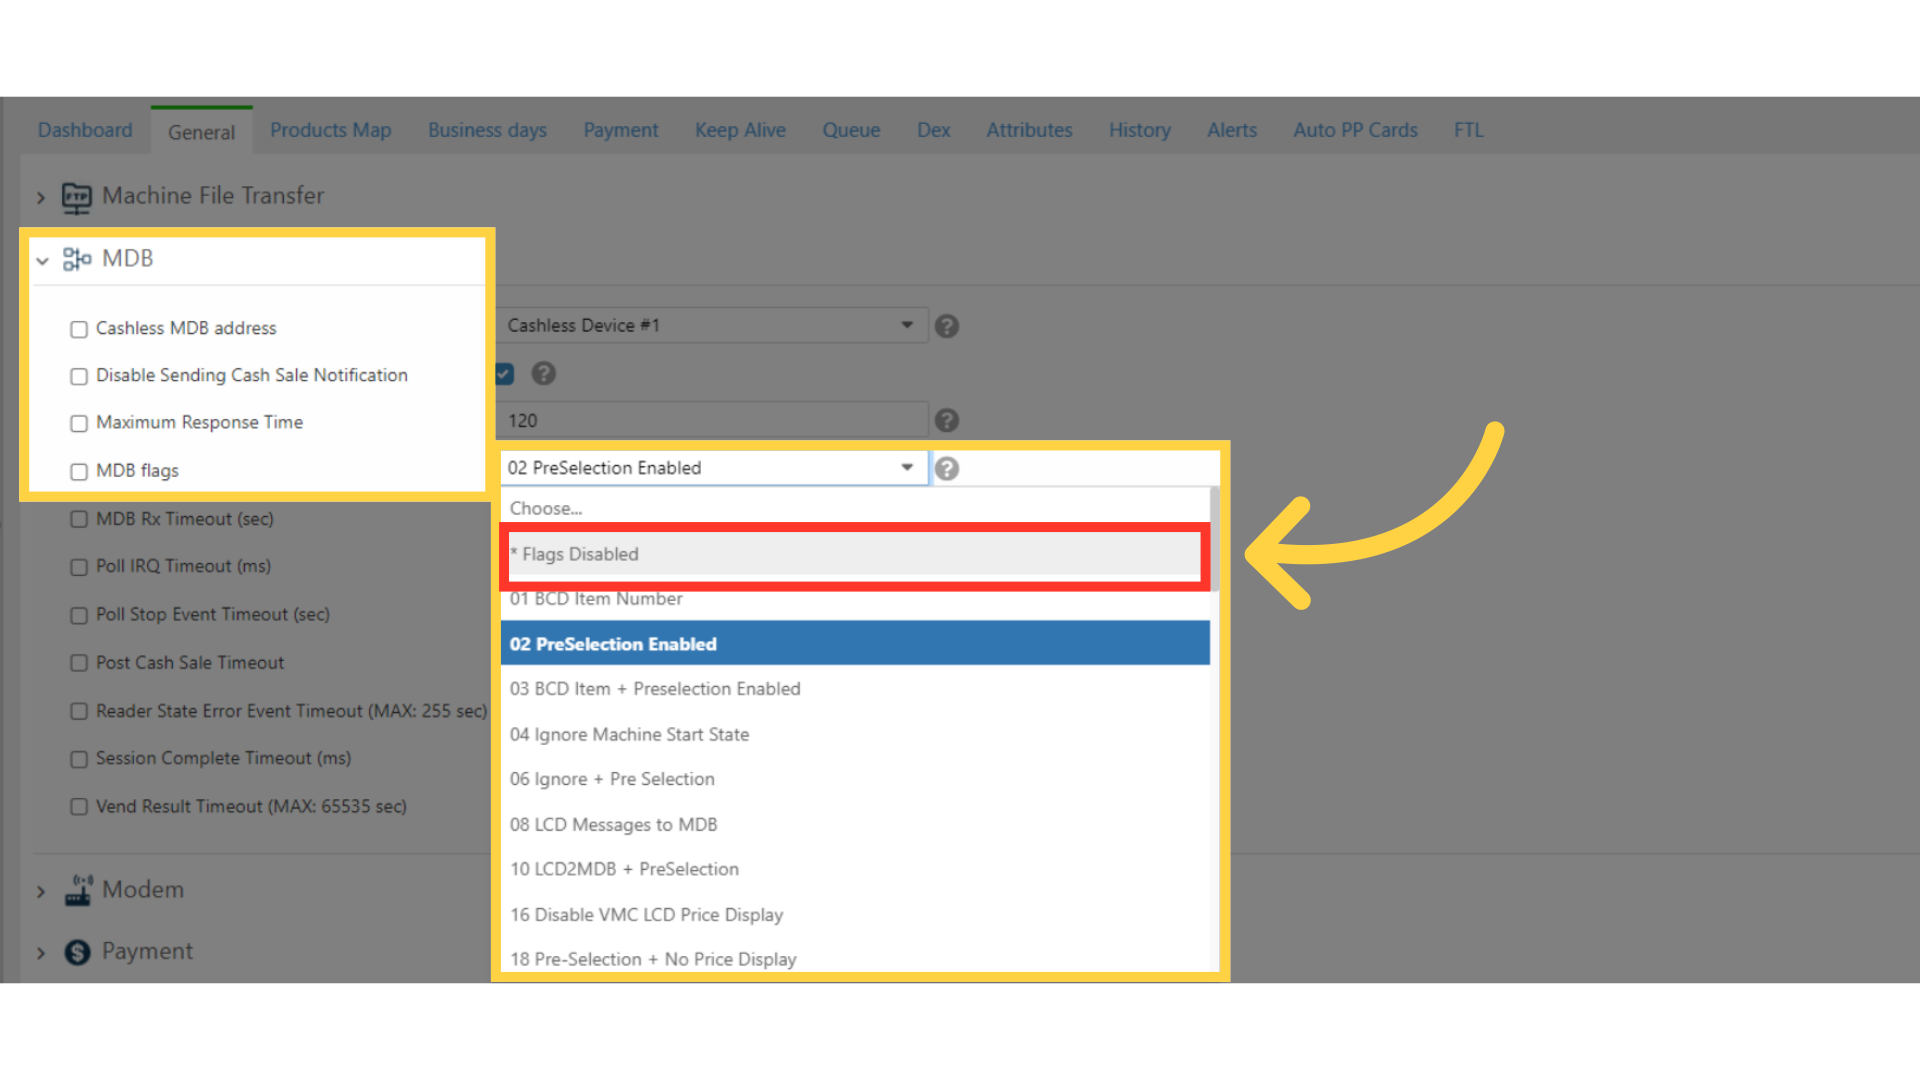
Set to Flags Disabled
Image Attached
Check that the MDB flags is set to Flags Disabled as highlighted in RED on the visual.
17
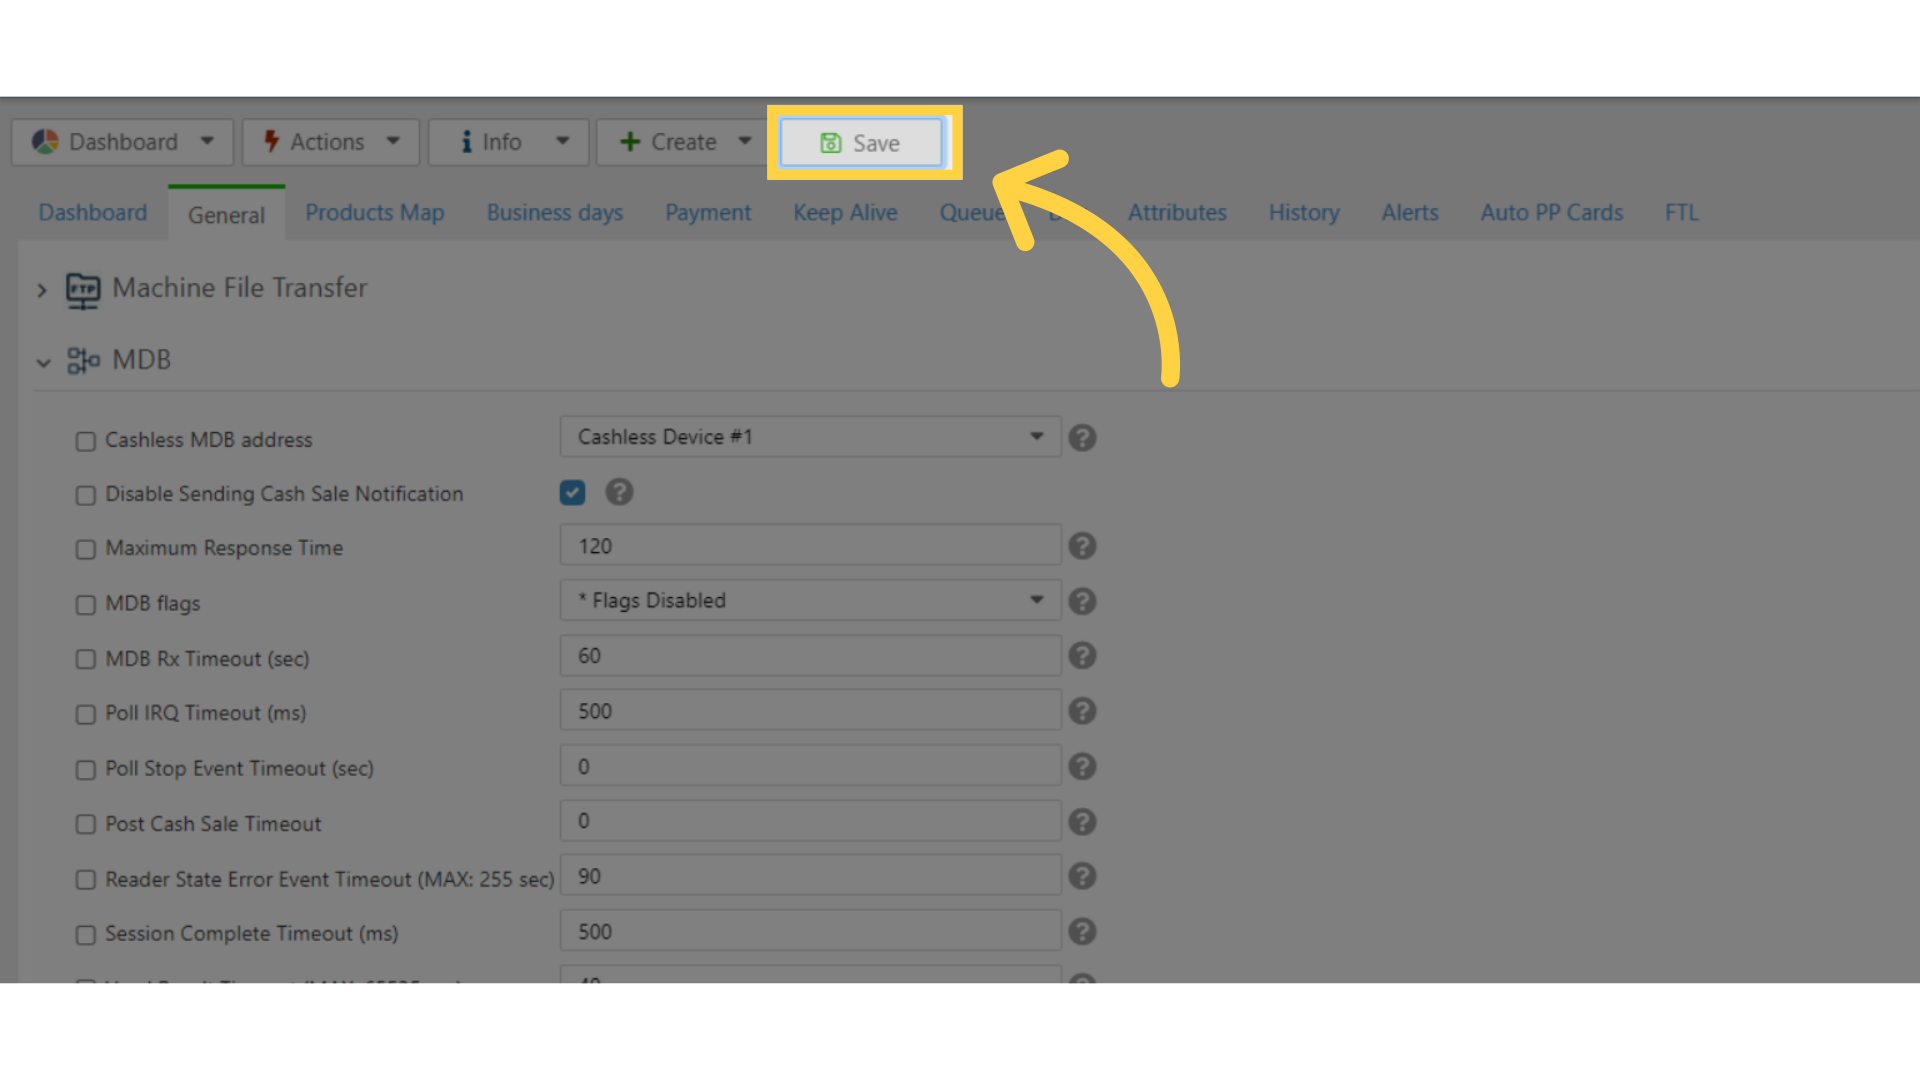
Click save
Image Attached
Click on save to save the changes.
18
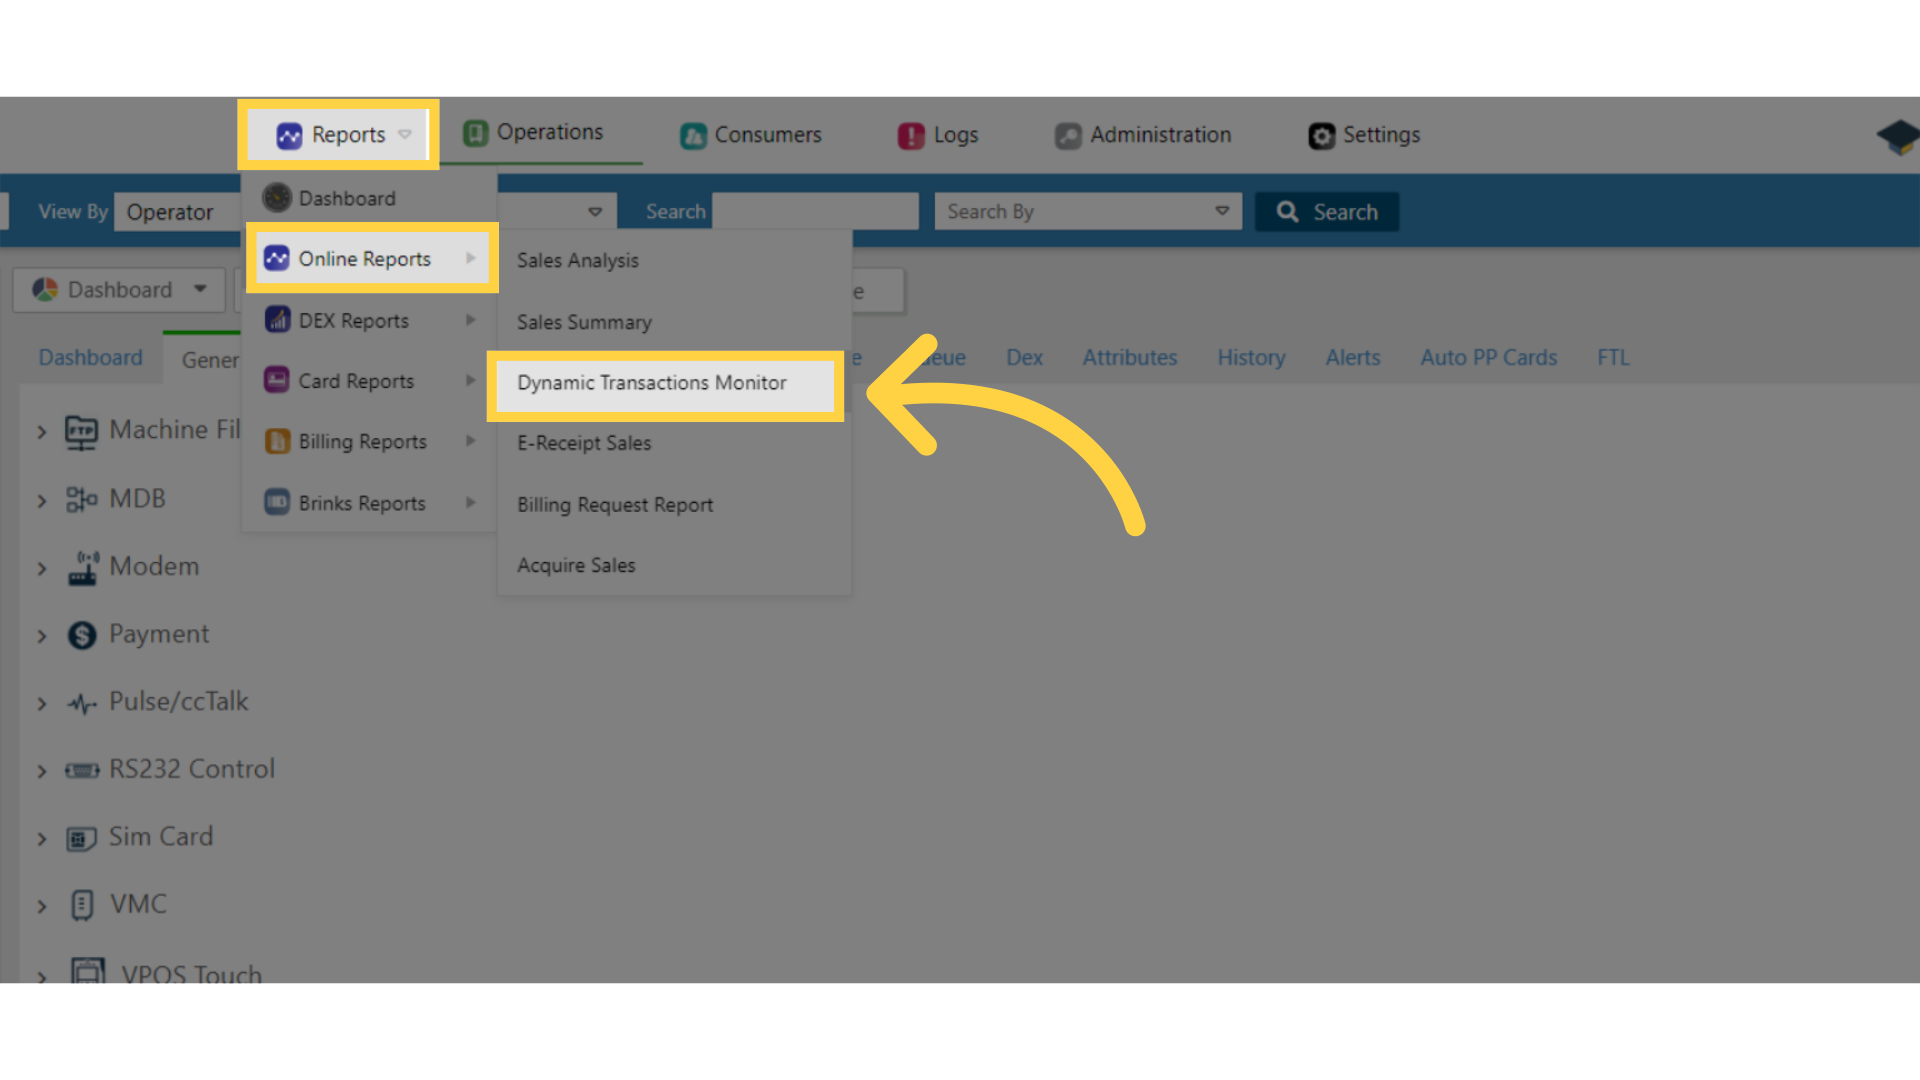
How to - View DTM Reports to display incremental authorizations
Image Attached
In order to properly display incremental authorizations in the DTM report, click the main Reports tab, then click on Online Reports and then click Dynamic Transactions Monitor as highlighted on the visual.
19
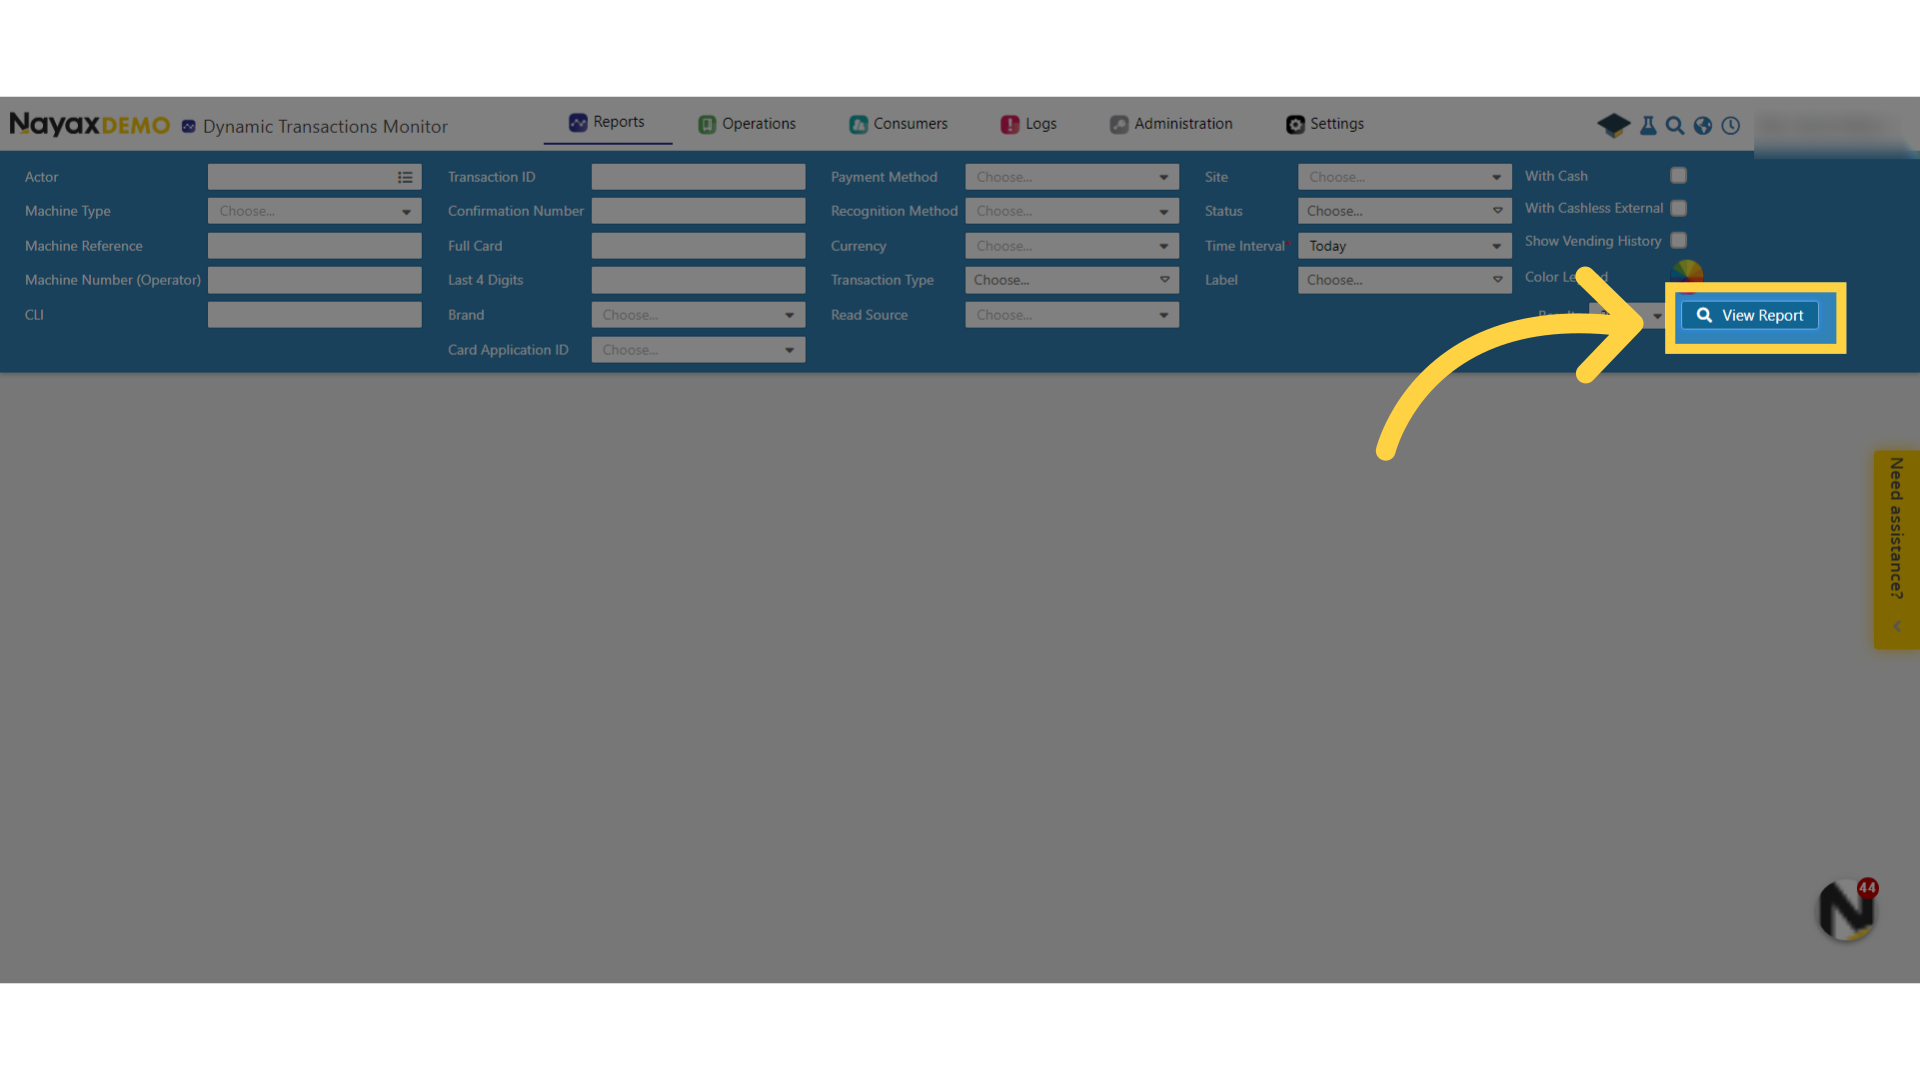
Click View Report Button
Image Attached
To edit your preset report click on view report button.
20
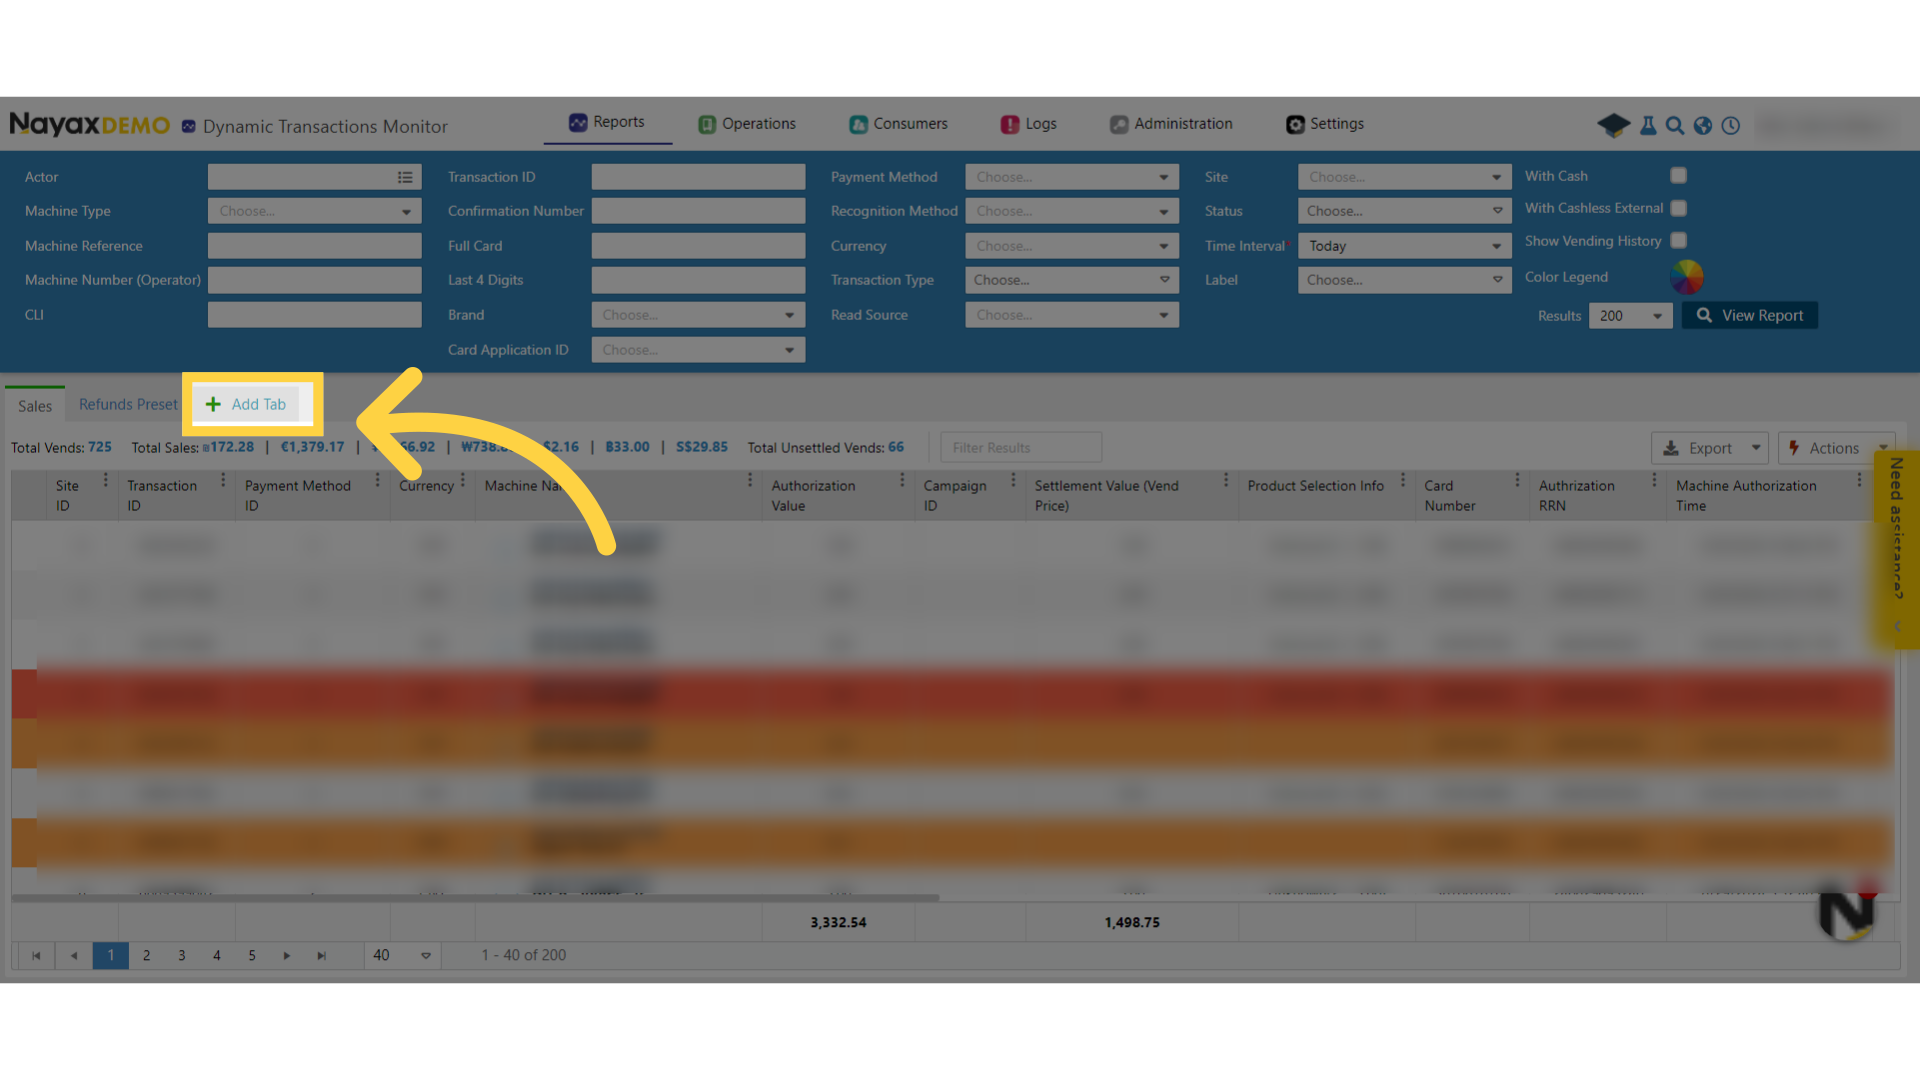
Click Add Tab
Image Attached
Click on add a new tab.
21
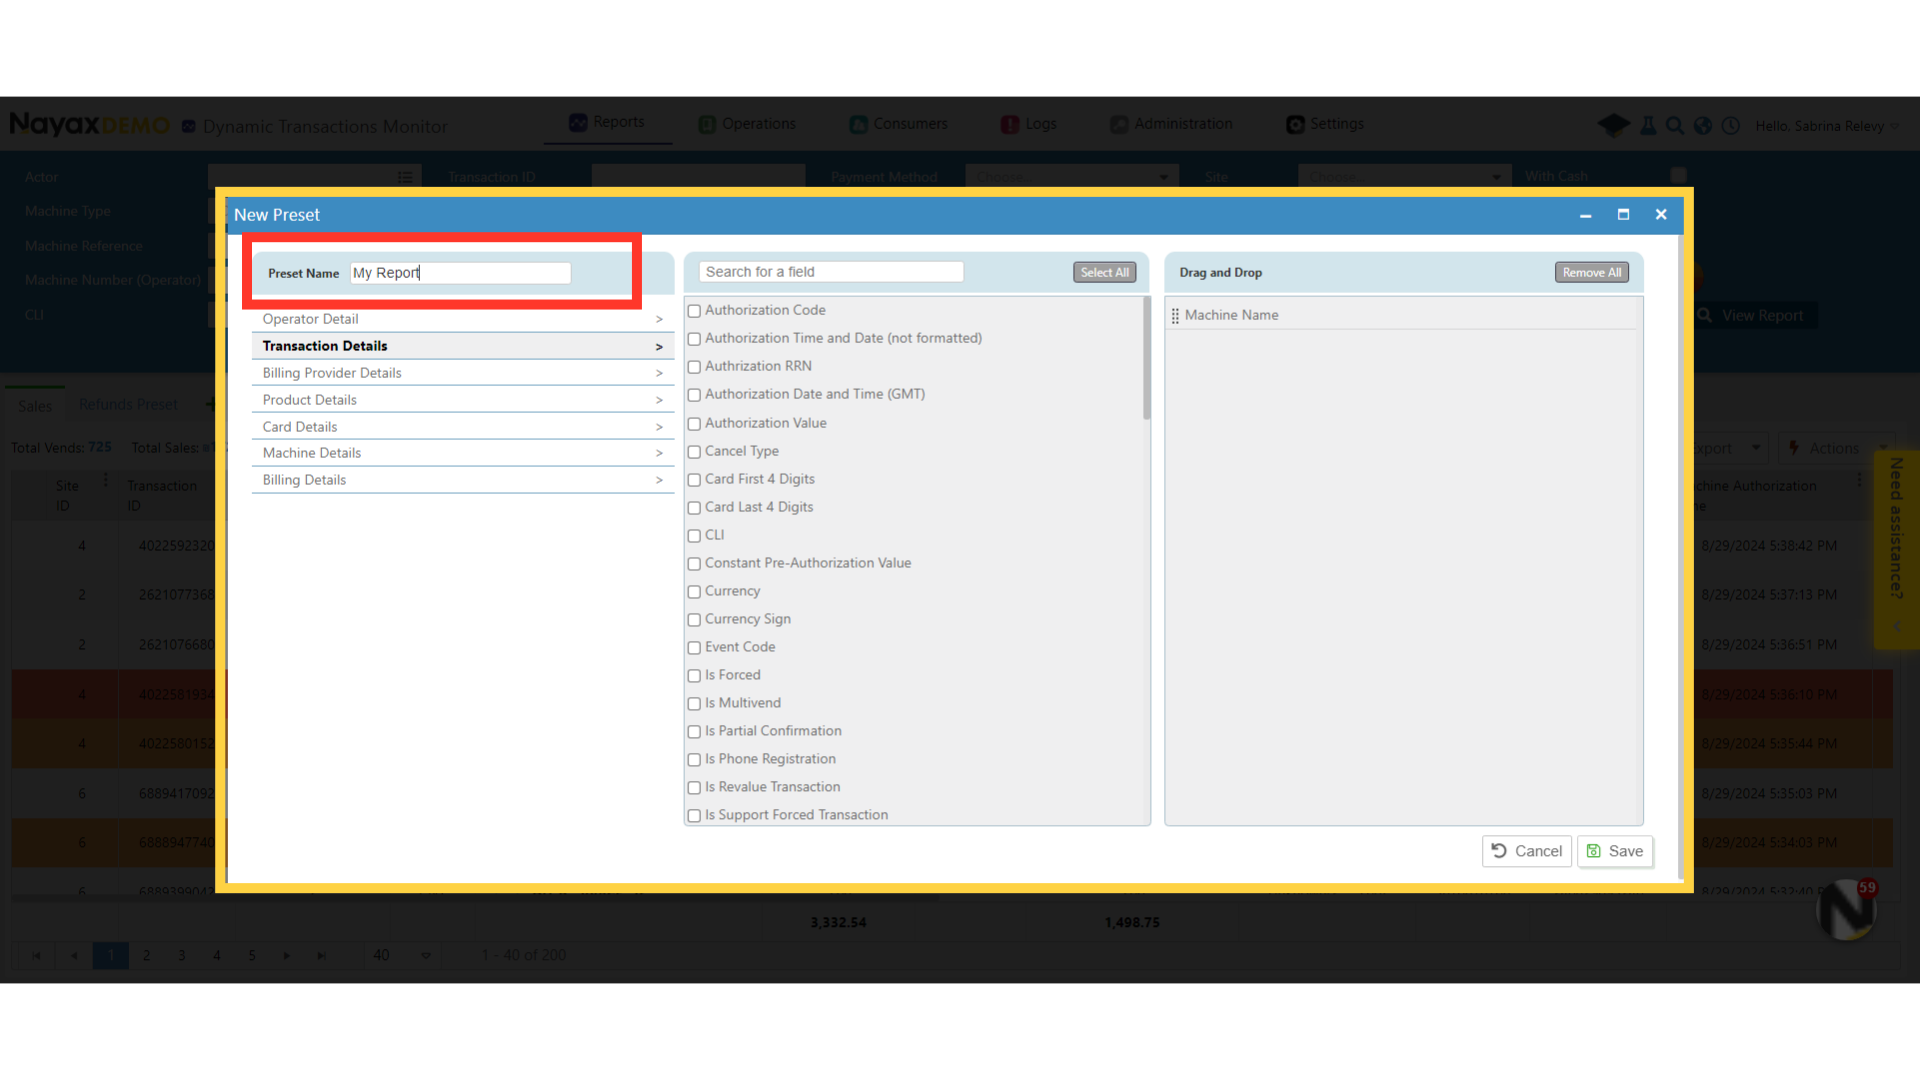
Name Tab
Image Attached
A window will pop up and label the tab in the field as highlighted in RED on the visual, for this example My Report.
22
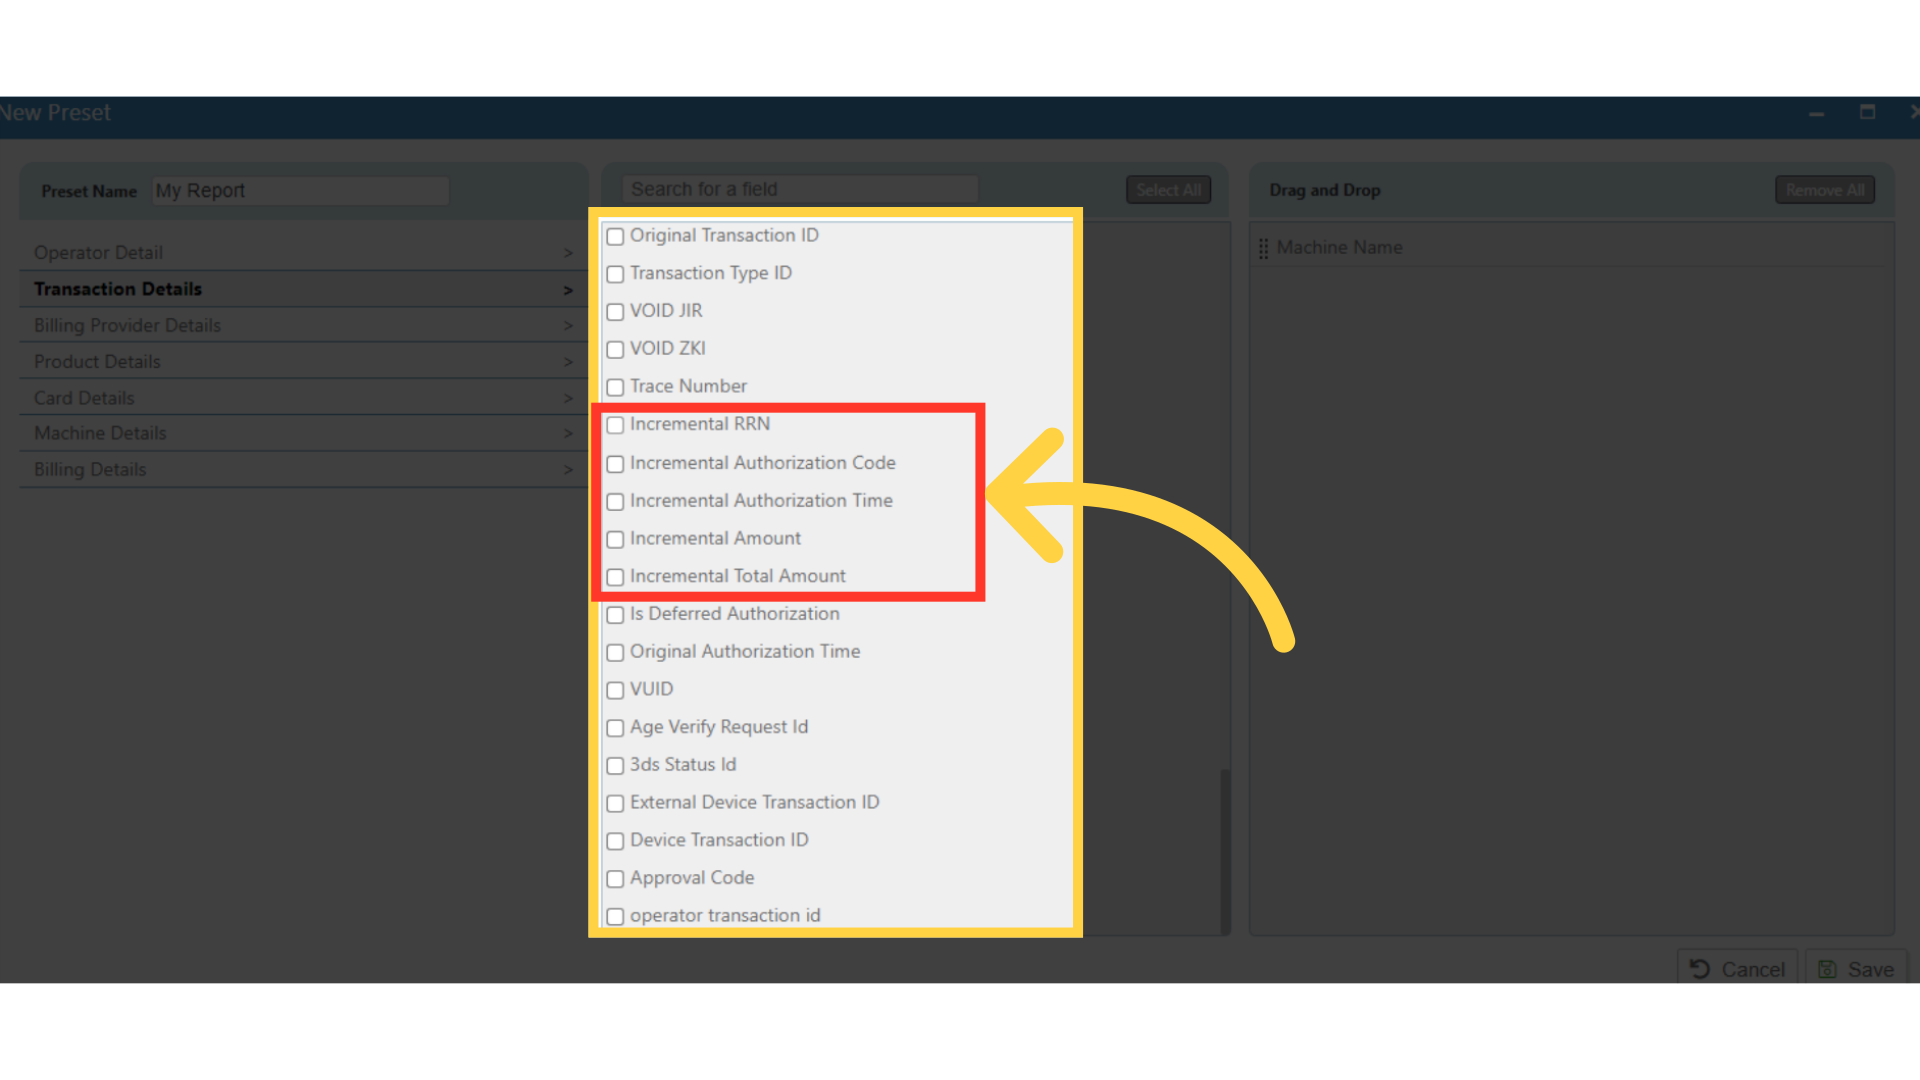
Scroll to Incremental Sections
Image Attached
Scroll down to the Incremental sections as highlighted in RED on the visual.
23
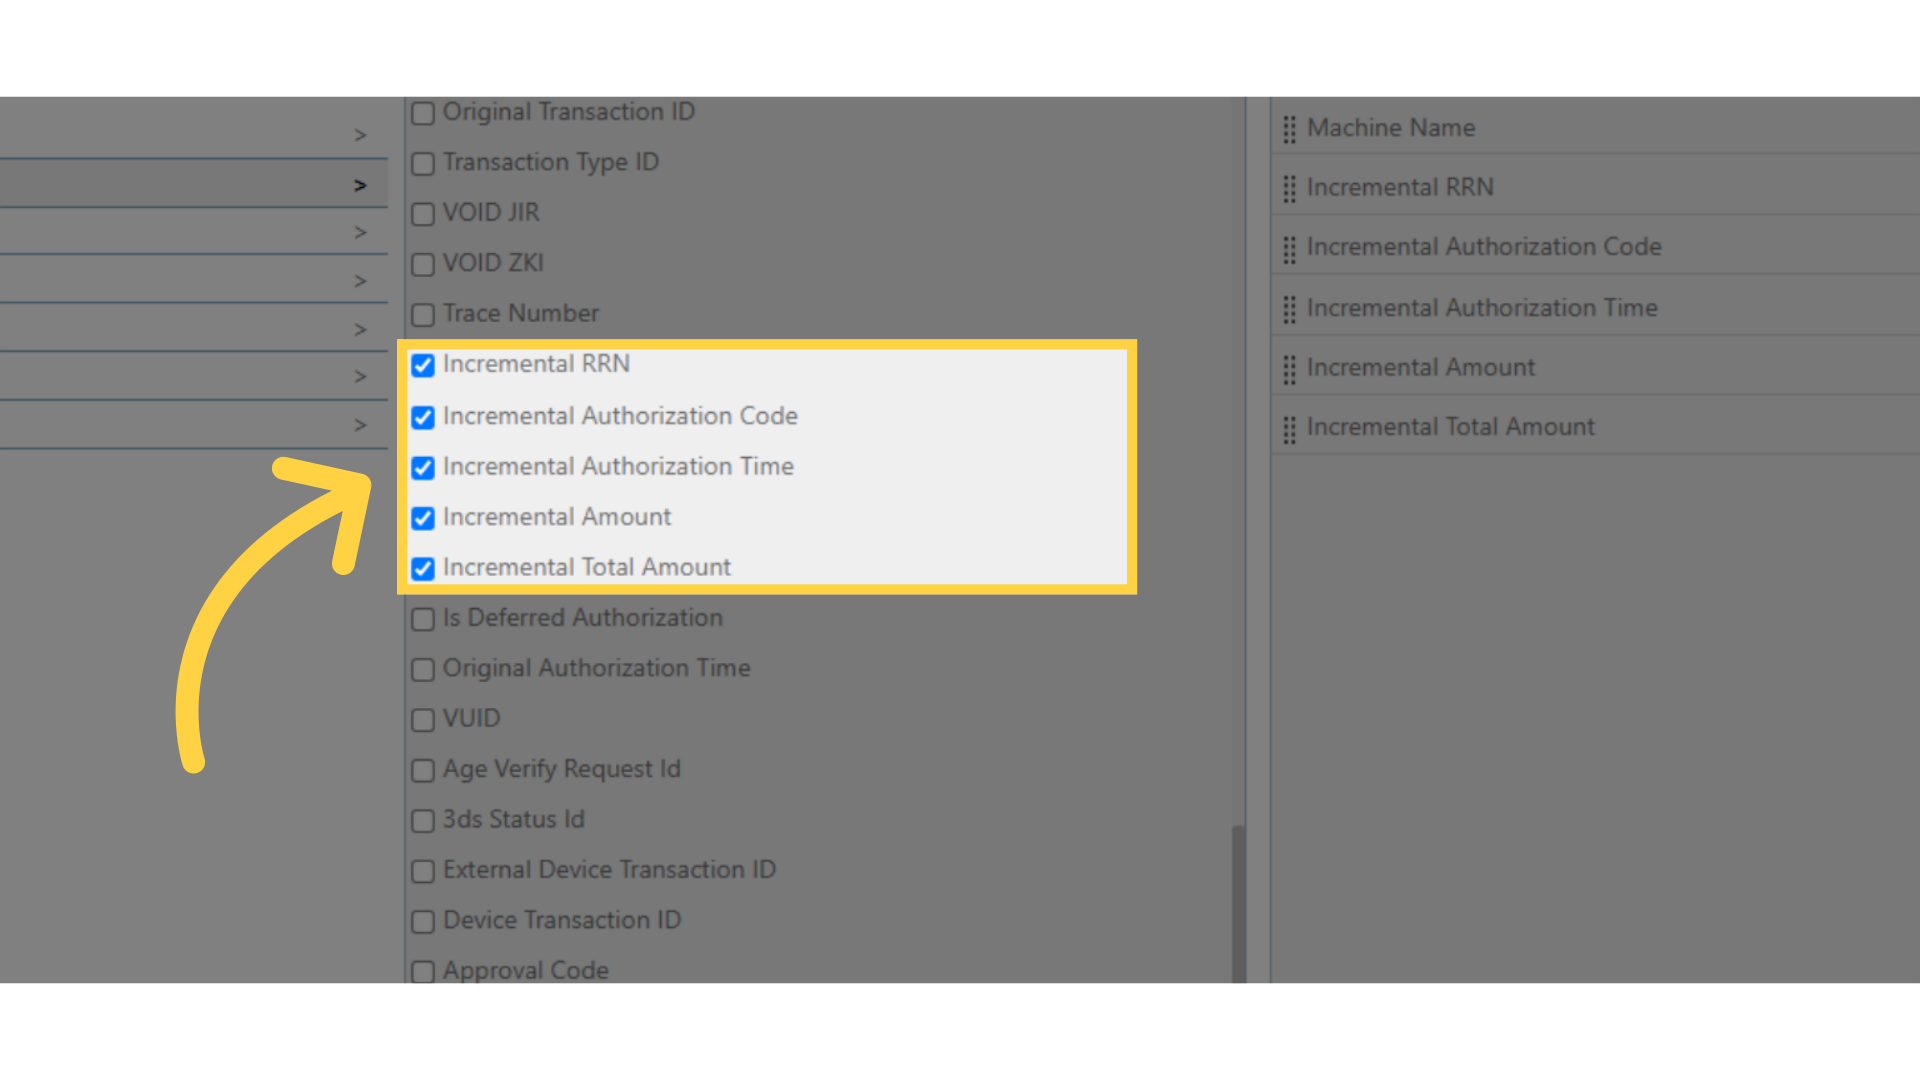
Click on the Checkboxes
Image Attached
Click on the Checkboxes as highlighted in the visual.
24
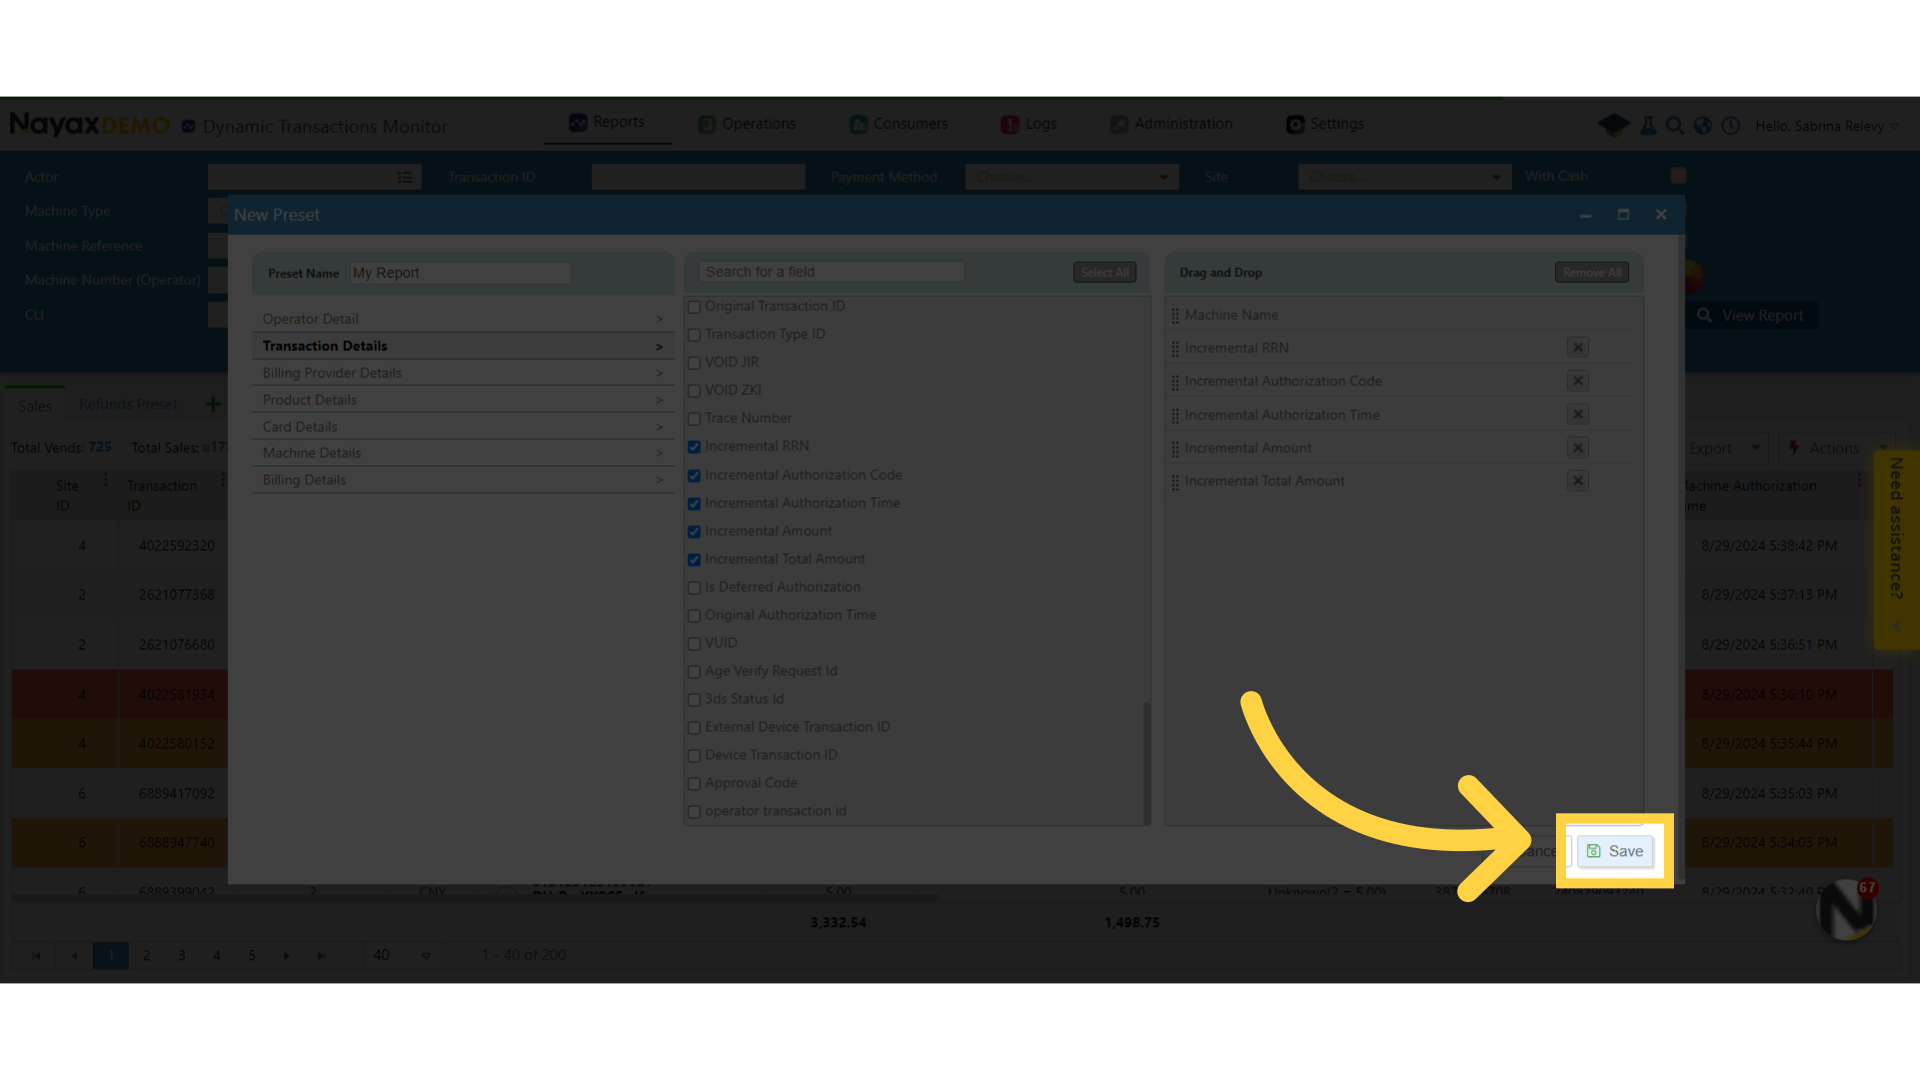
Click save
Image Attached
Click on save to save your changes.
25
Please leave feedback
We hope this guide was able to walk you through the process, we ask you to please help us help you by leaving feedback!
Thank you!
Did you find this article helpful?