Configure Deferred Online | Payments
1
Video guide
2
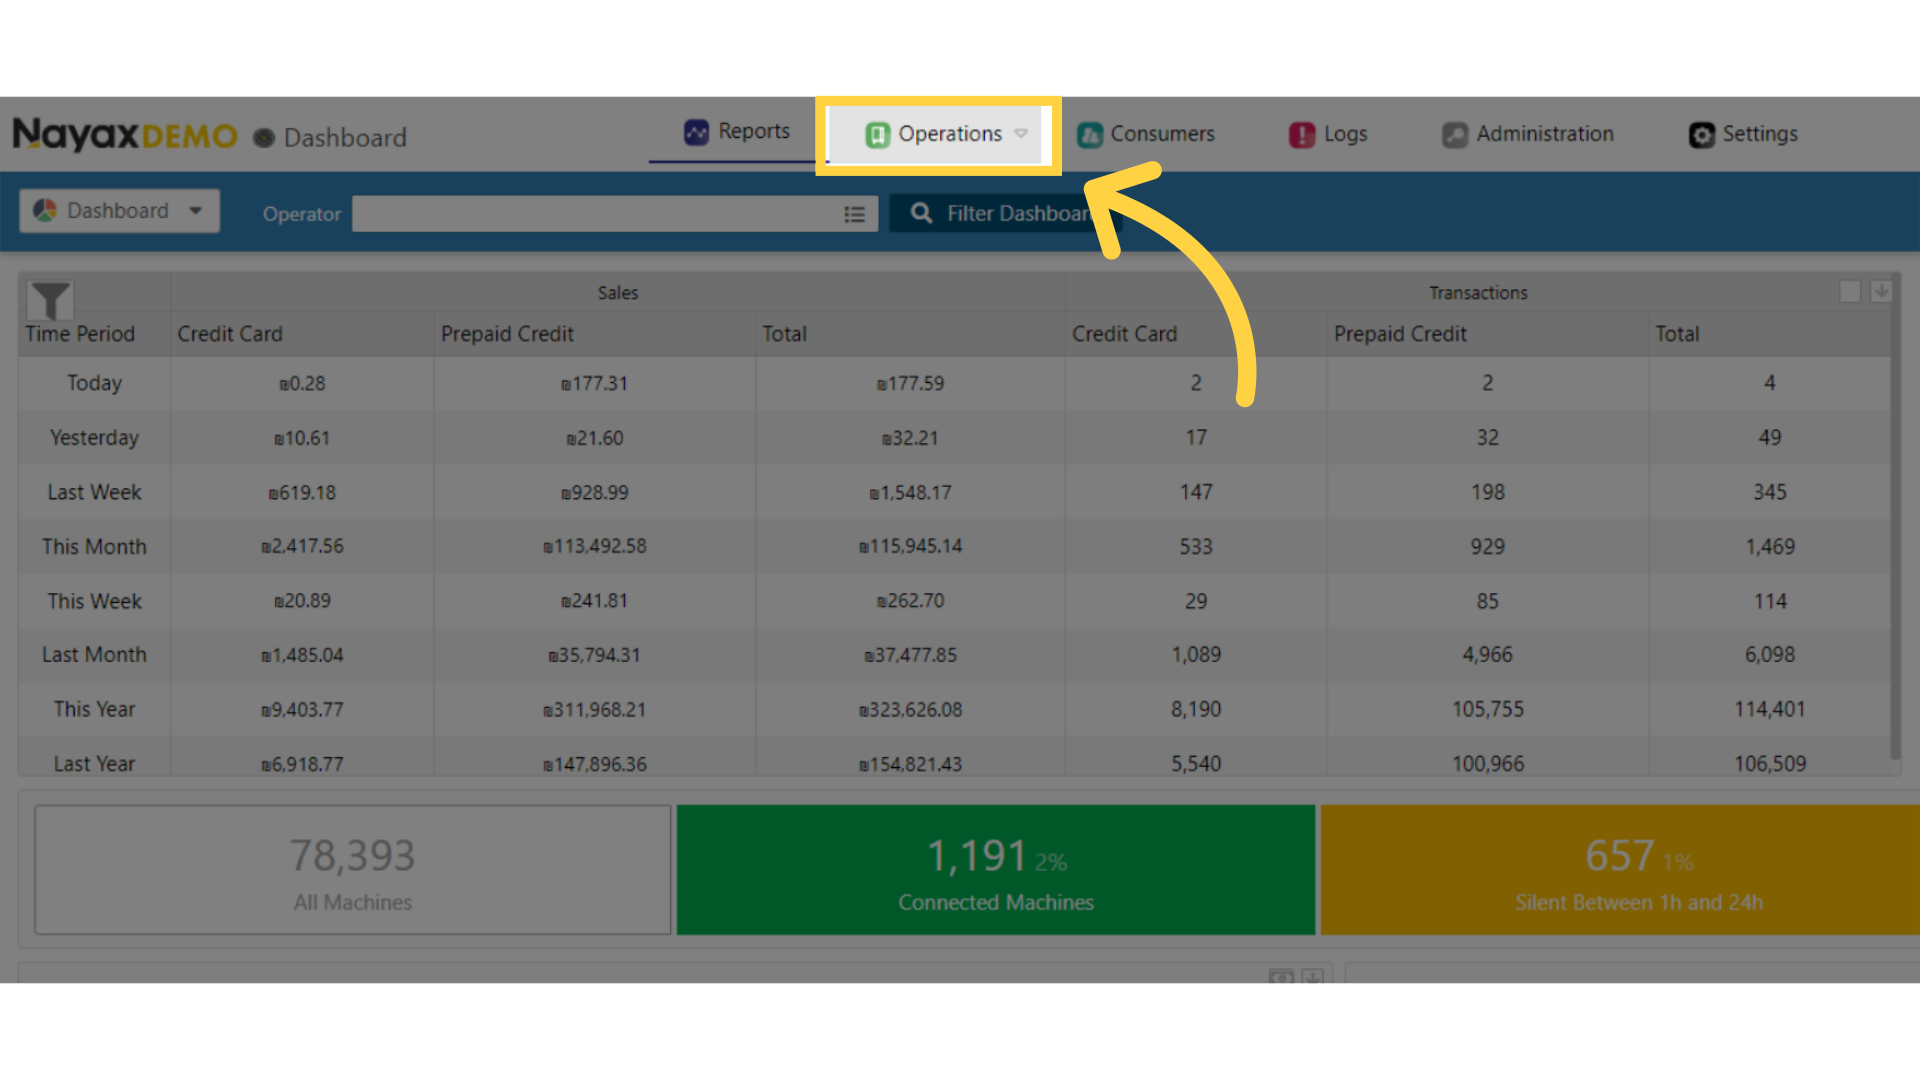
On the Dashboard of your Nayax Core management suite click on the operations tab
Image Attached
On the Dashboard of your Nayax Core management suite click on the operations tab.
3
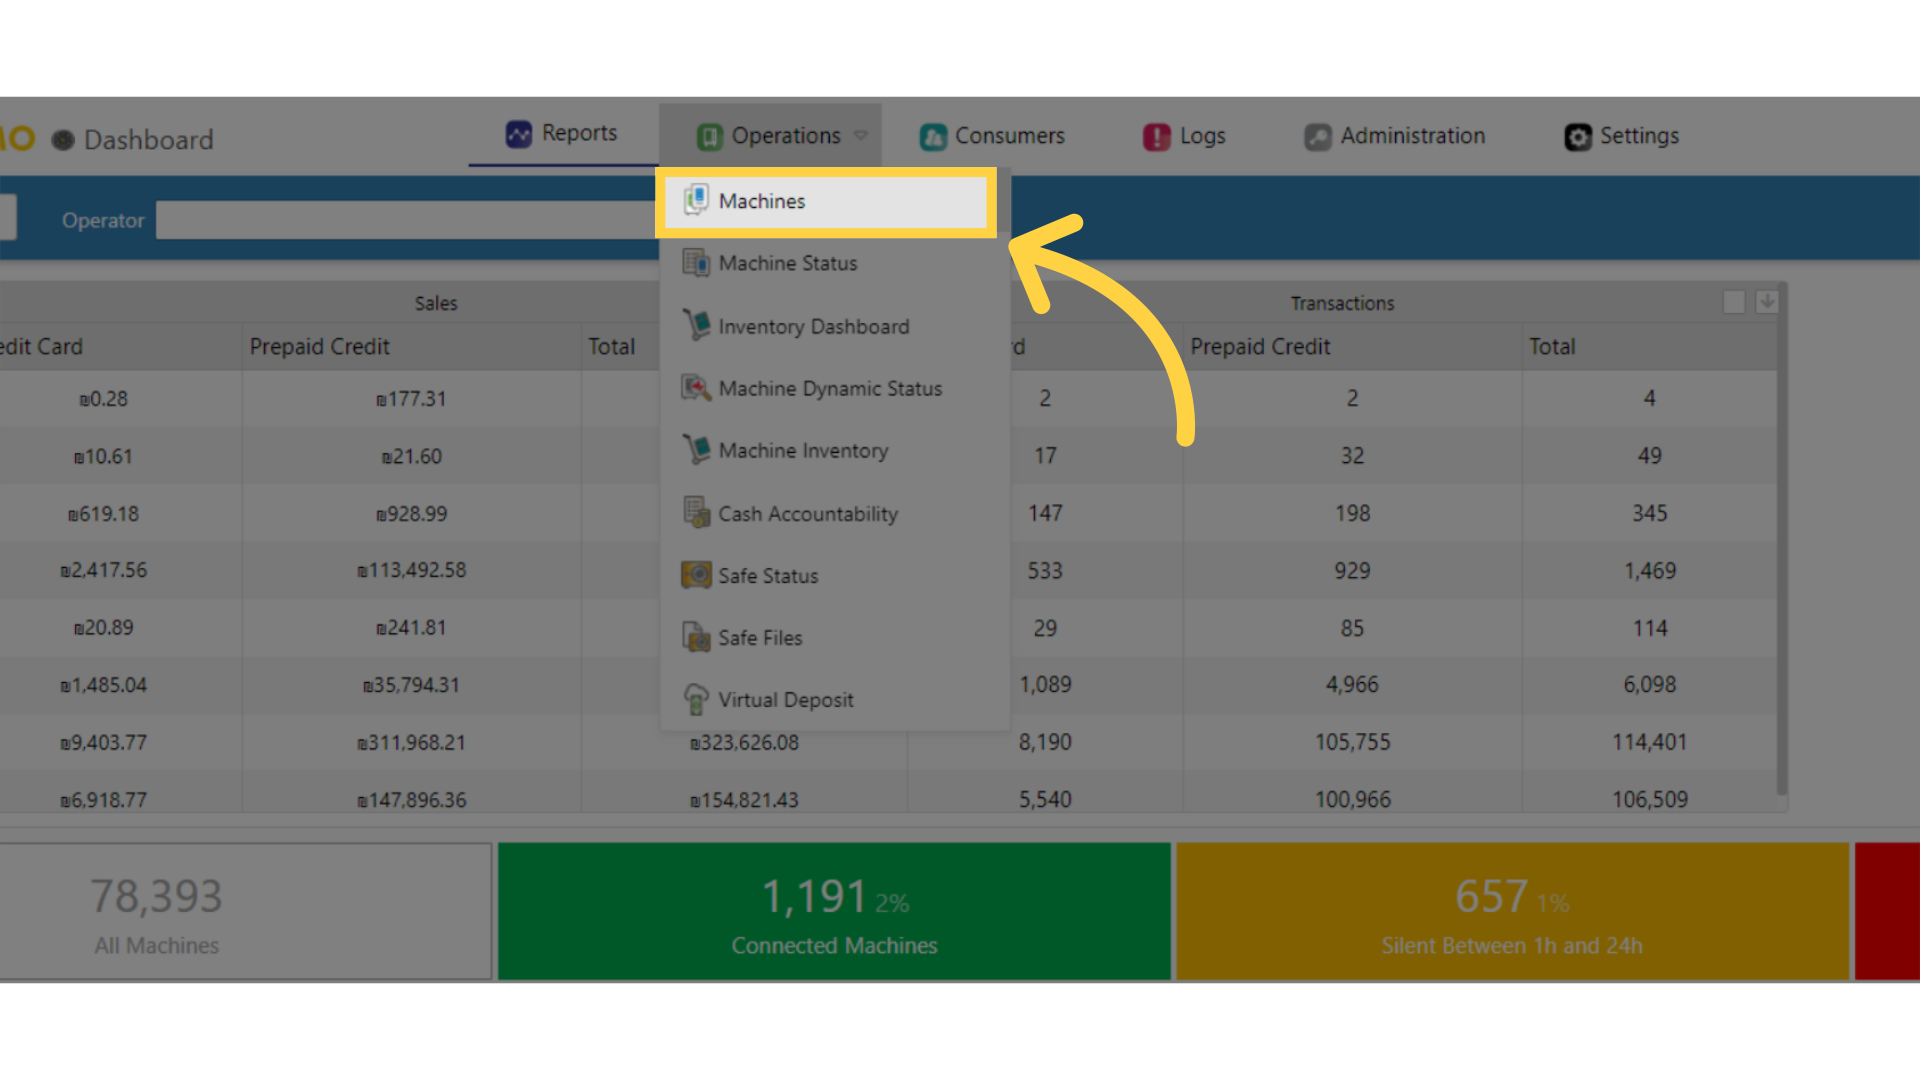
Click on machines from the drop down menu
Image Attached
Click on machines from the drop down menu.
4
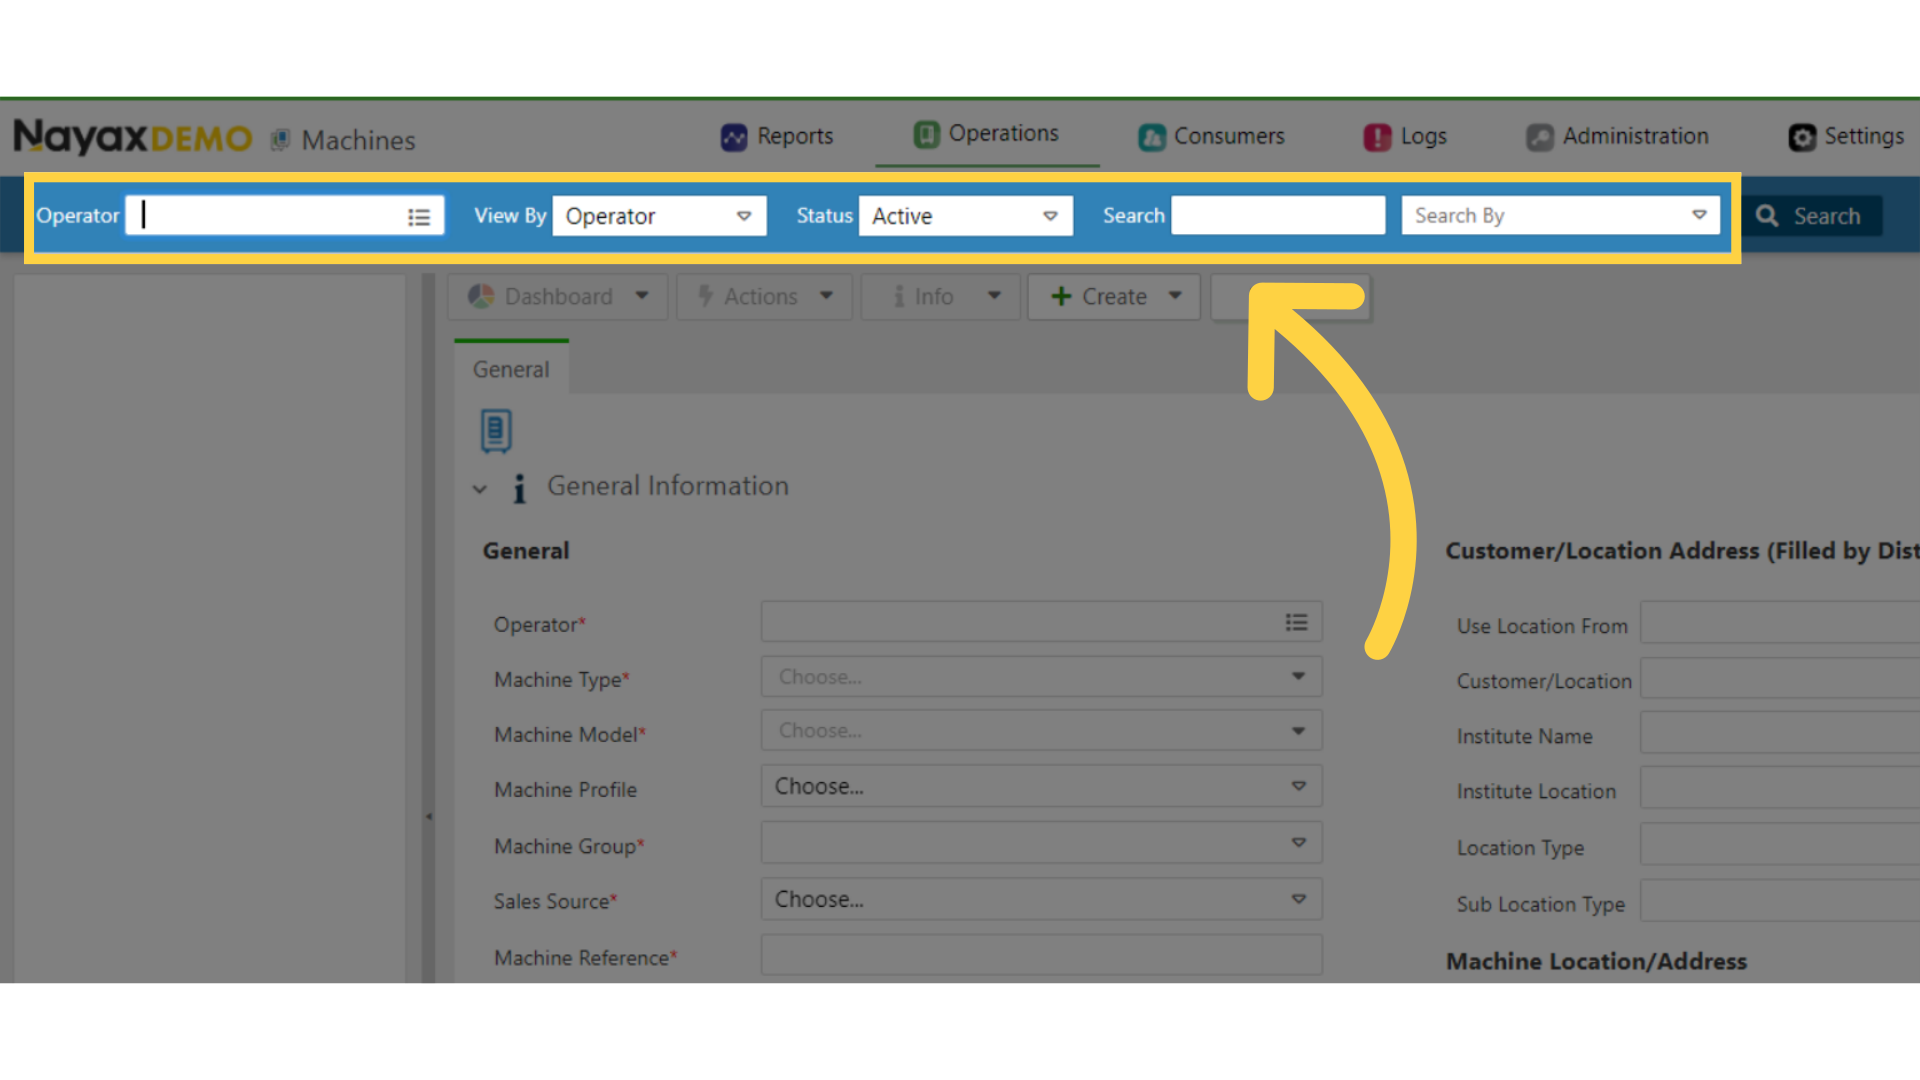
Fill in your operator's name and other fields
Image Attached
Fill in your operator's name and other fields.
5
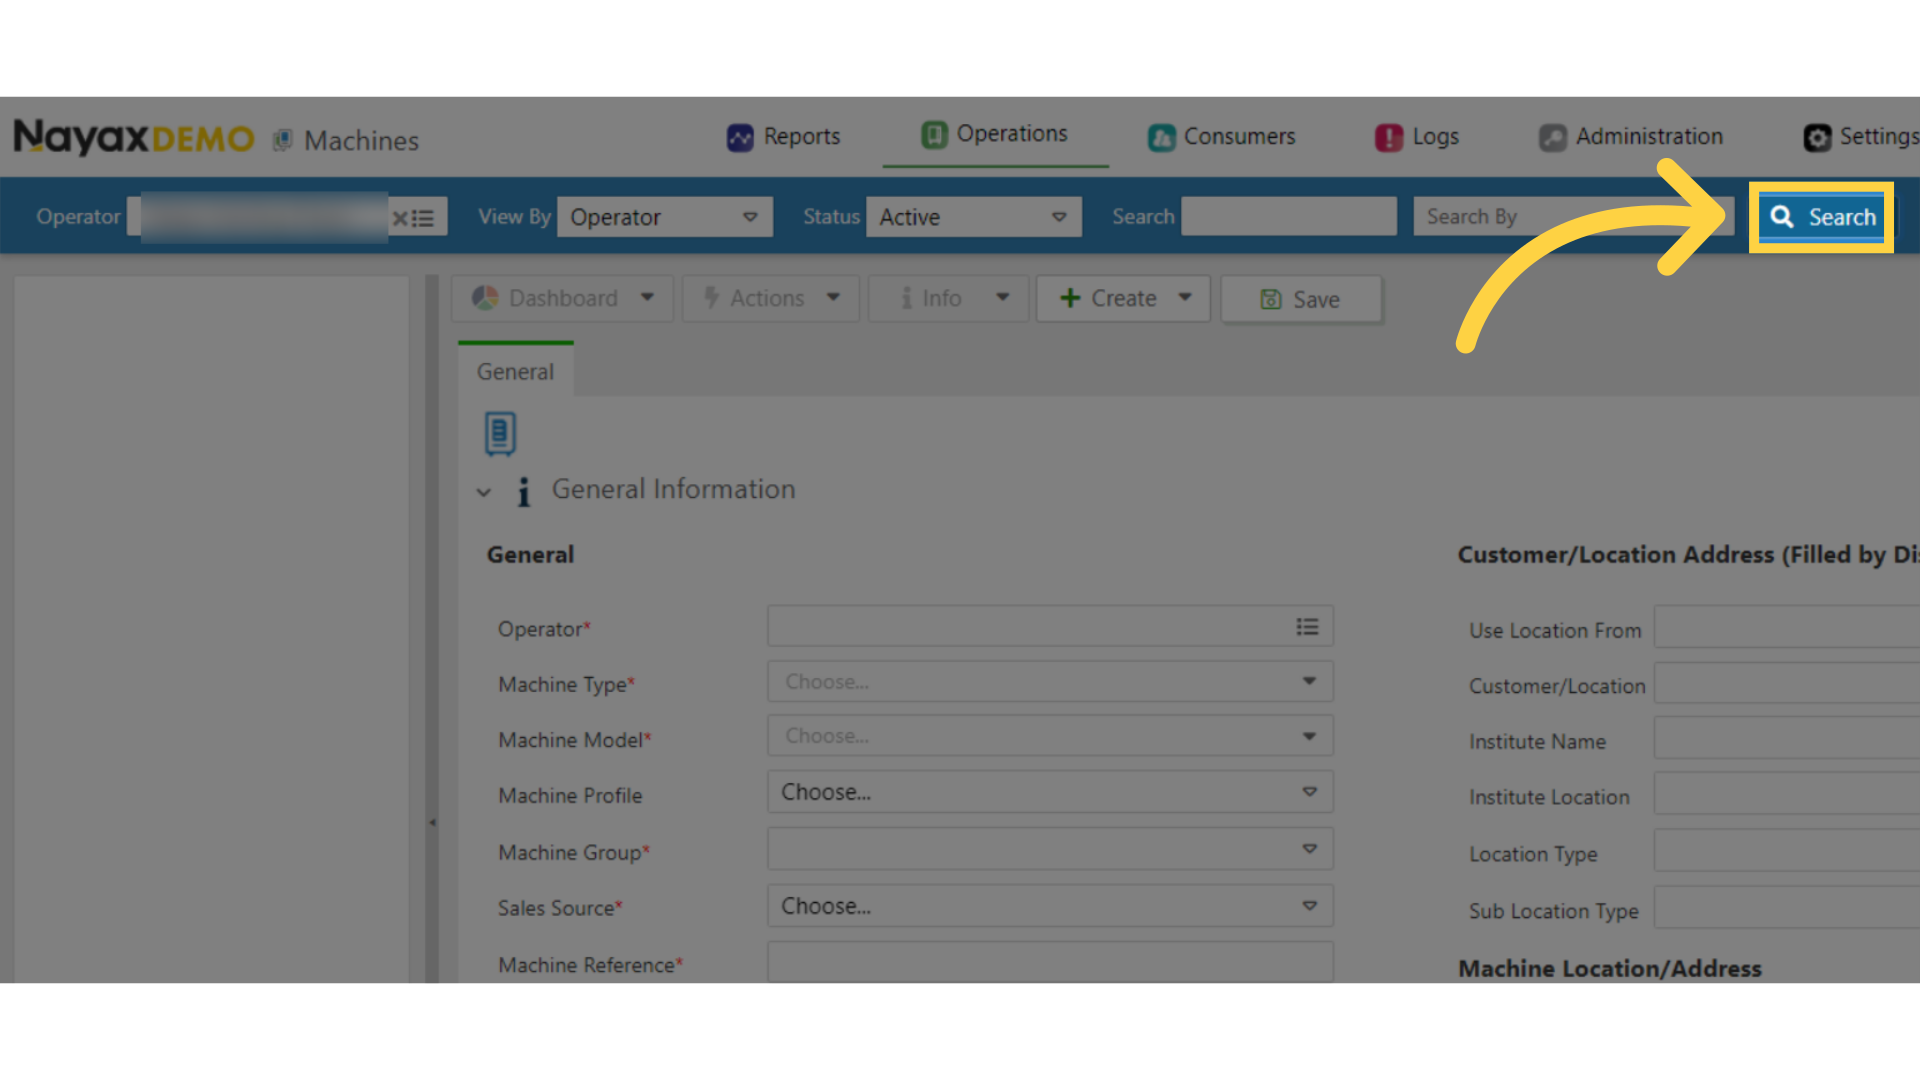
Click search
Image Attached
Click search.
6
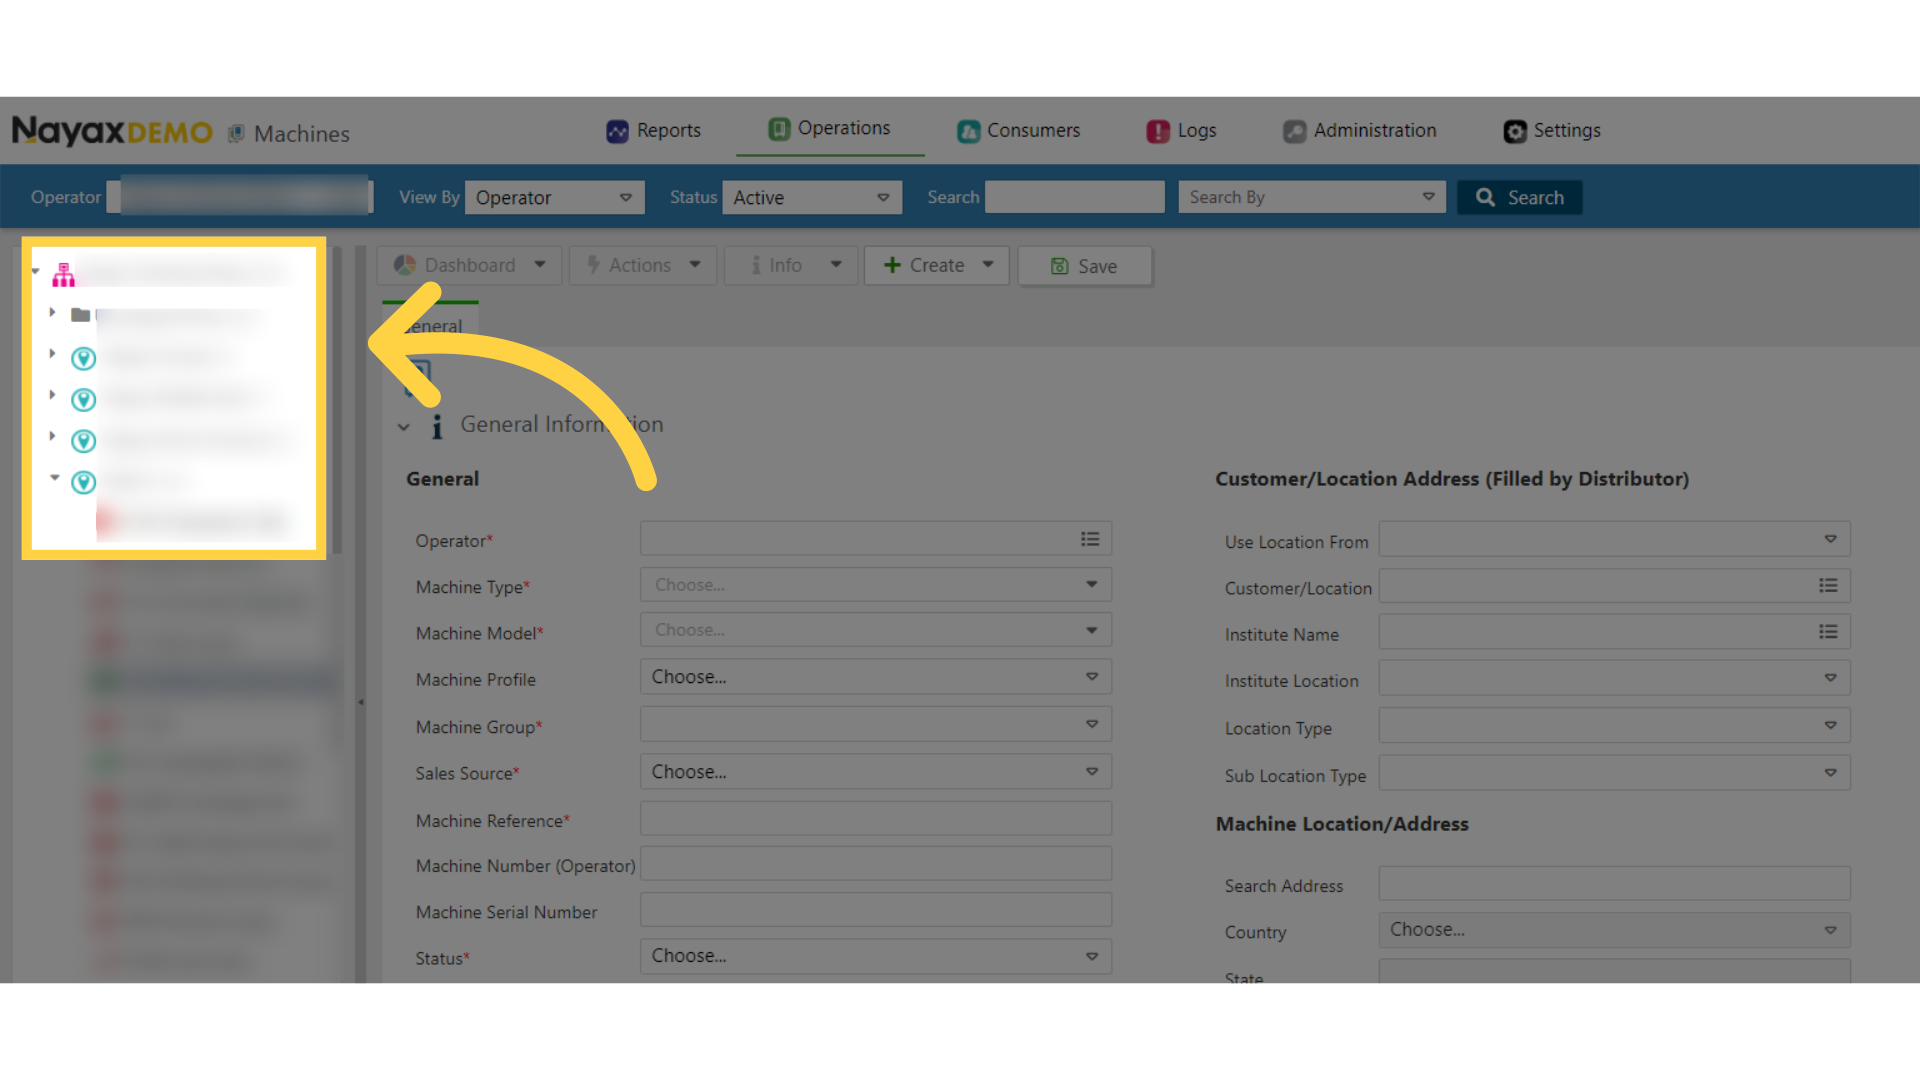
Locate and click on the operator machine from the hierarchy
Image Attached
Locate and click on the operator machine from the hierarchy.
7
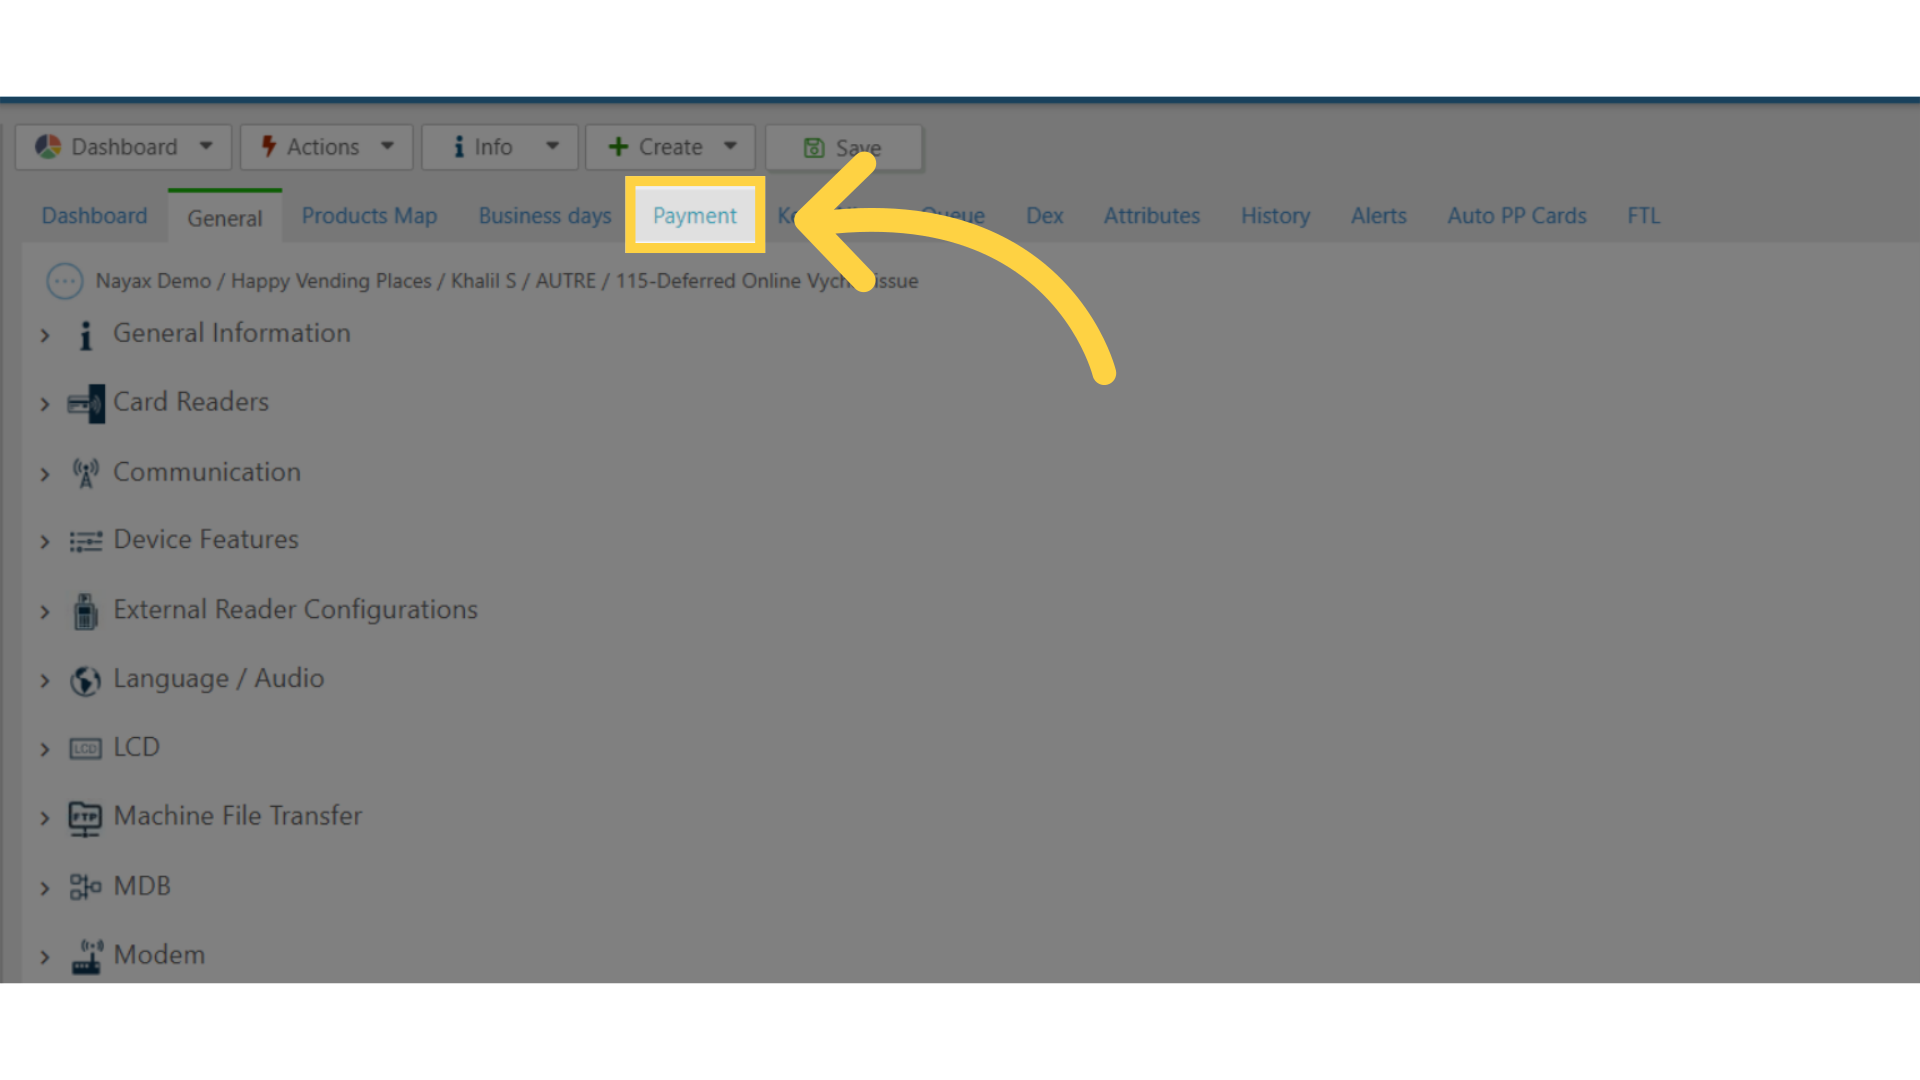
Click payment tab
Image Attached
Click on payment tab from the main section.
8
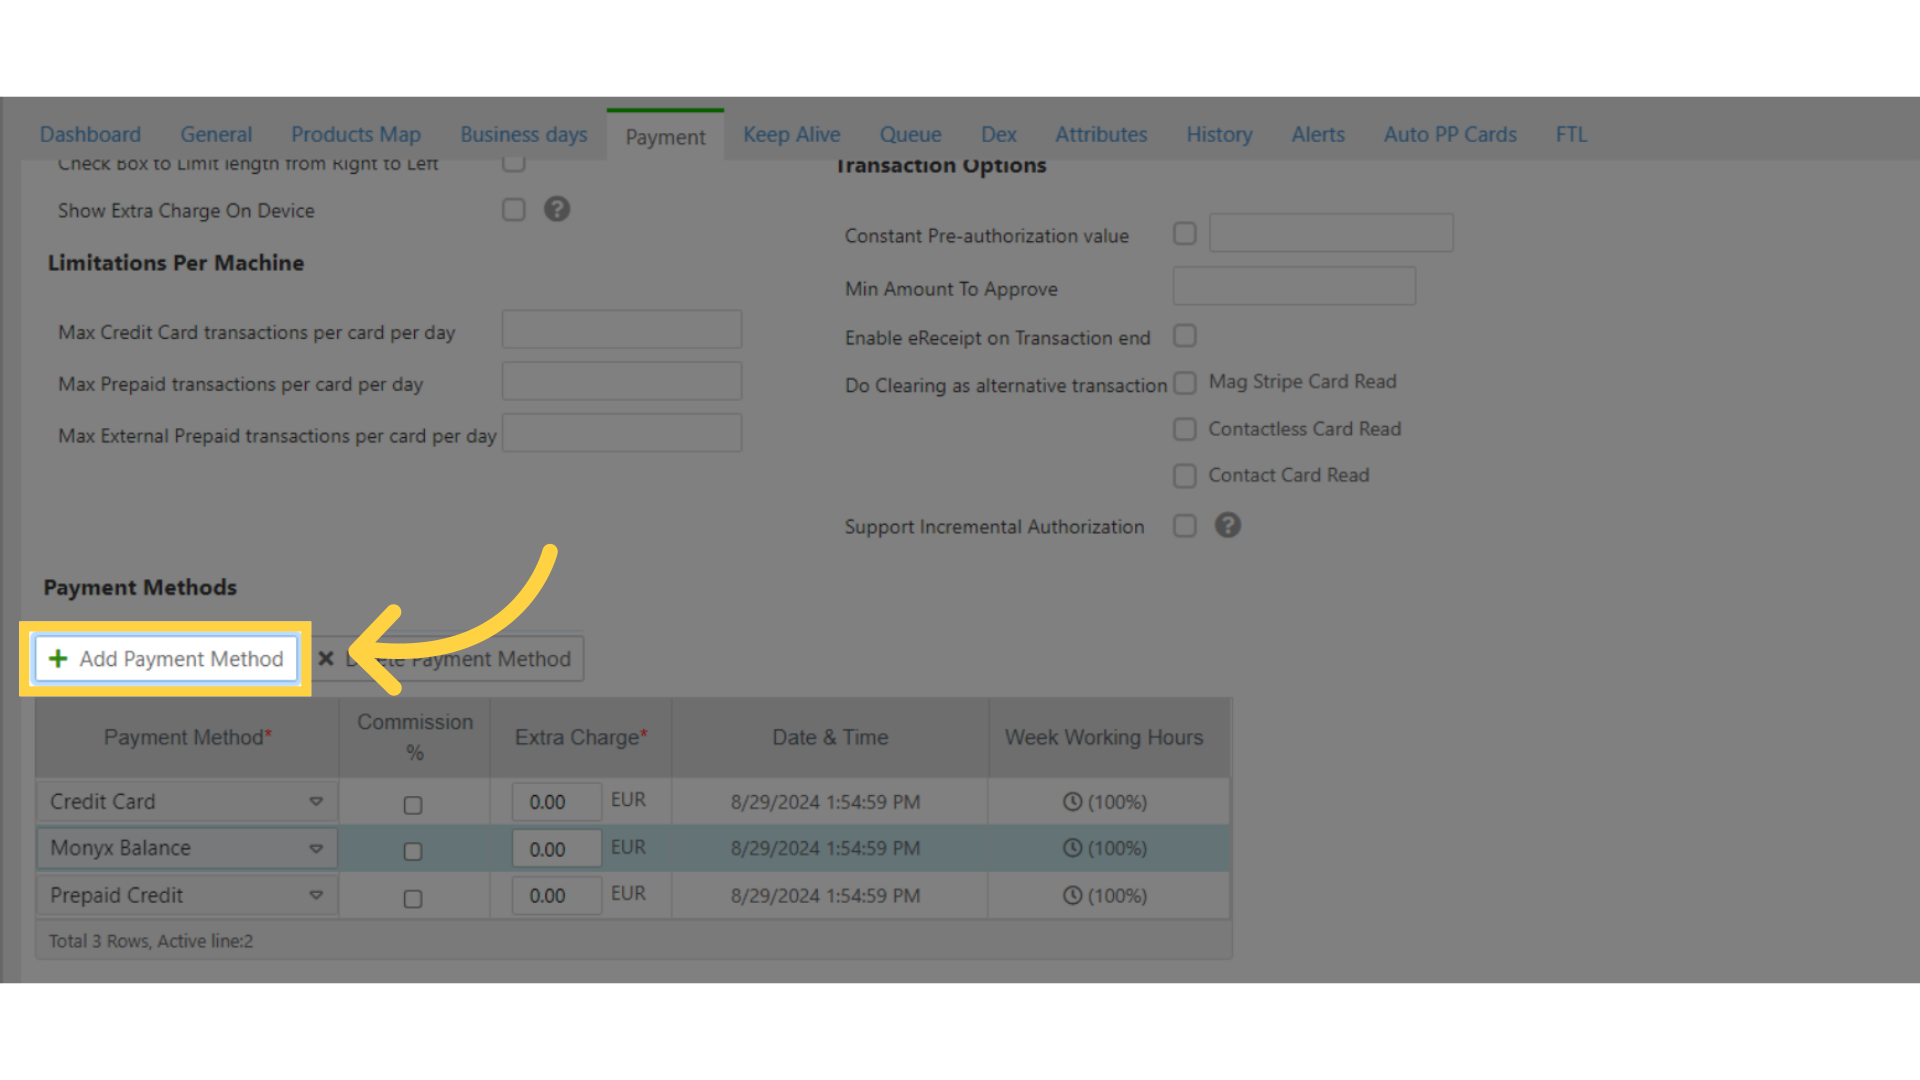
Click Add Payment Method tab
Image Attached
Click Add Payment Method tab.
9
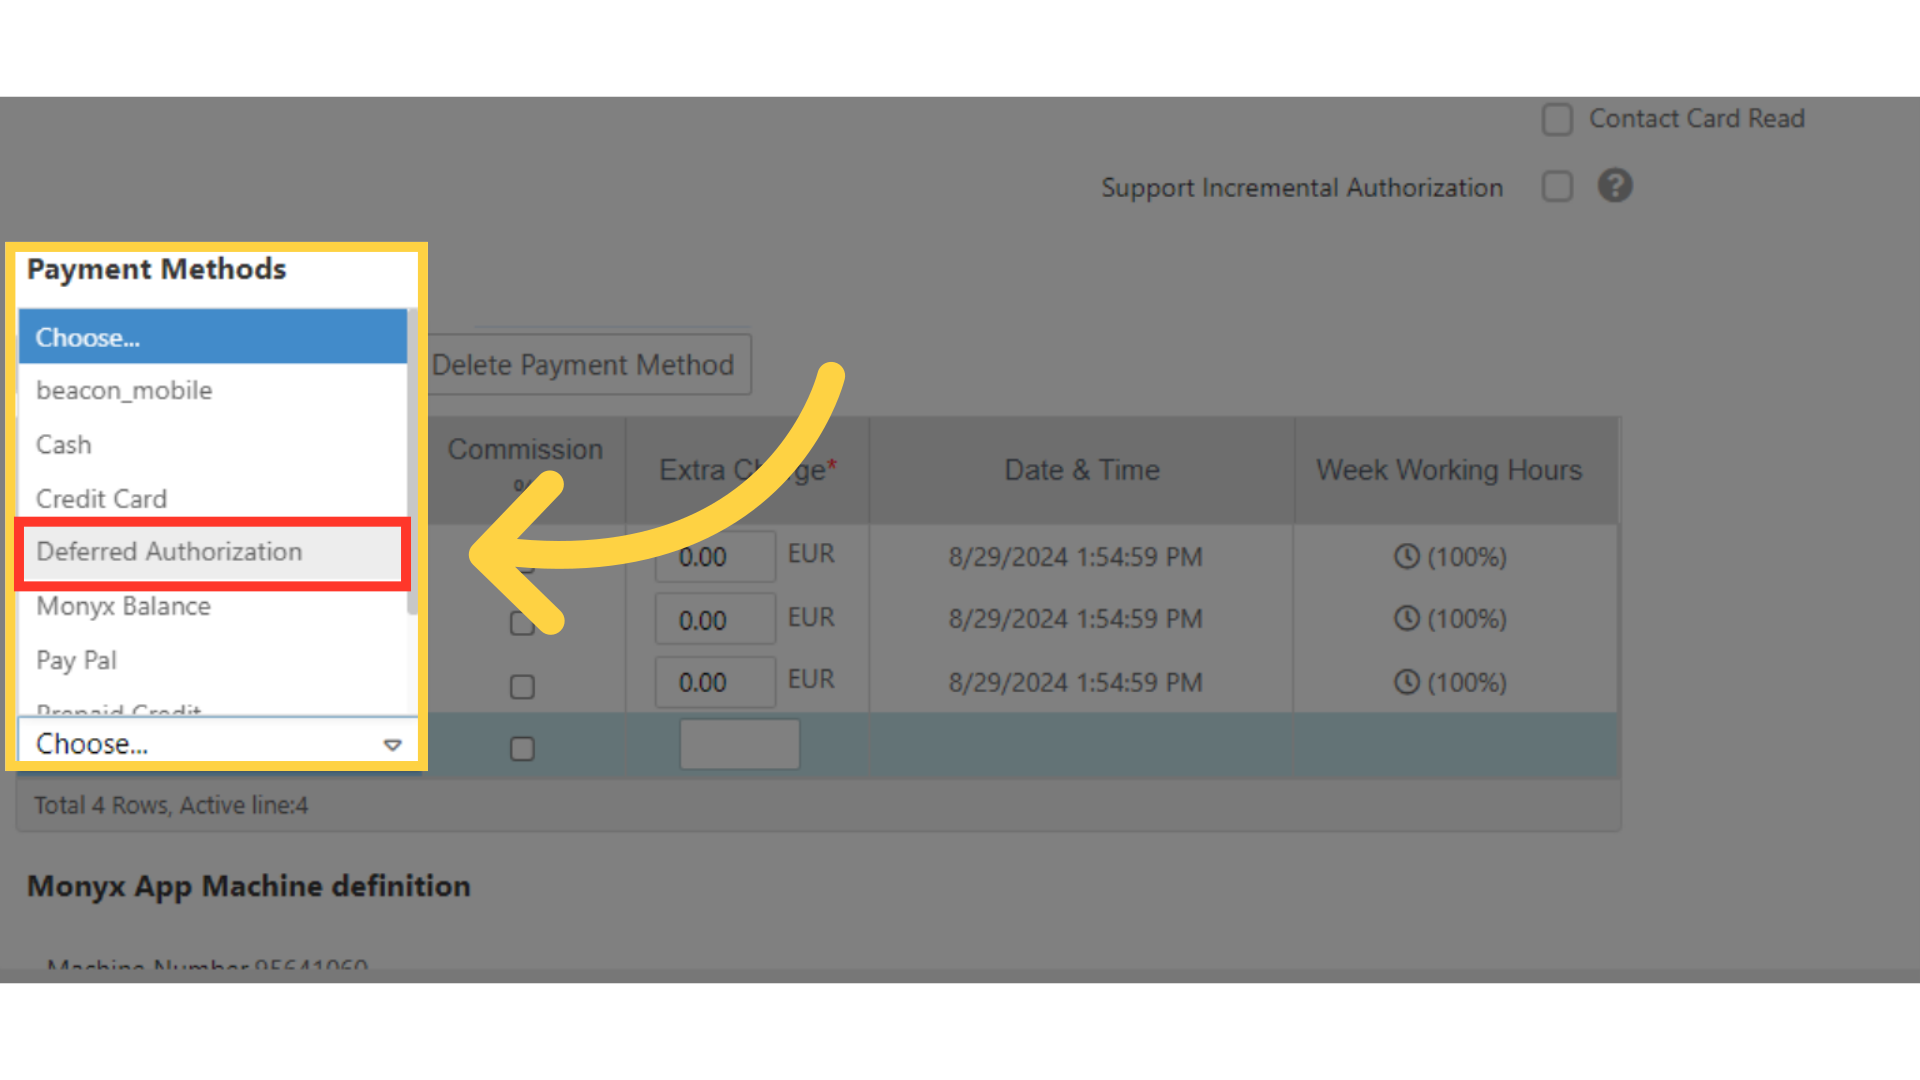
Scroll down to add Deferred Authorization
Image Attached
Scroll down to the drop down field and add "Deferred Authorization" from the drop down menu as highlighted in RED on the visual.
10
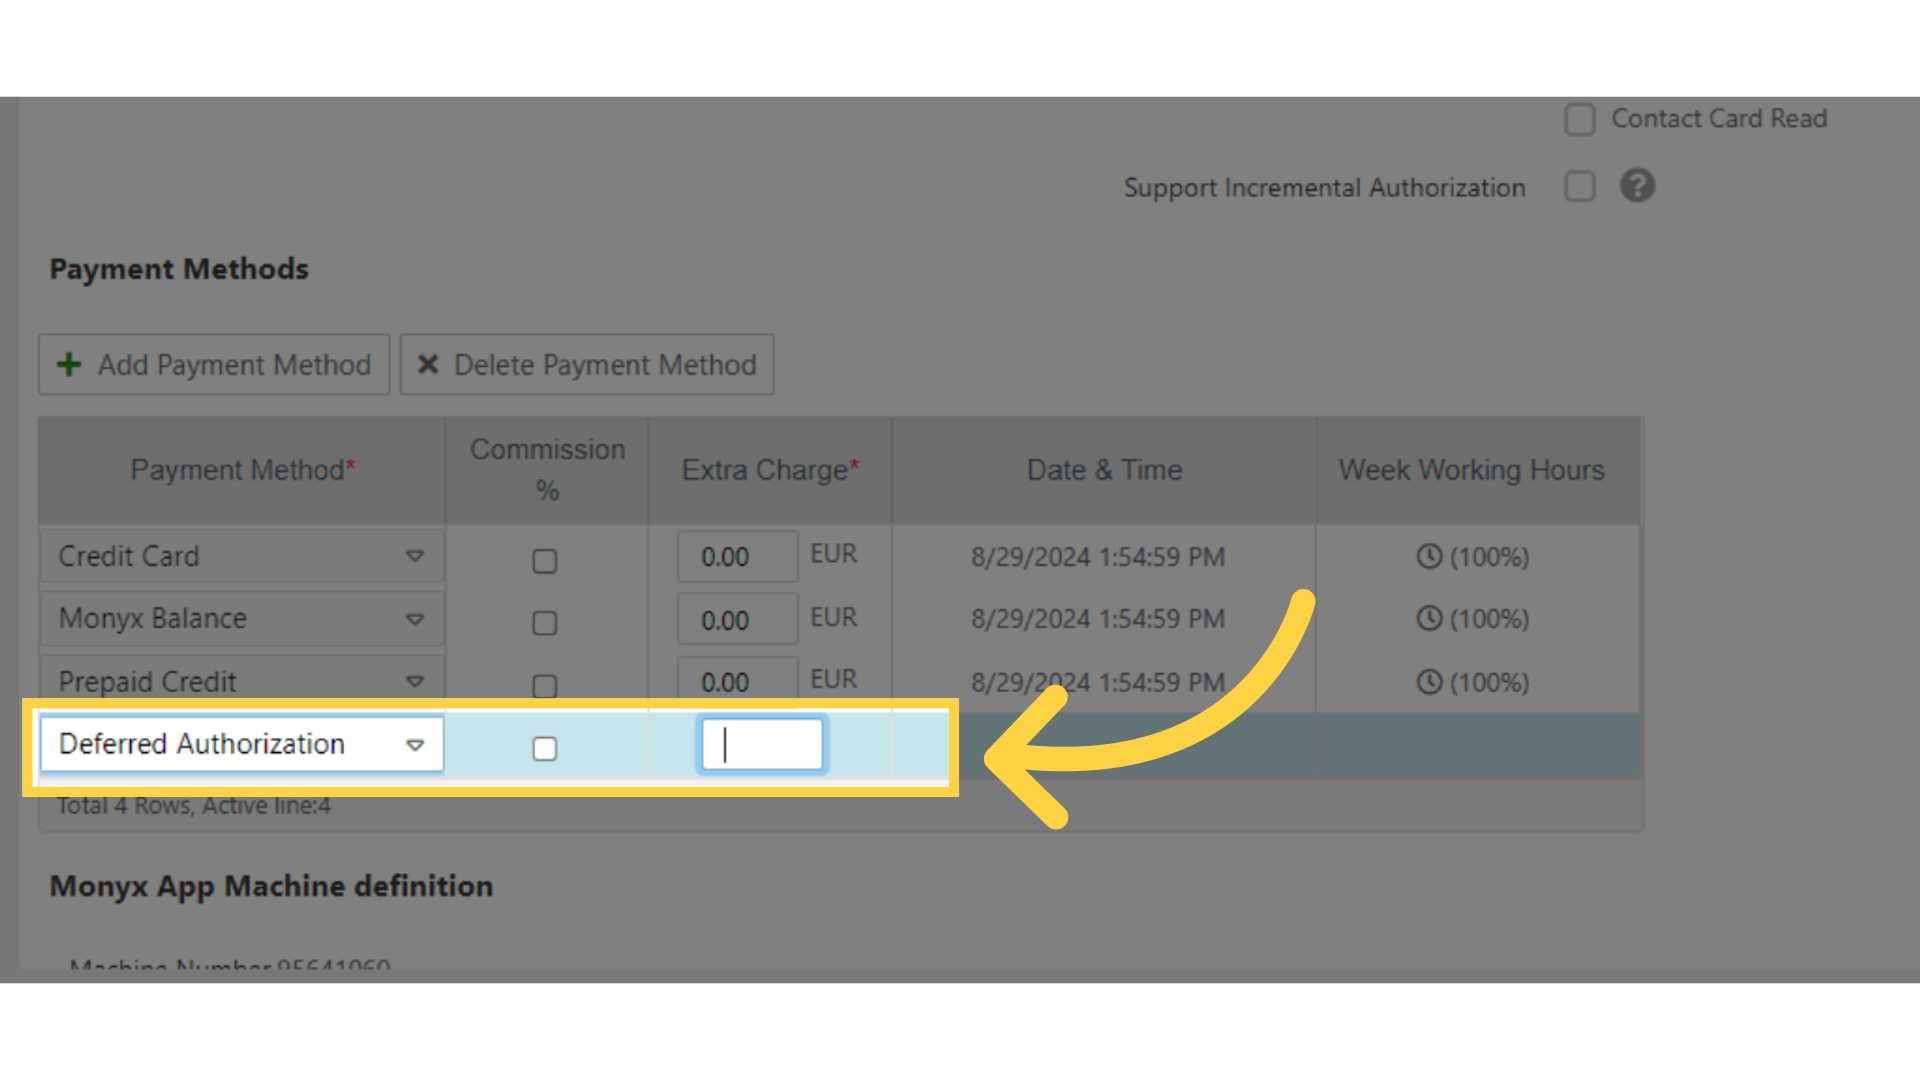
Deferred Online Mode
Image Attached
In deferred online modes, extra charge is disabled, therefore, it has to be set to zero.
11
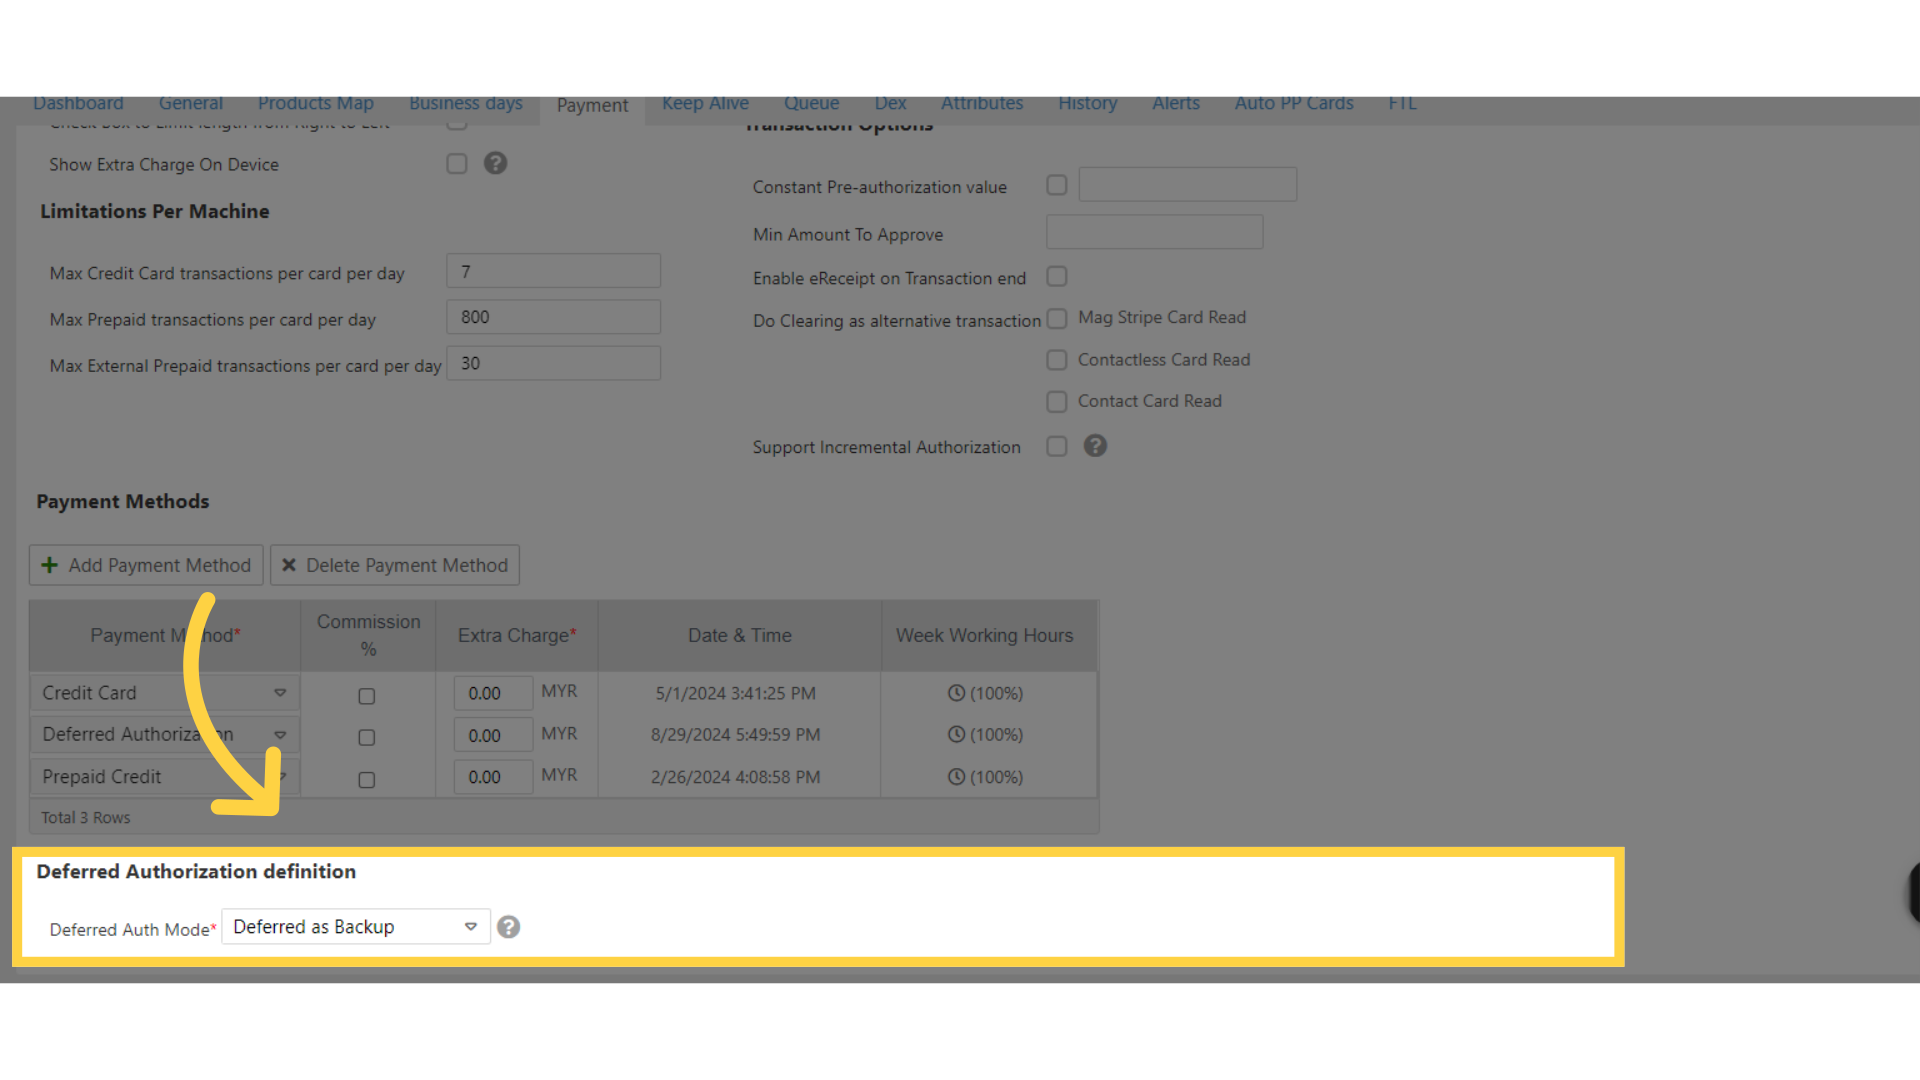
Scroll down to Deferred Authorization definition
Image Attached
Scroll down to Deferred Authorization definition.
12
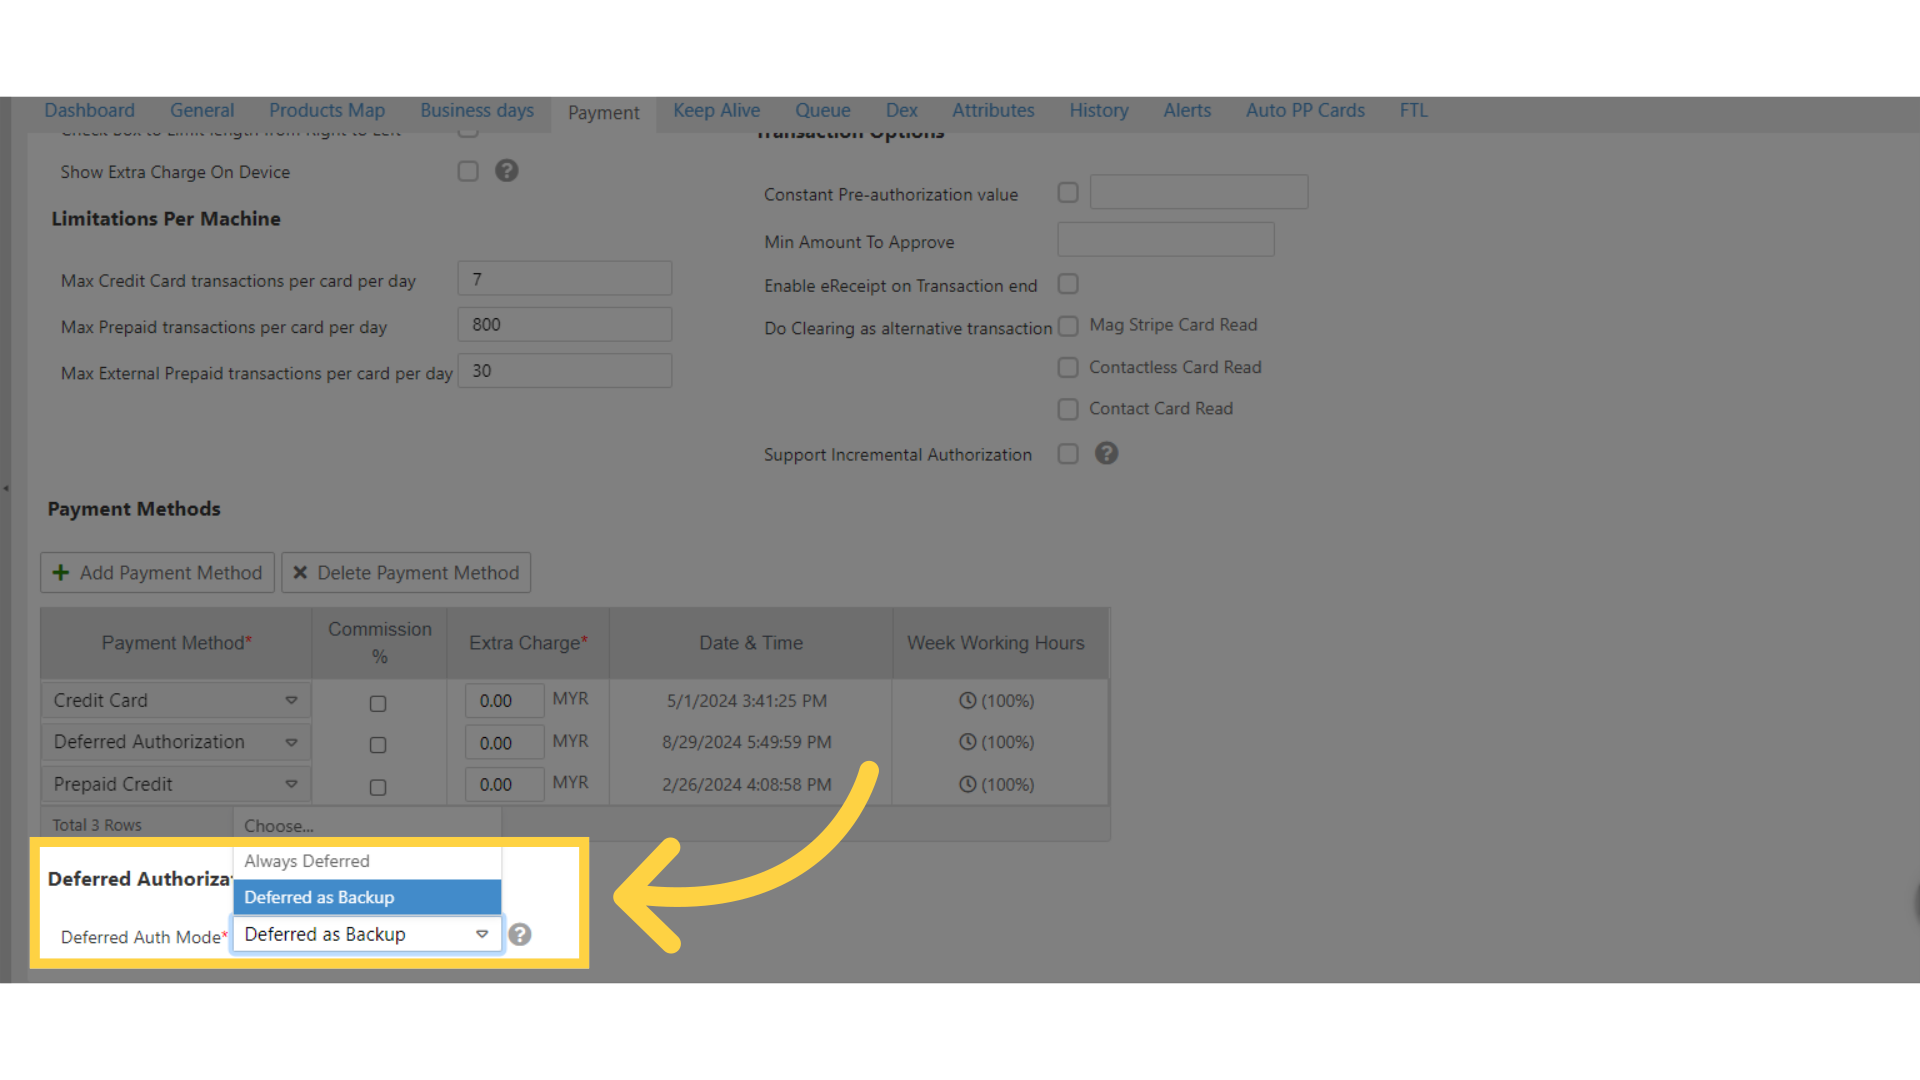
Deferred Authorization Definition
Image Attached
Deferred Authorization definition
Select Deferred as Backup to activate - Deferred Online: ONLY in the event an EMV transaction fails due to unstable connectivity.
13
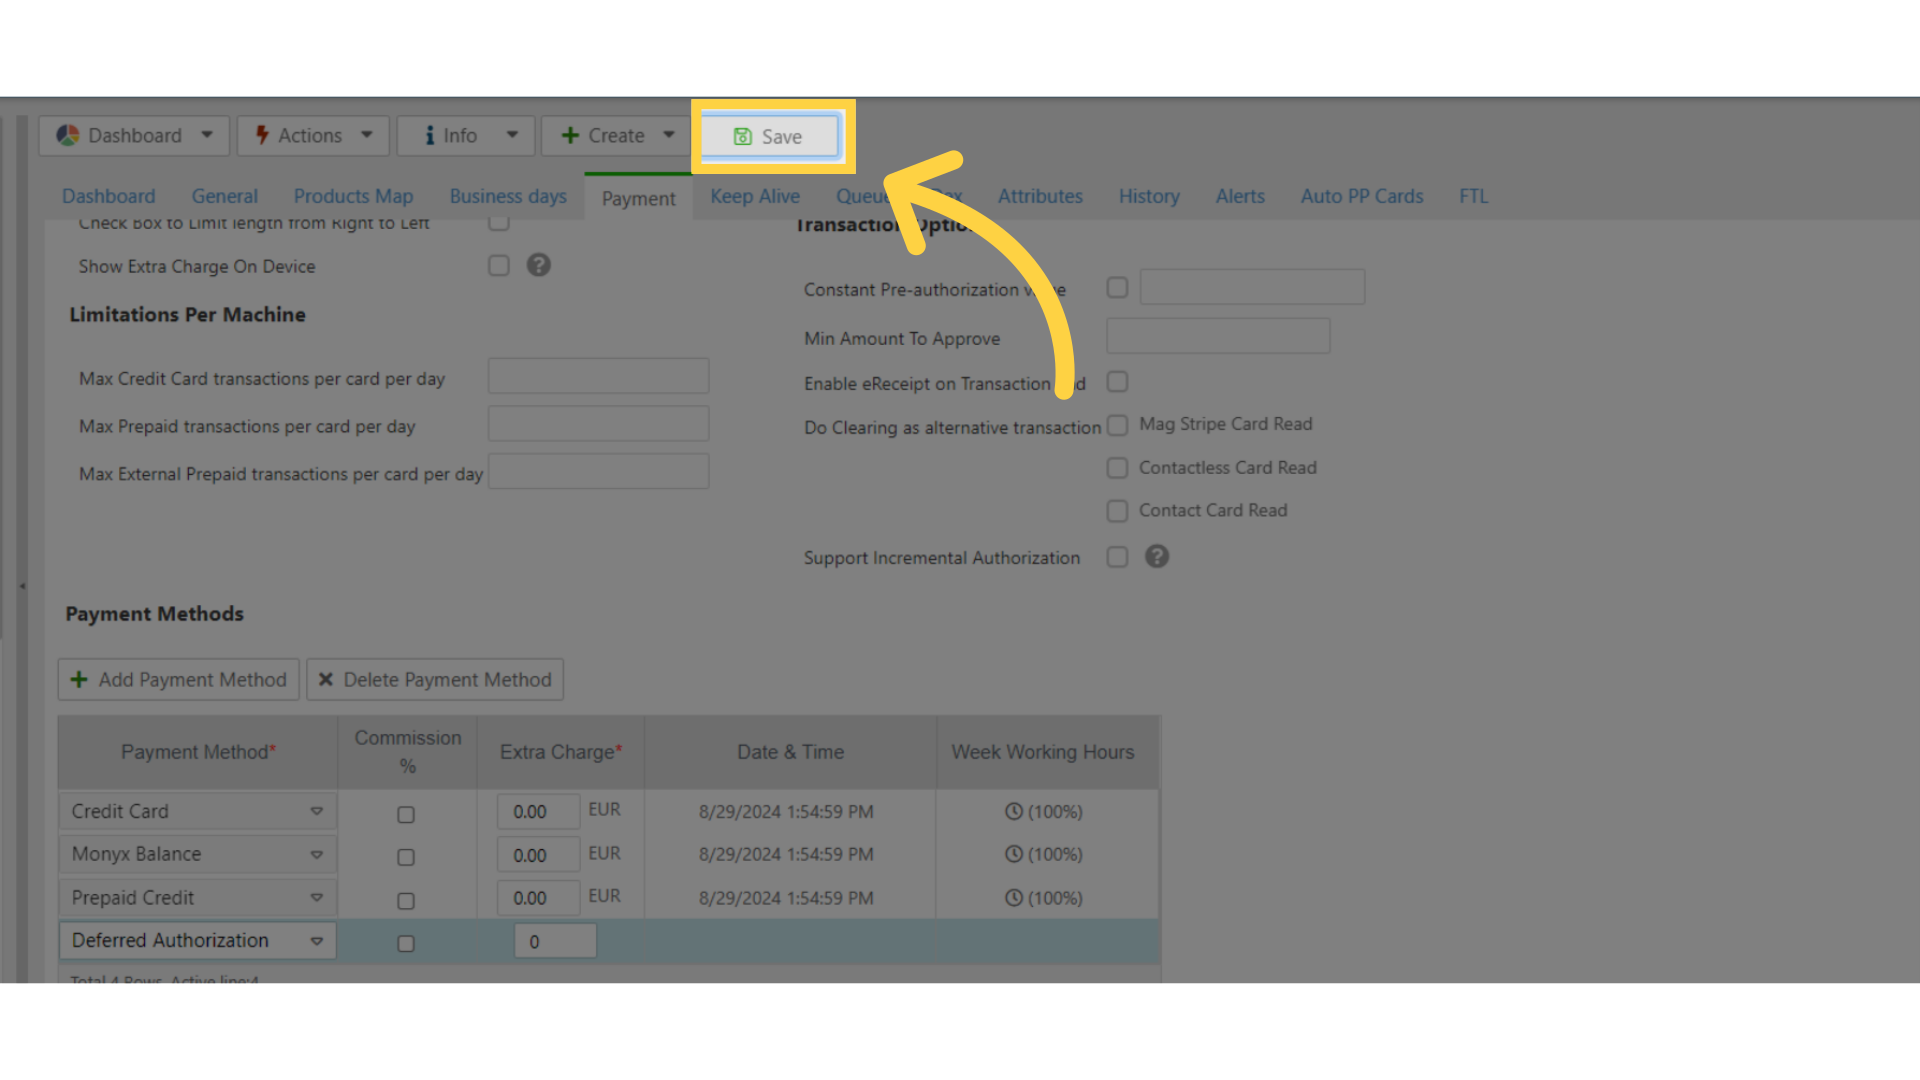
Click save
Image Attached
Click save
14
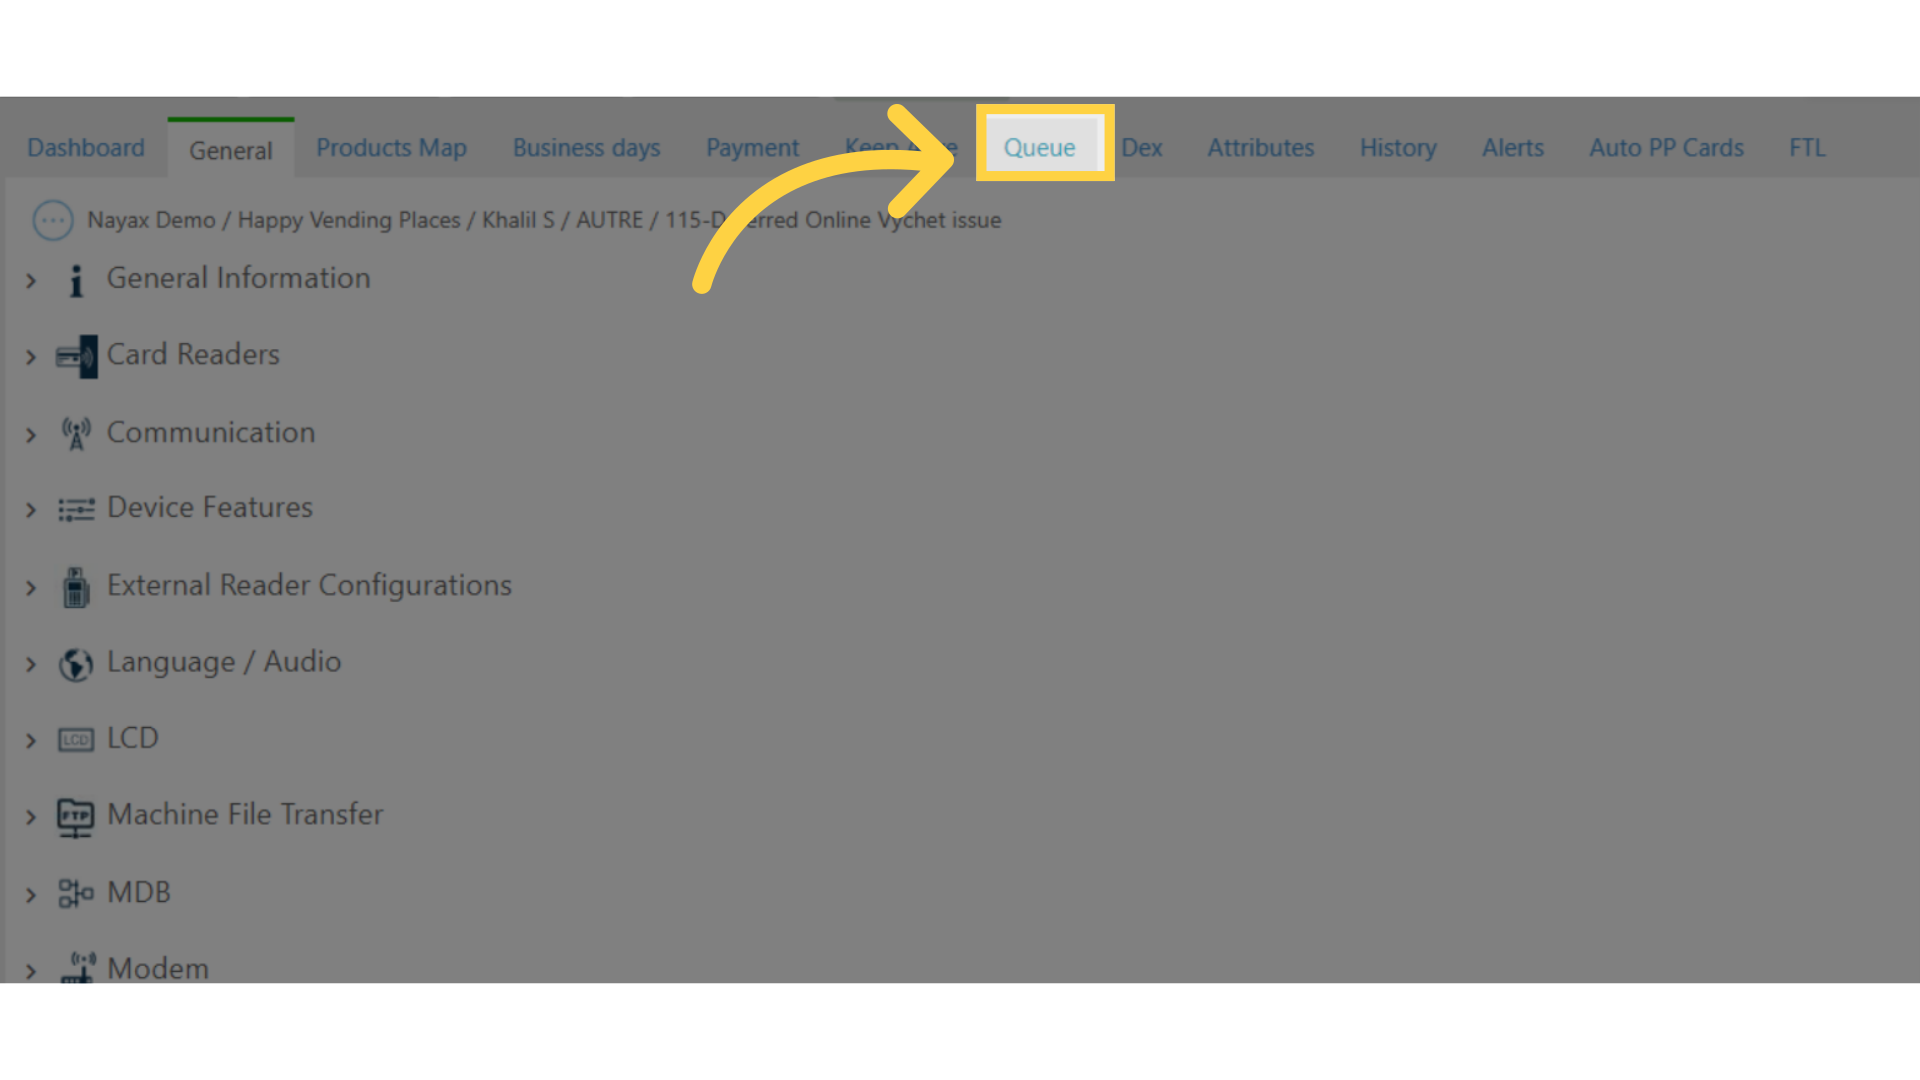
Click Queue Tab
Image Attached
Click the Queue Tab after saving the deferred type under the payment tab to ensure that the deferred was sent to the device.
15
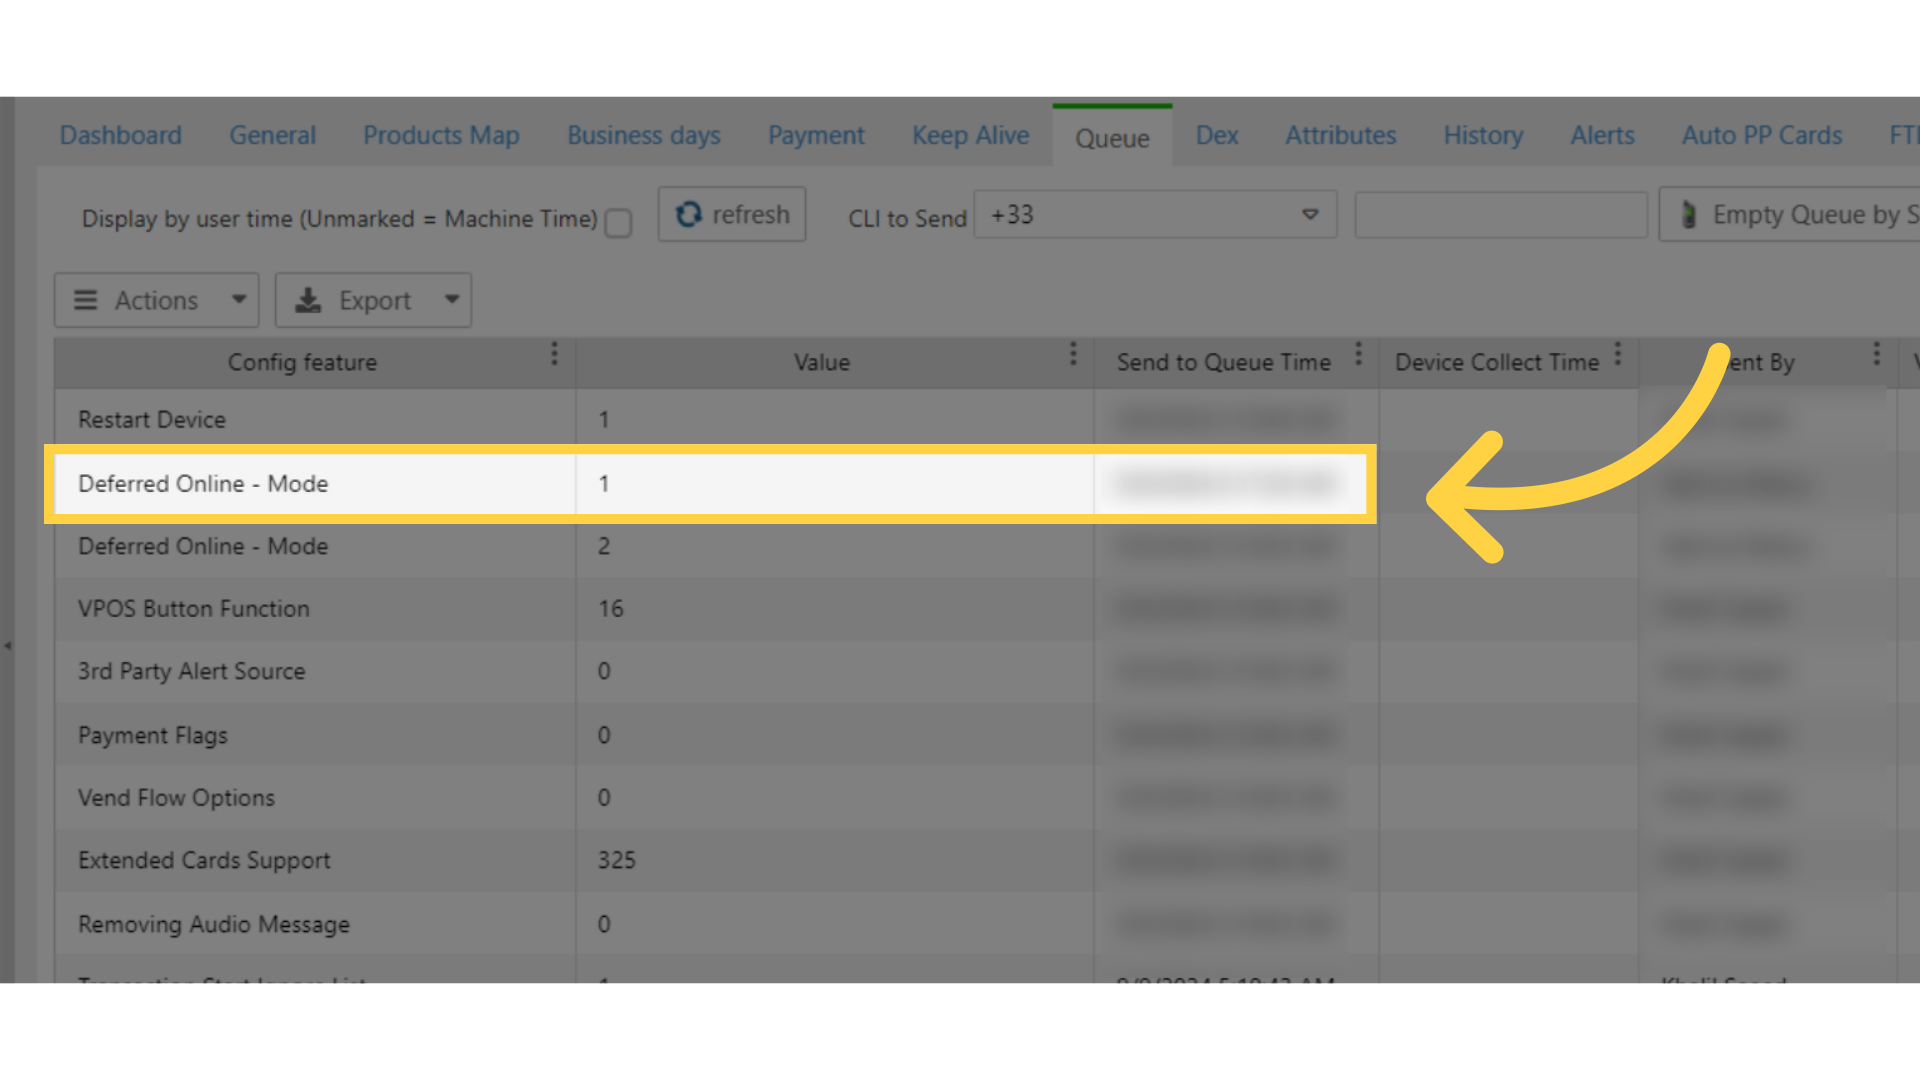
Confirm Action Attributes
Image Attached
You'll see the new attributes submitted to the device. Deferred action confirmed here and was sent to the device.
16
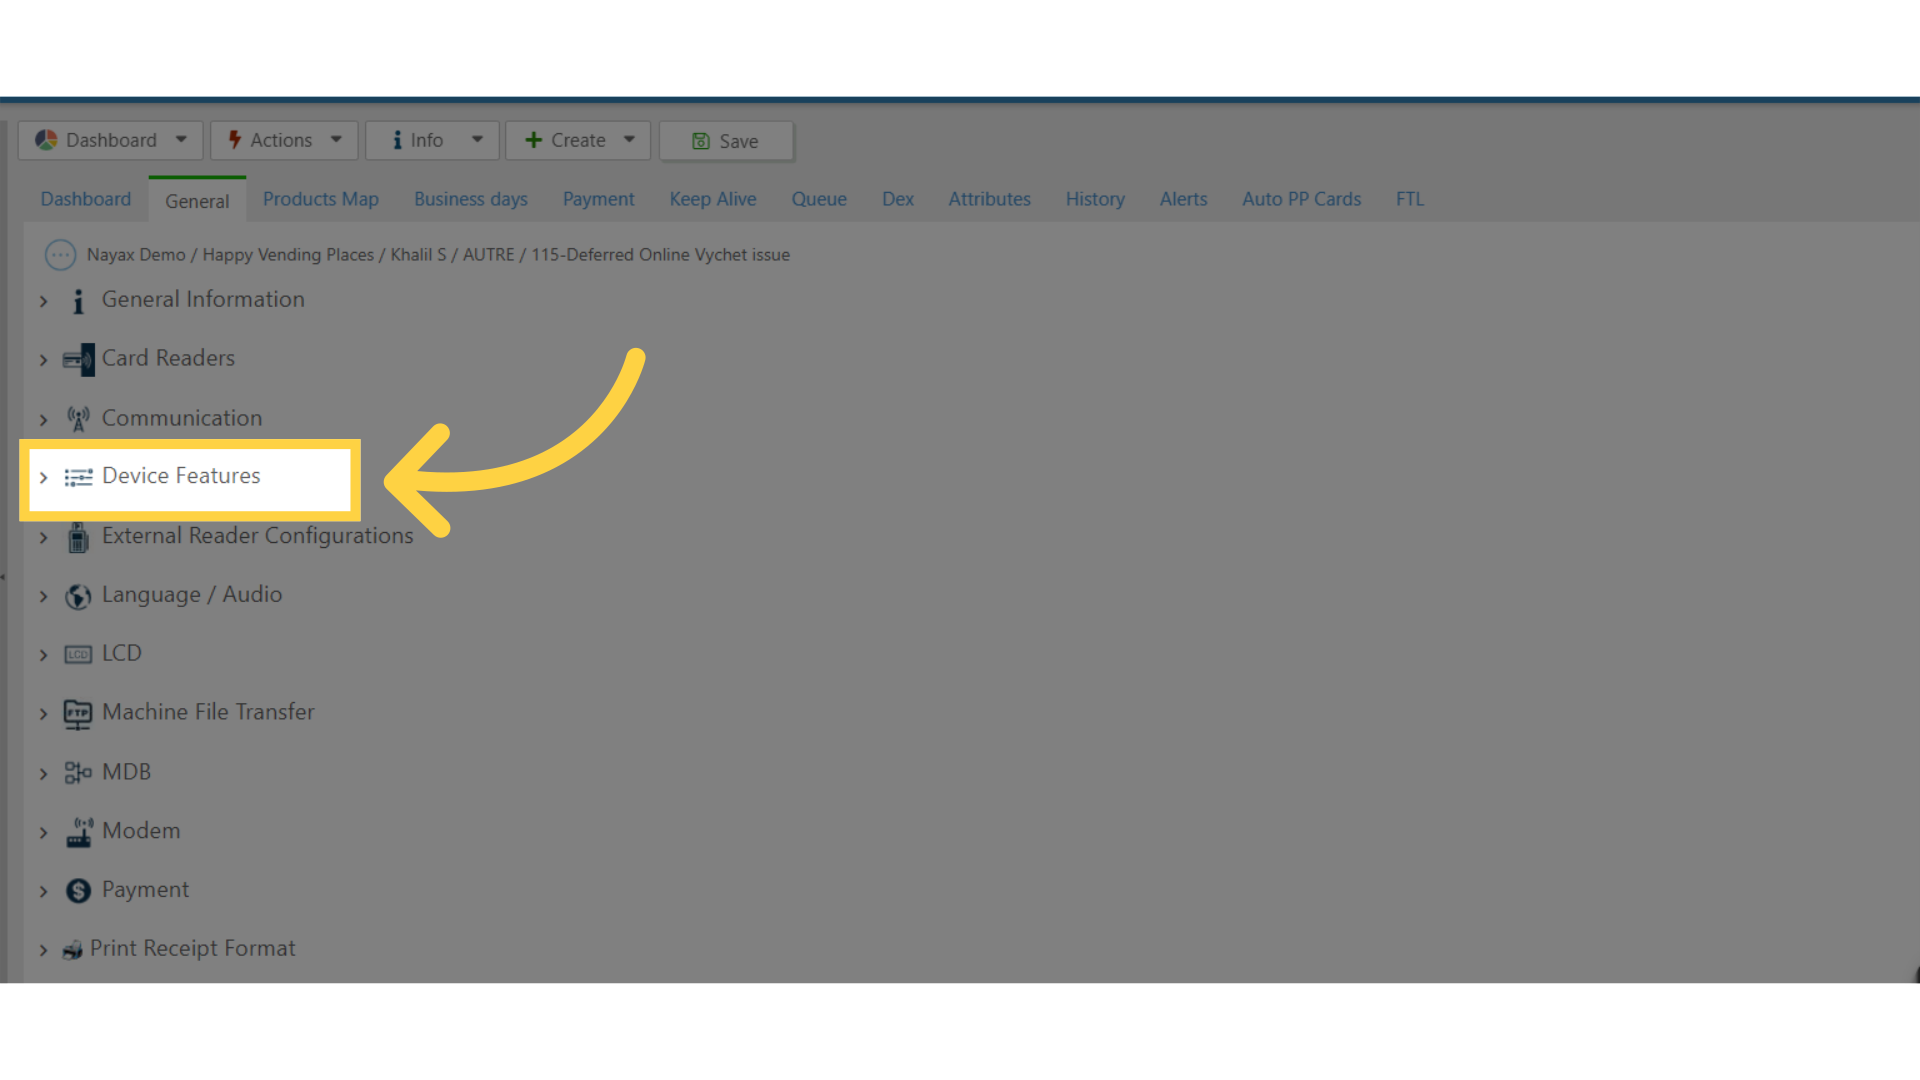
General Tab - Click on Device Features tab
Image Attached
In the main general section scroll and click on the Device Features tab.
17
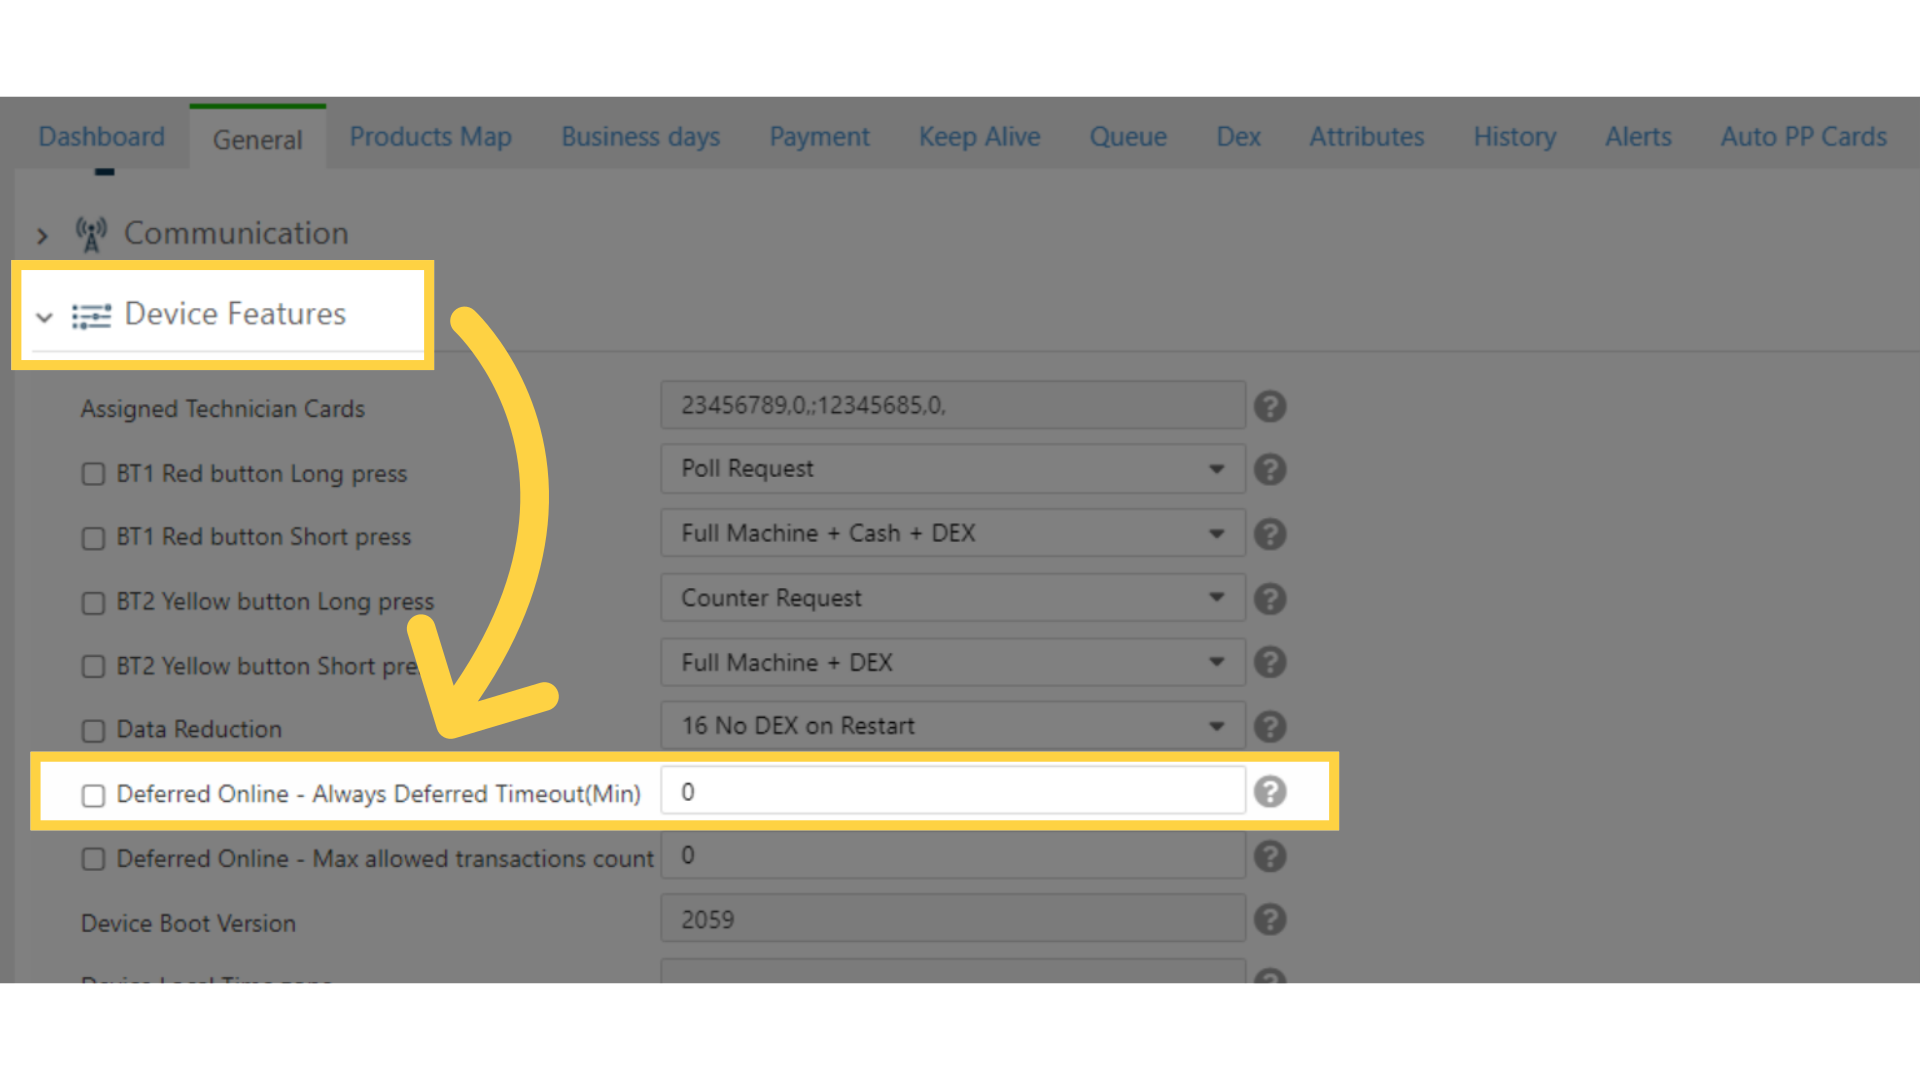
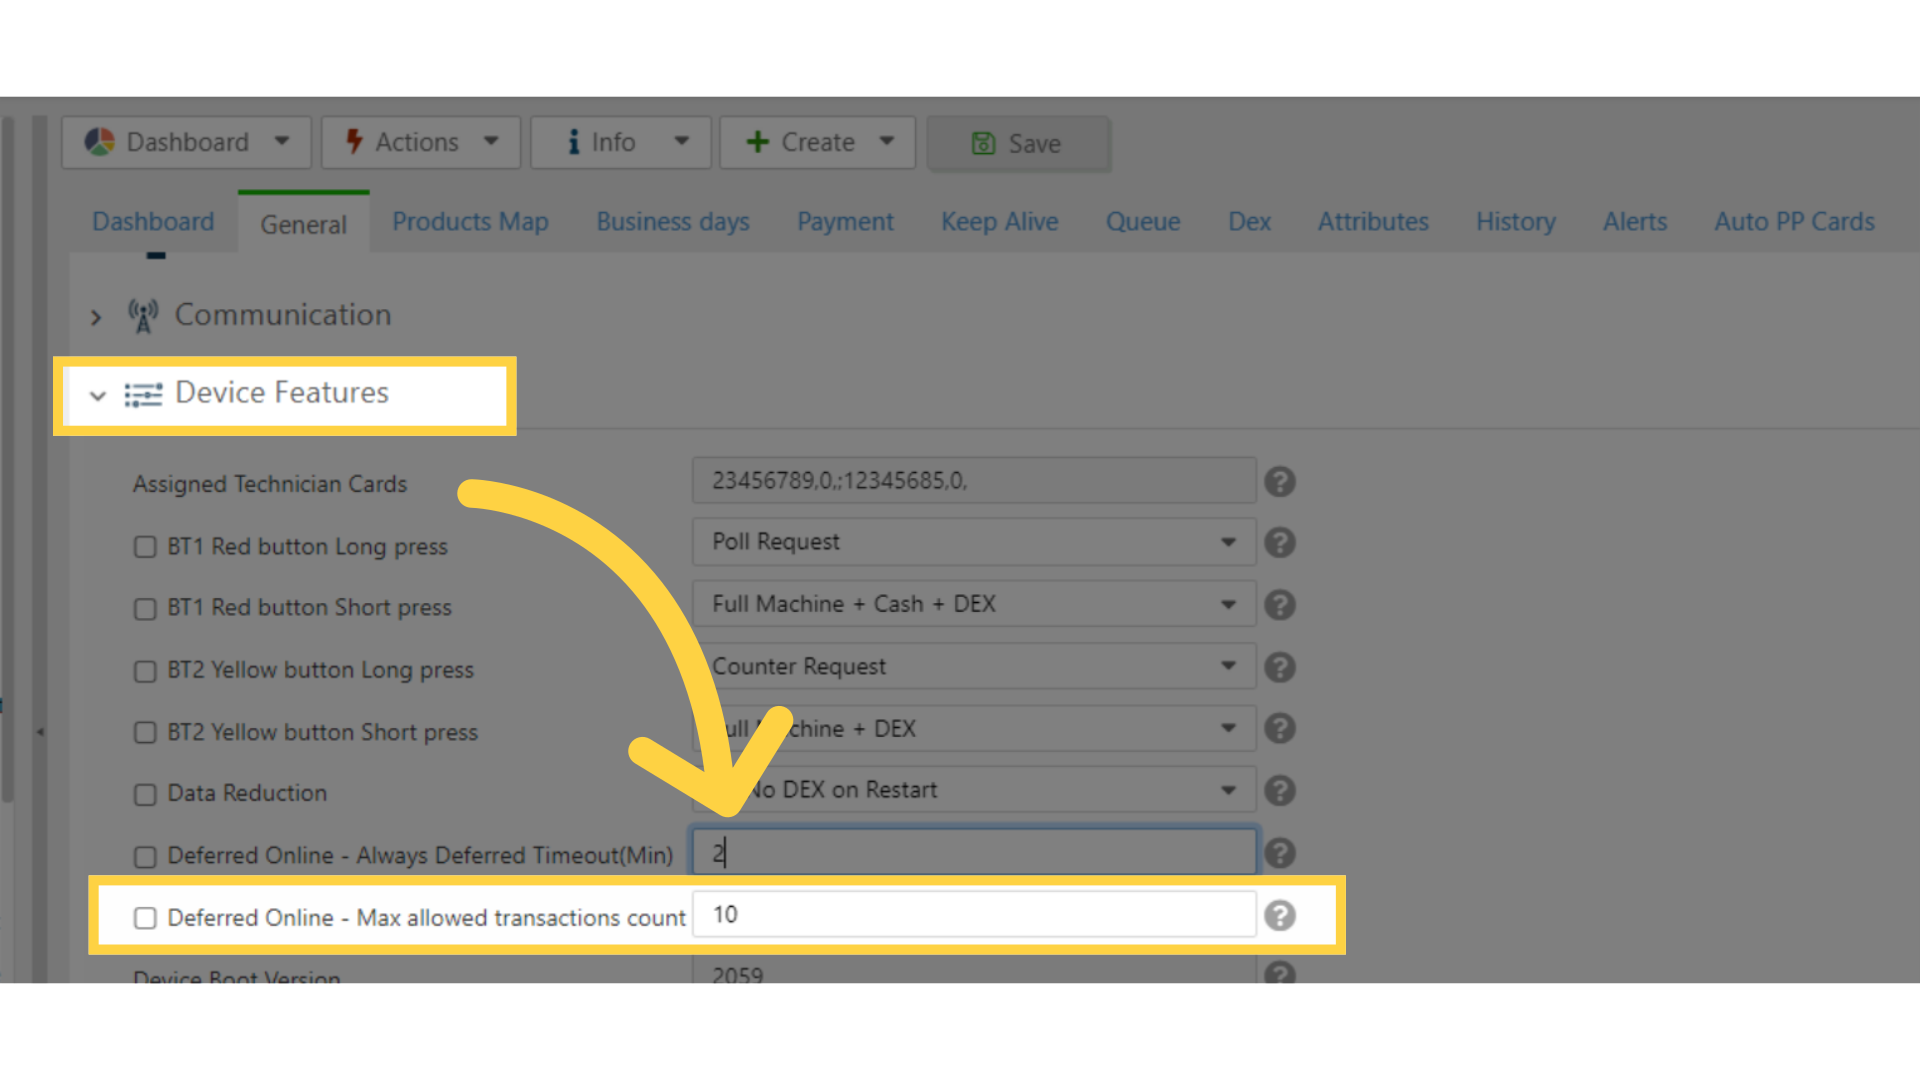
Deferred Timeout - Always Deferred Timeout
Image Attached
Always Deferred Timeout defines how many minutes the device will stay in the deferred online mode after failing to complete the transaction online.
It is relevant only if the machine is set as "Deferred as Backup". When the value is set as 0, the device will always try an online transaction first.
18
Deferred Timeout - Maximum Allowed Transaction
Image Attached
Maximum Allowed Transaction Count is the maximum number of transactions that can be deferred and held in the device at a given time.
In this example it is 10. This means that once 10 transactions are reached, the device will go online and will send the transactions.
19
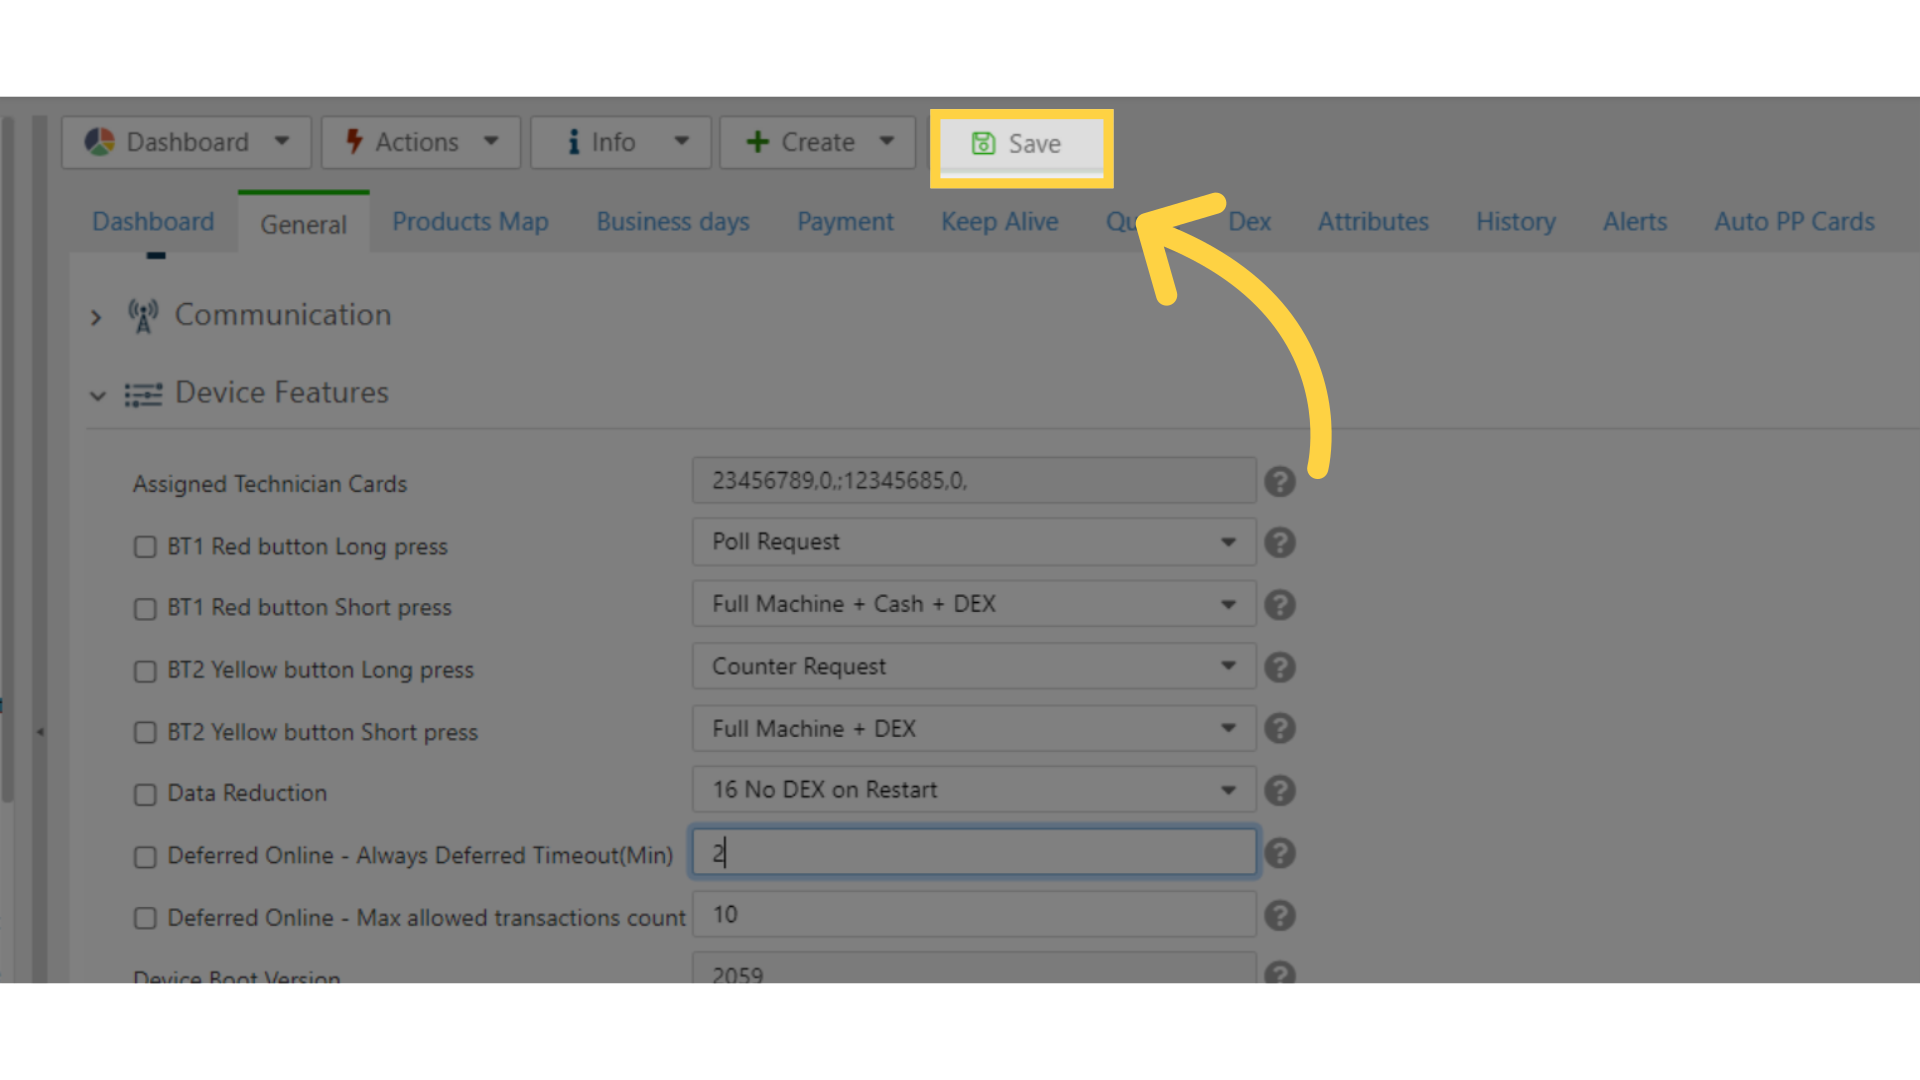
Click Save Button
Image Attached
Click save to save your changes!
20
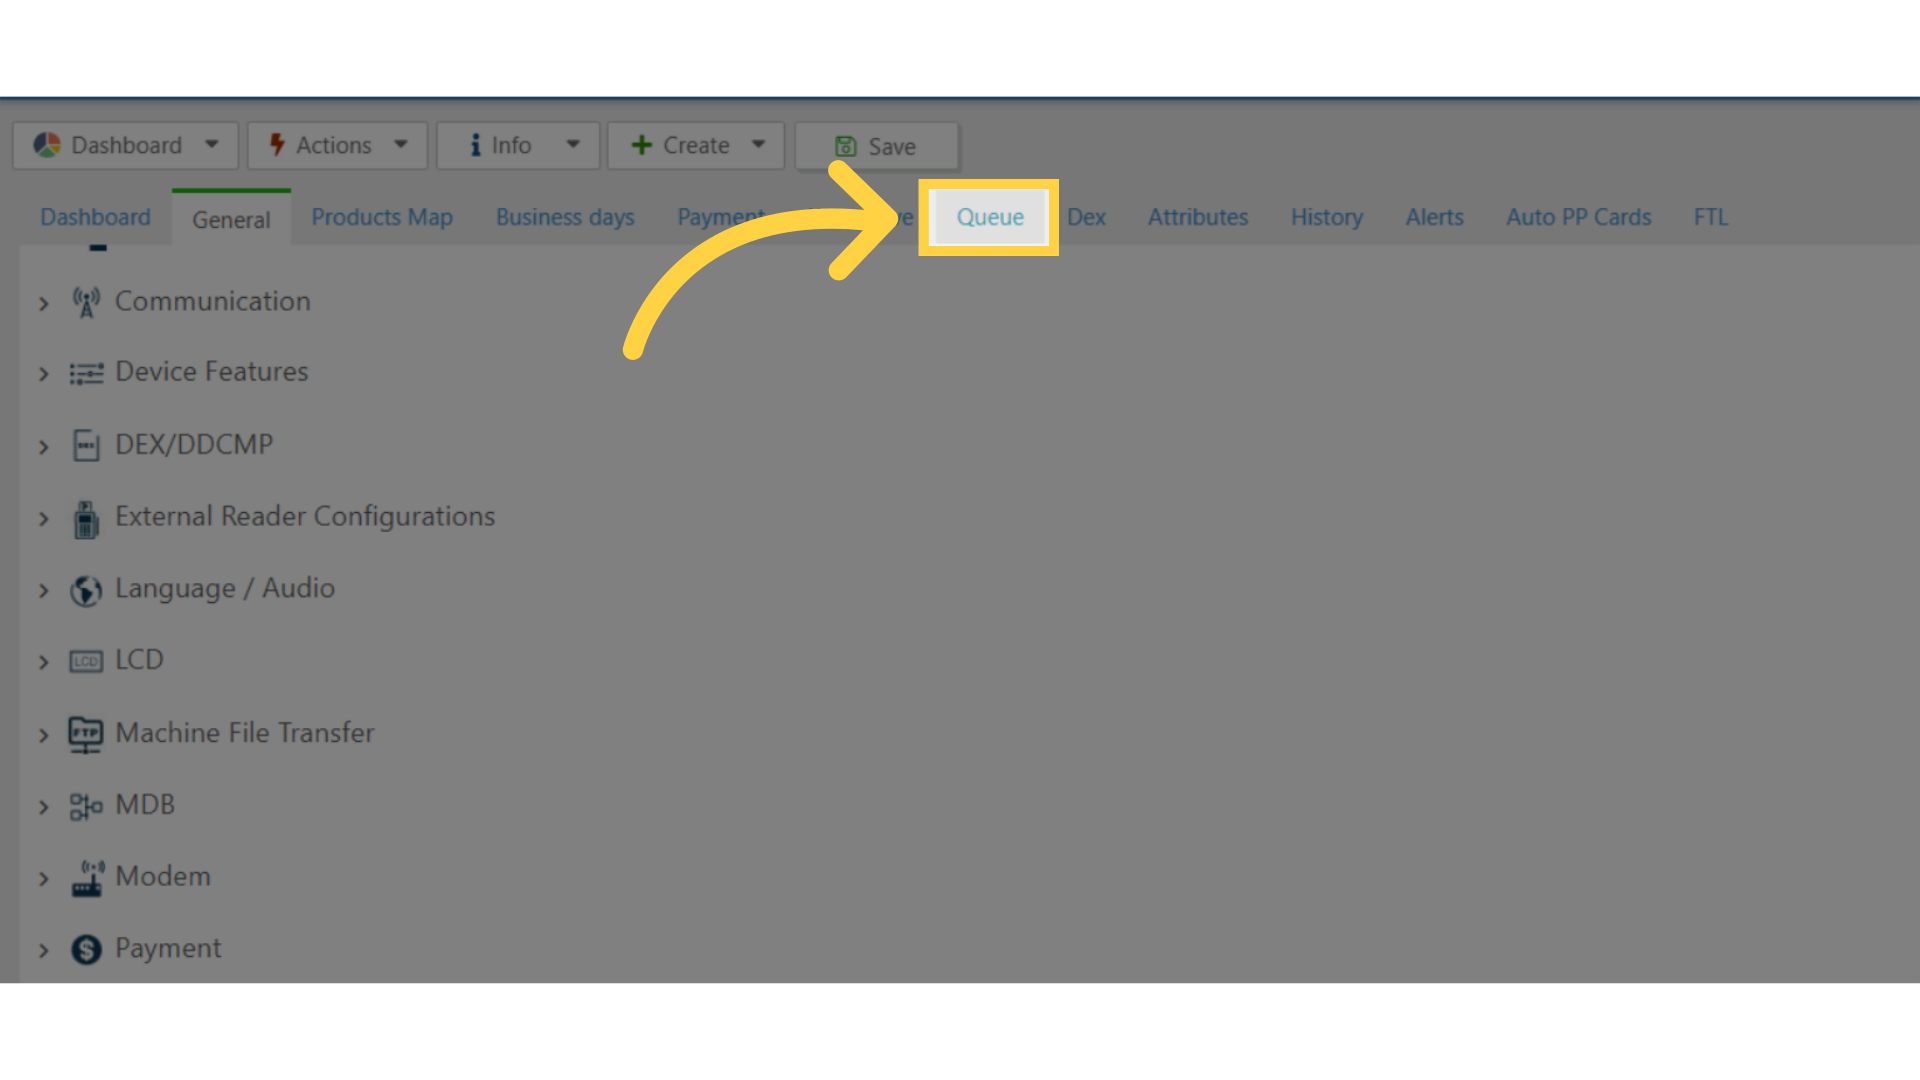
Click Queue Tab
Image Attached
Click Queue Tab.
21
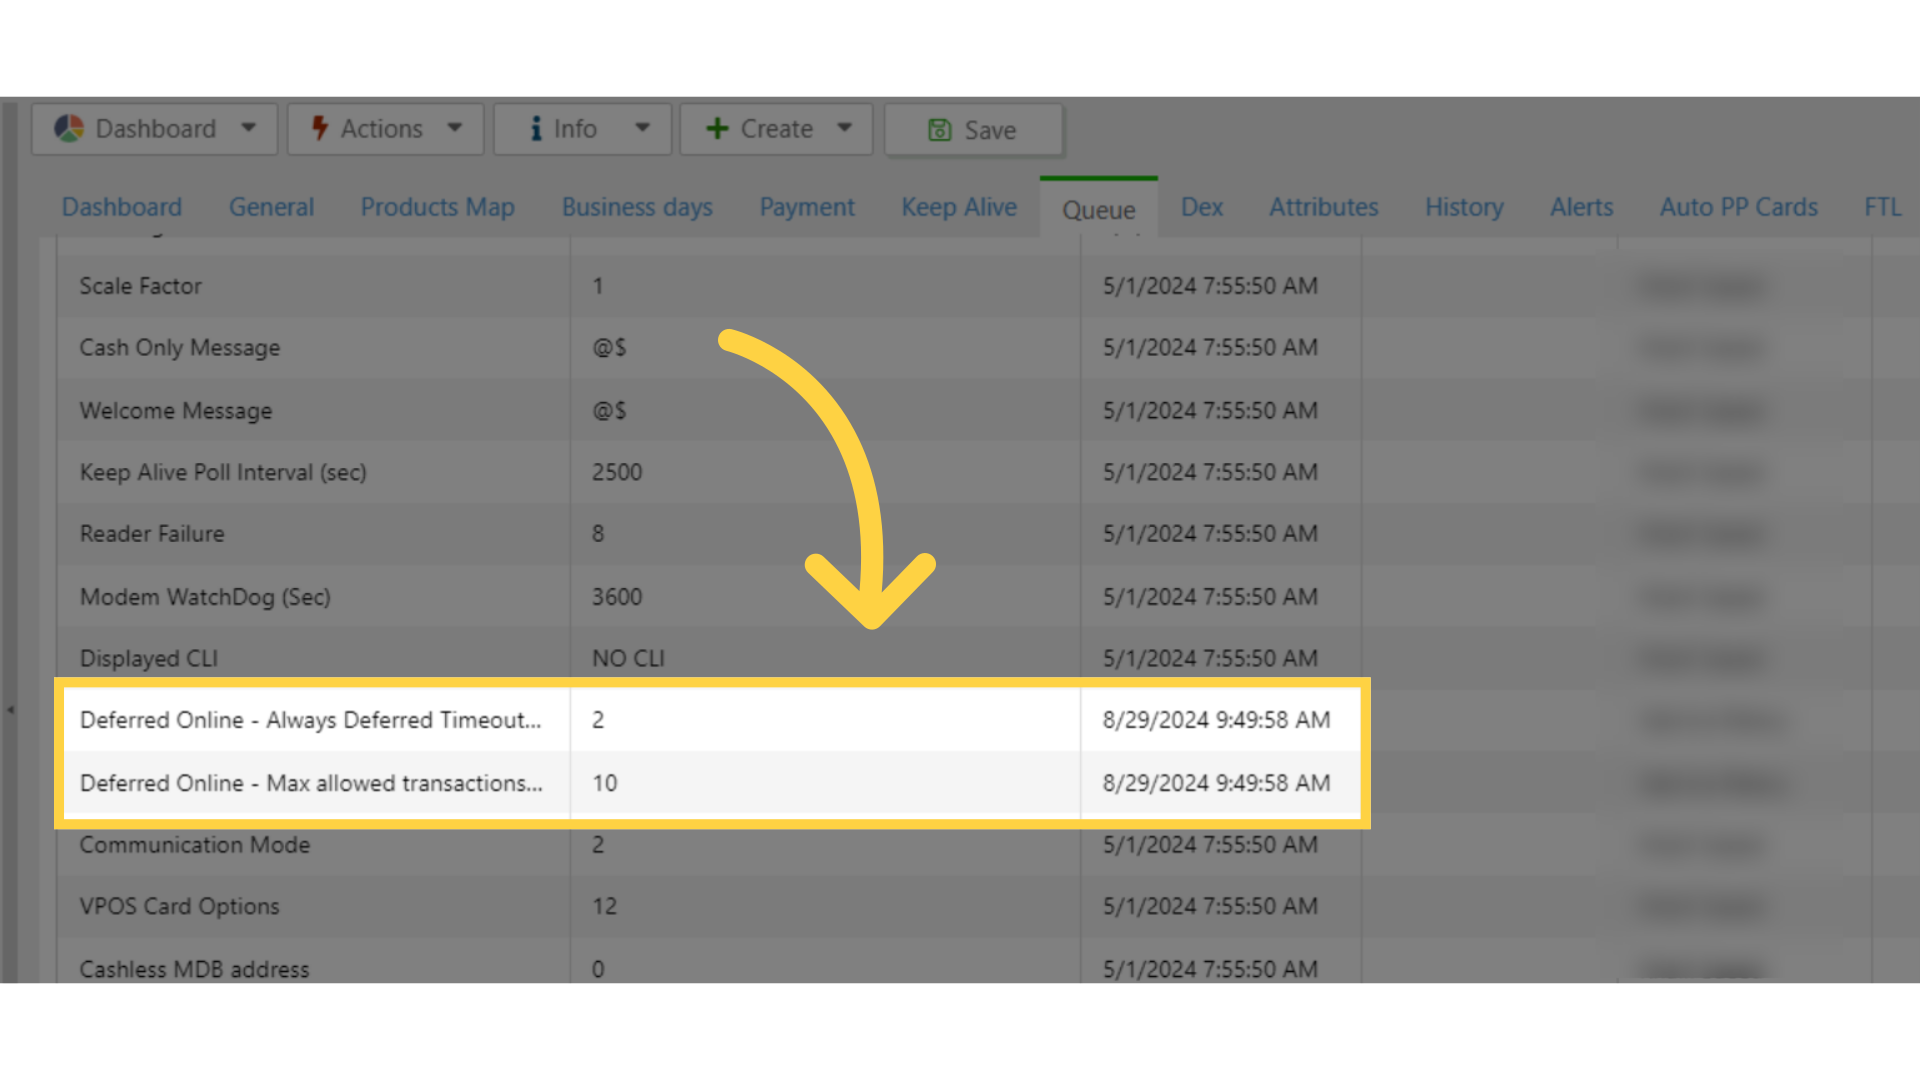
Attributes submitted to the device
Image Attached
You'll see the new attributes submitted to the device.
22
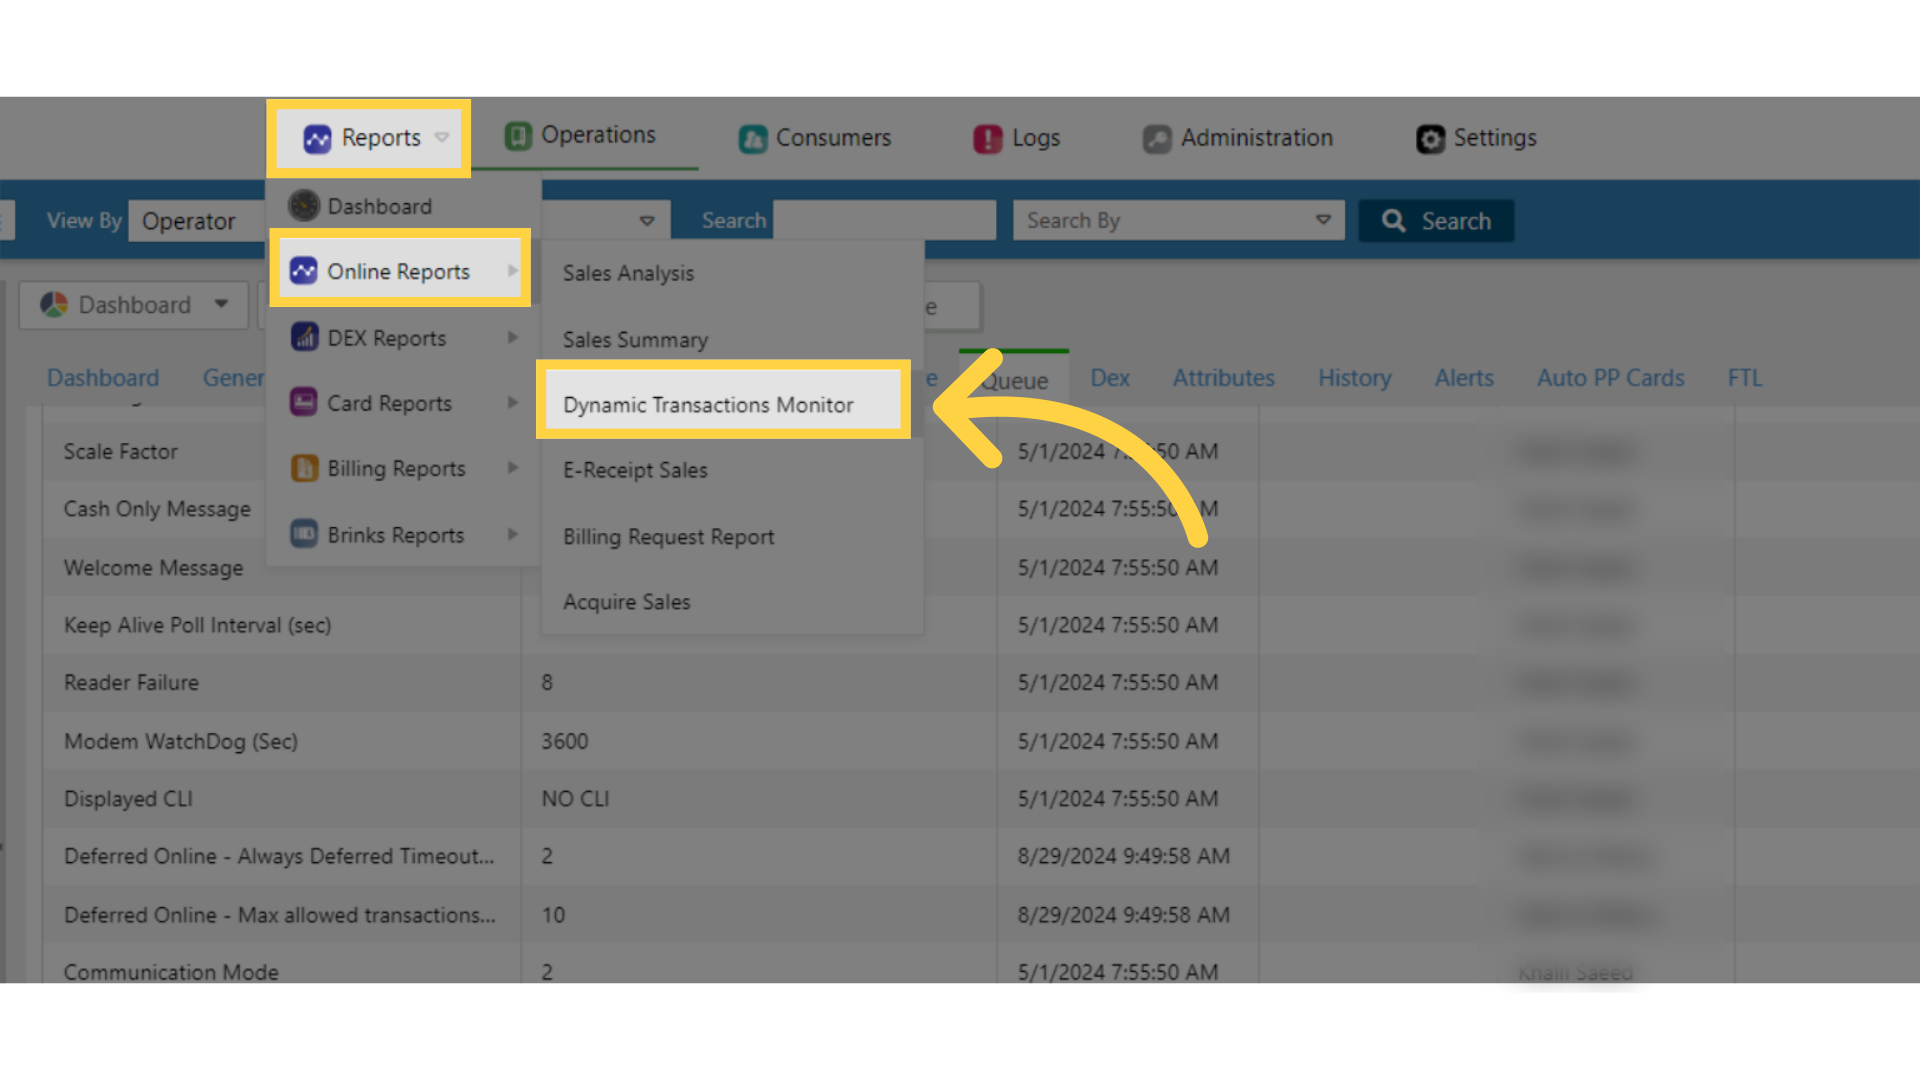
Dynamic Transactions Monitor
Image Attached
In order to properly display deferred payments in the DTM report, click the main Reports tab, then click on Online Reports and then click Dynamic Transactions Monitor as highlighted on the visual.
23
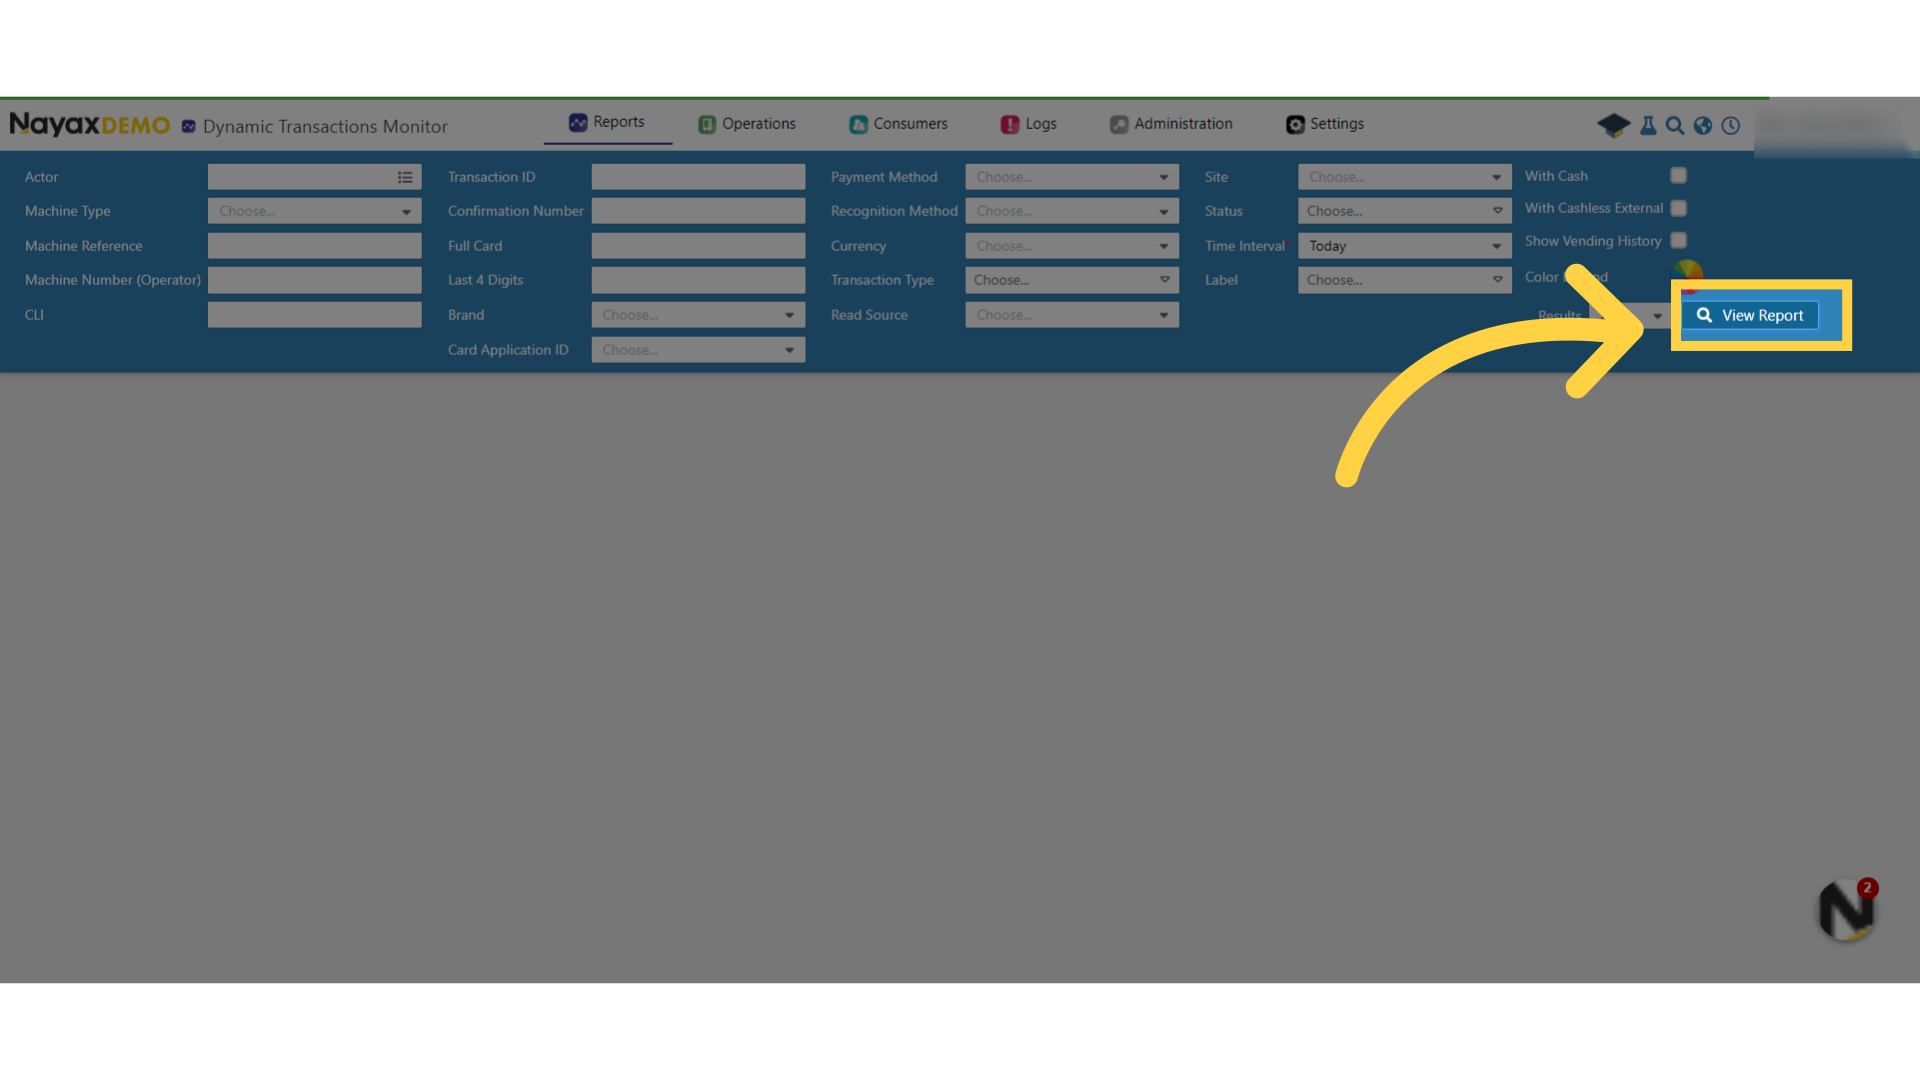
Click View Report
Image Attached
To edit your preset report click on view report button.
24
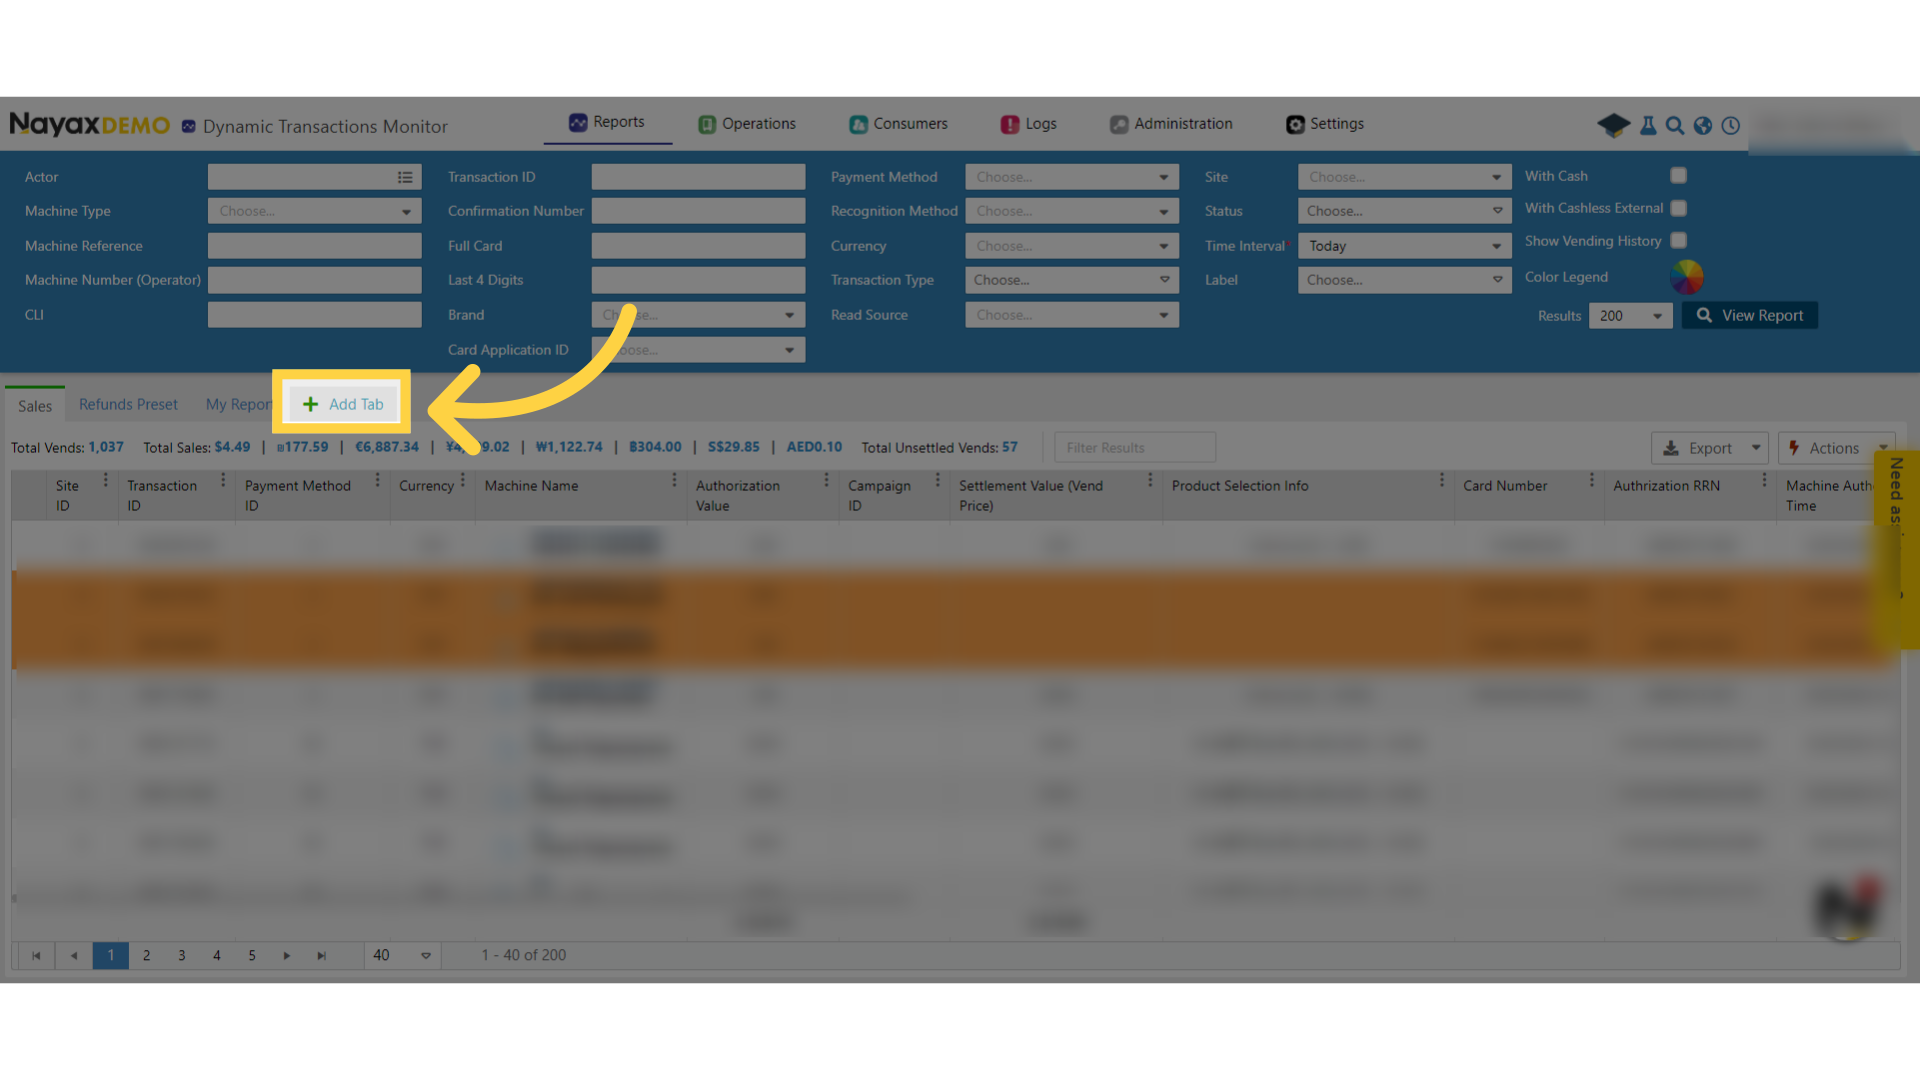
Click Add Tab
Image Attached
Click on add a new tab.
25
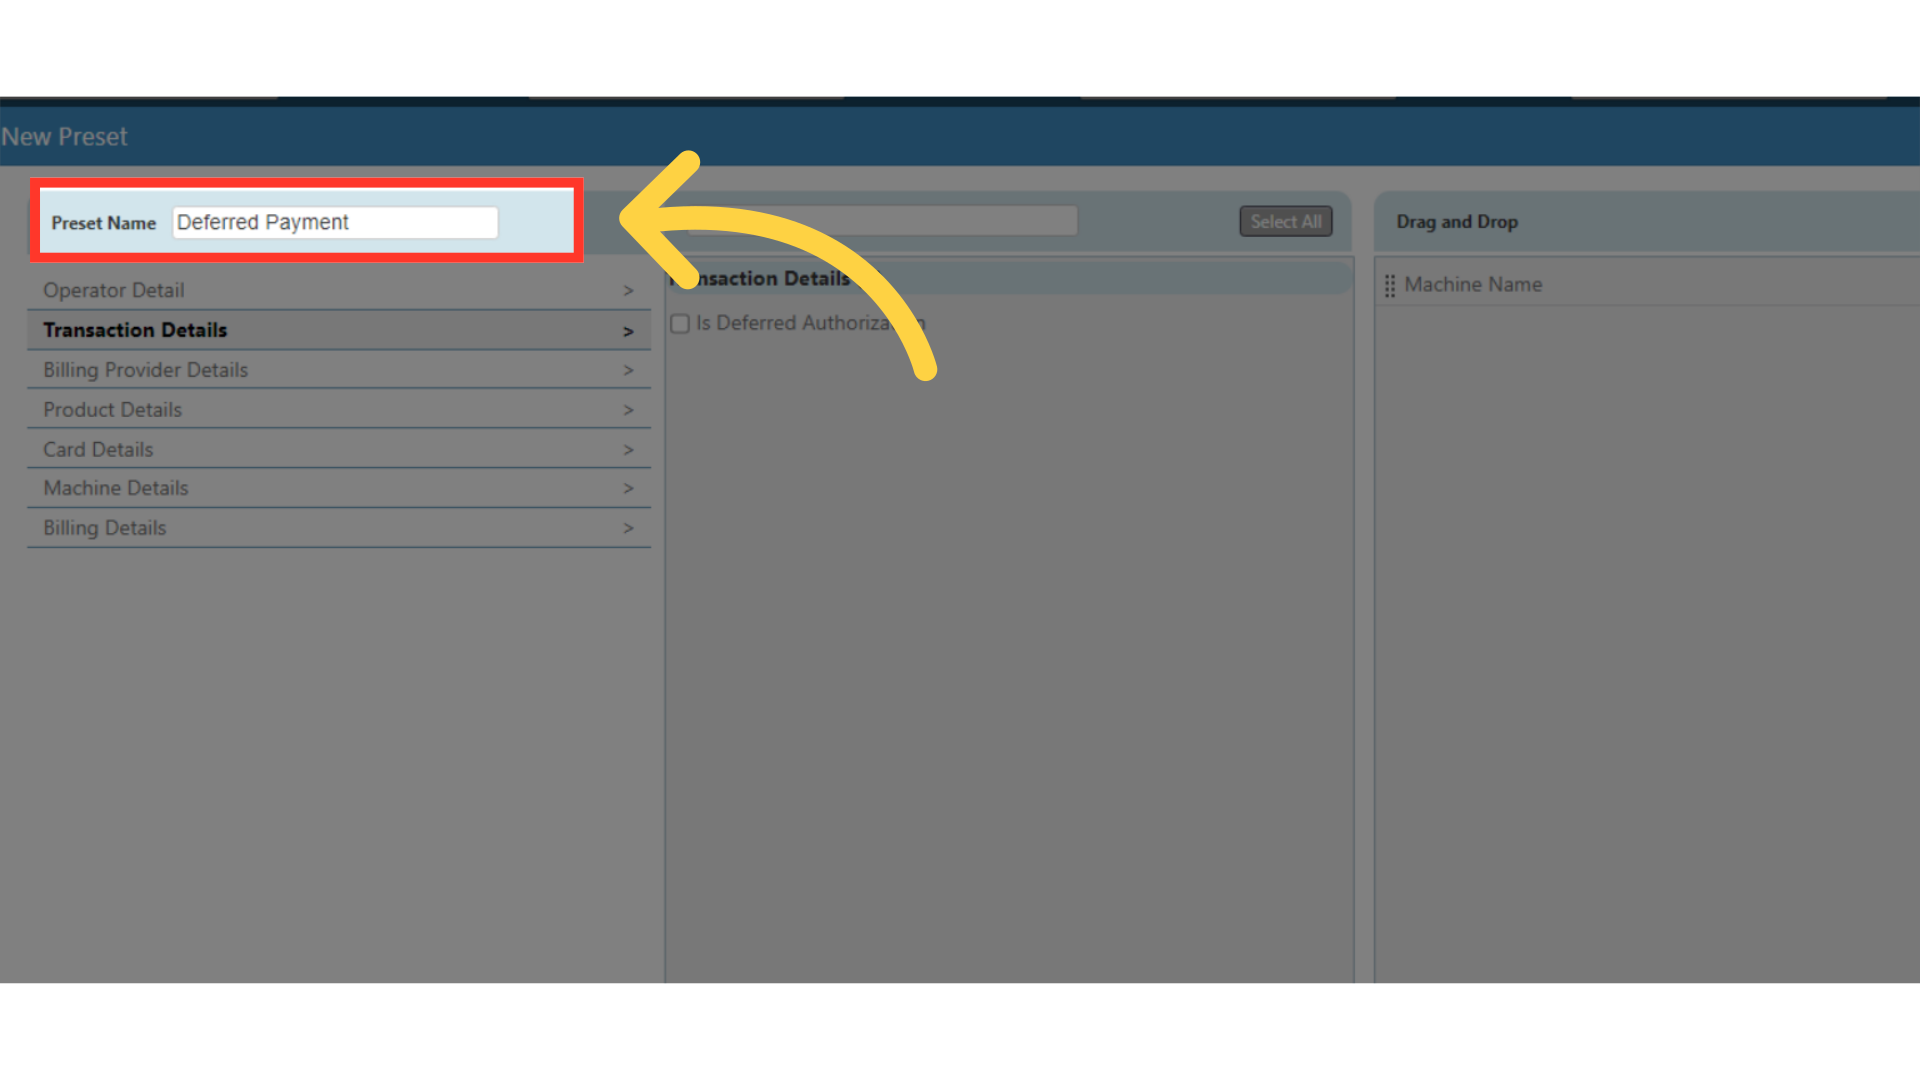
Name Preset
Image Attached
A window will pop up, label the tab in the field as highlighted in RED on the visual.
26
Type Attribute in Search Field
Image Attached
Type in the search bar to locate the attribute as highlighted in RED on the visual.

27
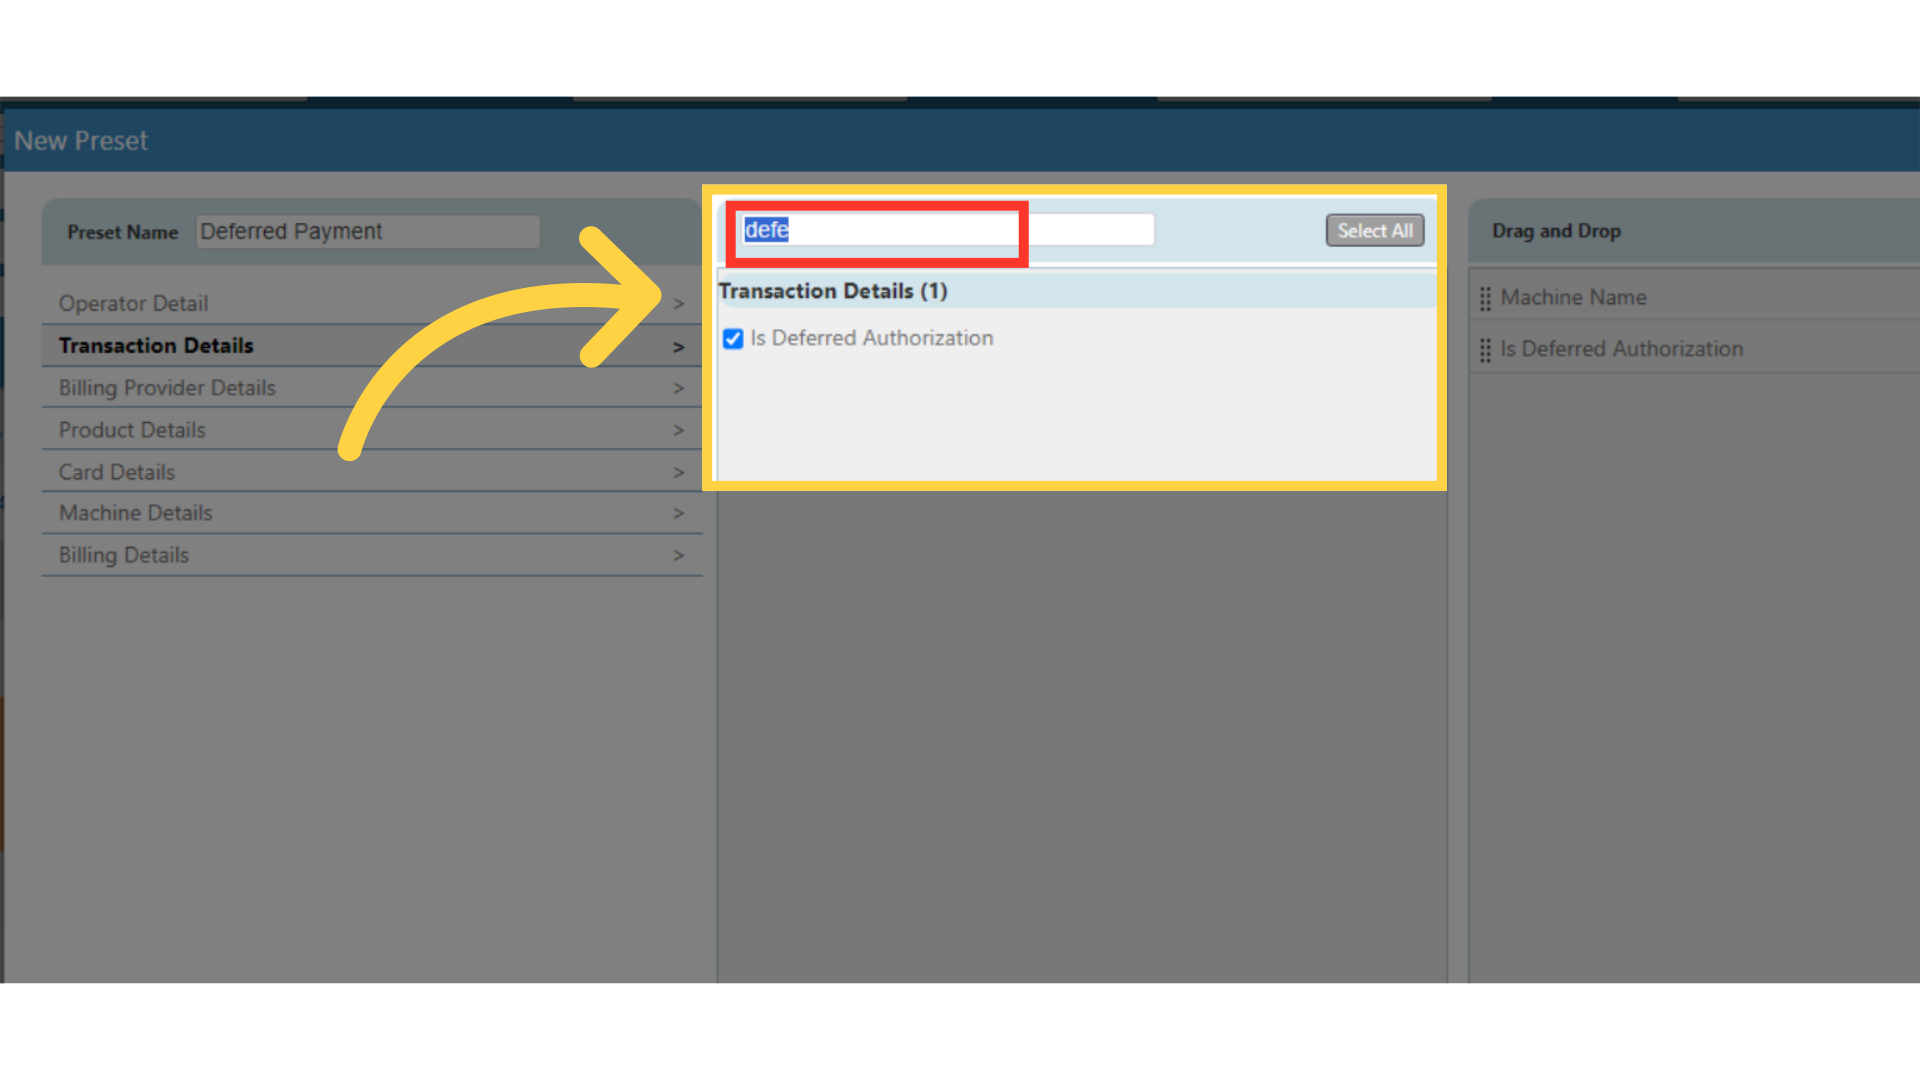
Type Attribute
Image Attached
Type in the search bar to locate the attribute as highlighted in RED on the visual, then check box the preset.
28
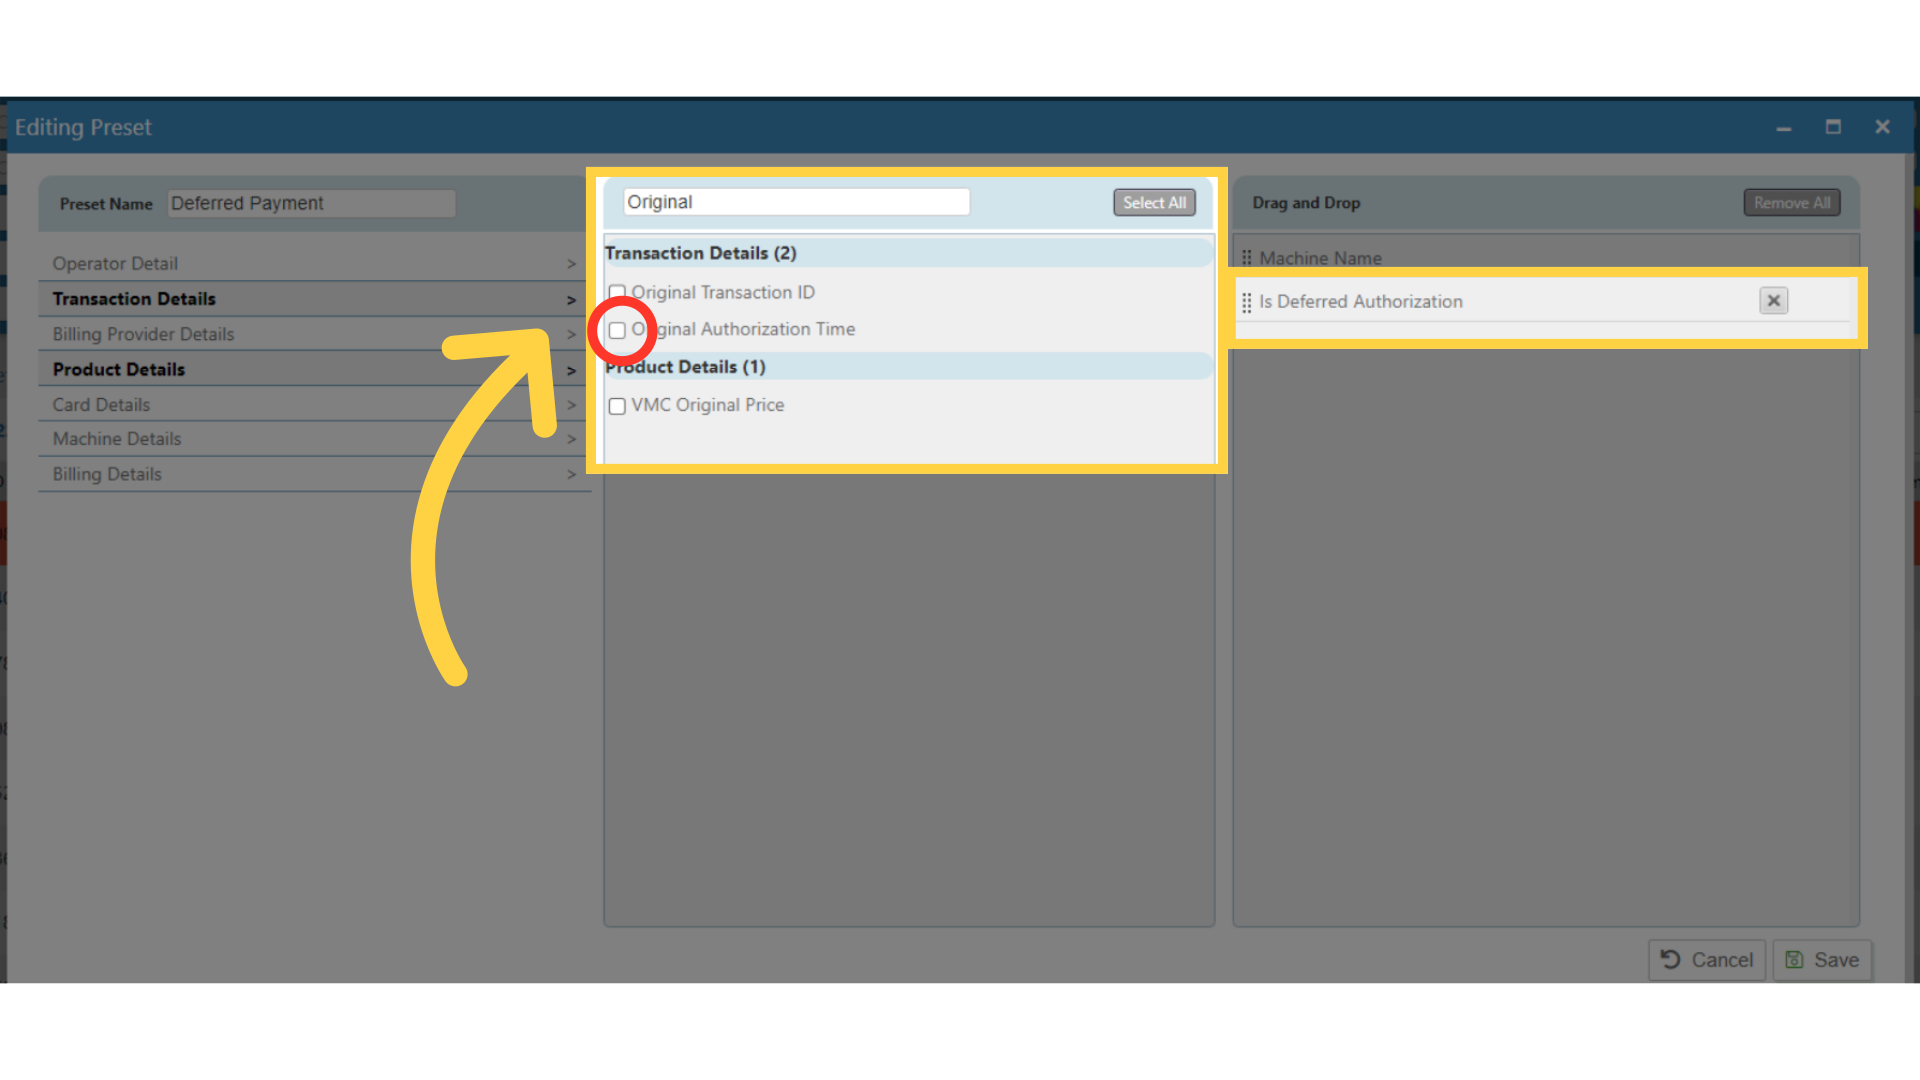
Check Box the Preset
Image Attached
For this example checkbox Deferred Automation and Original Authorization Time then check box the preset as highlighted in RED on the visual.
29
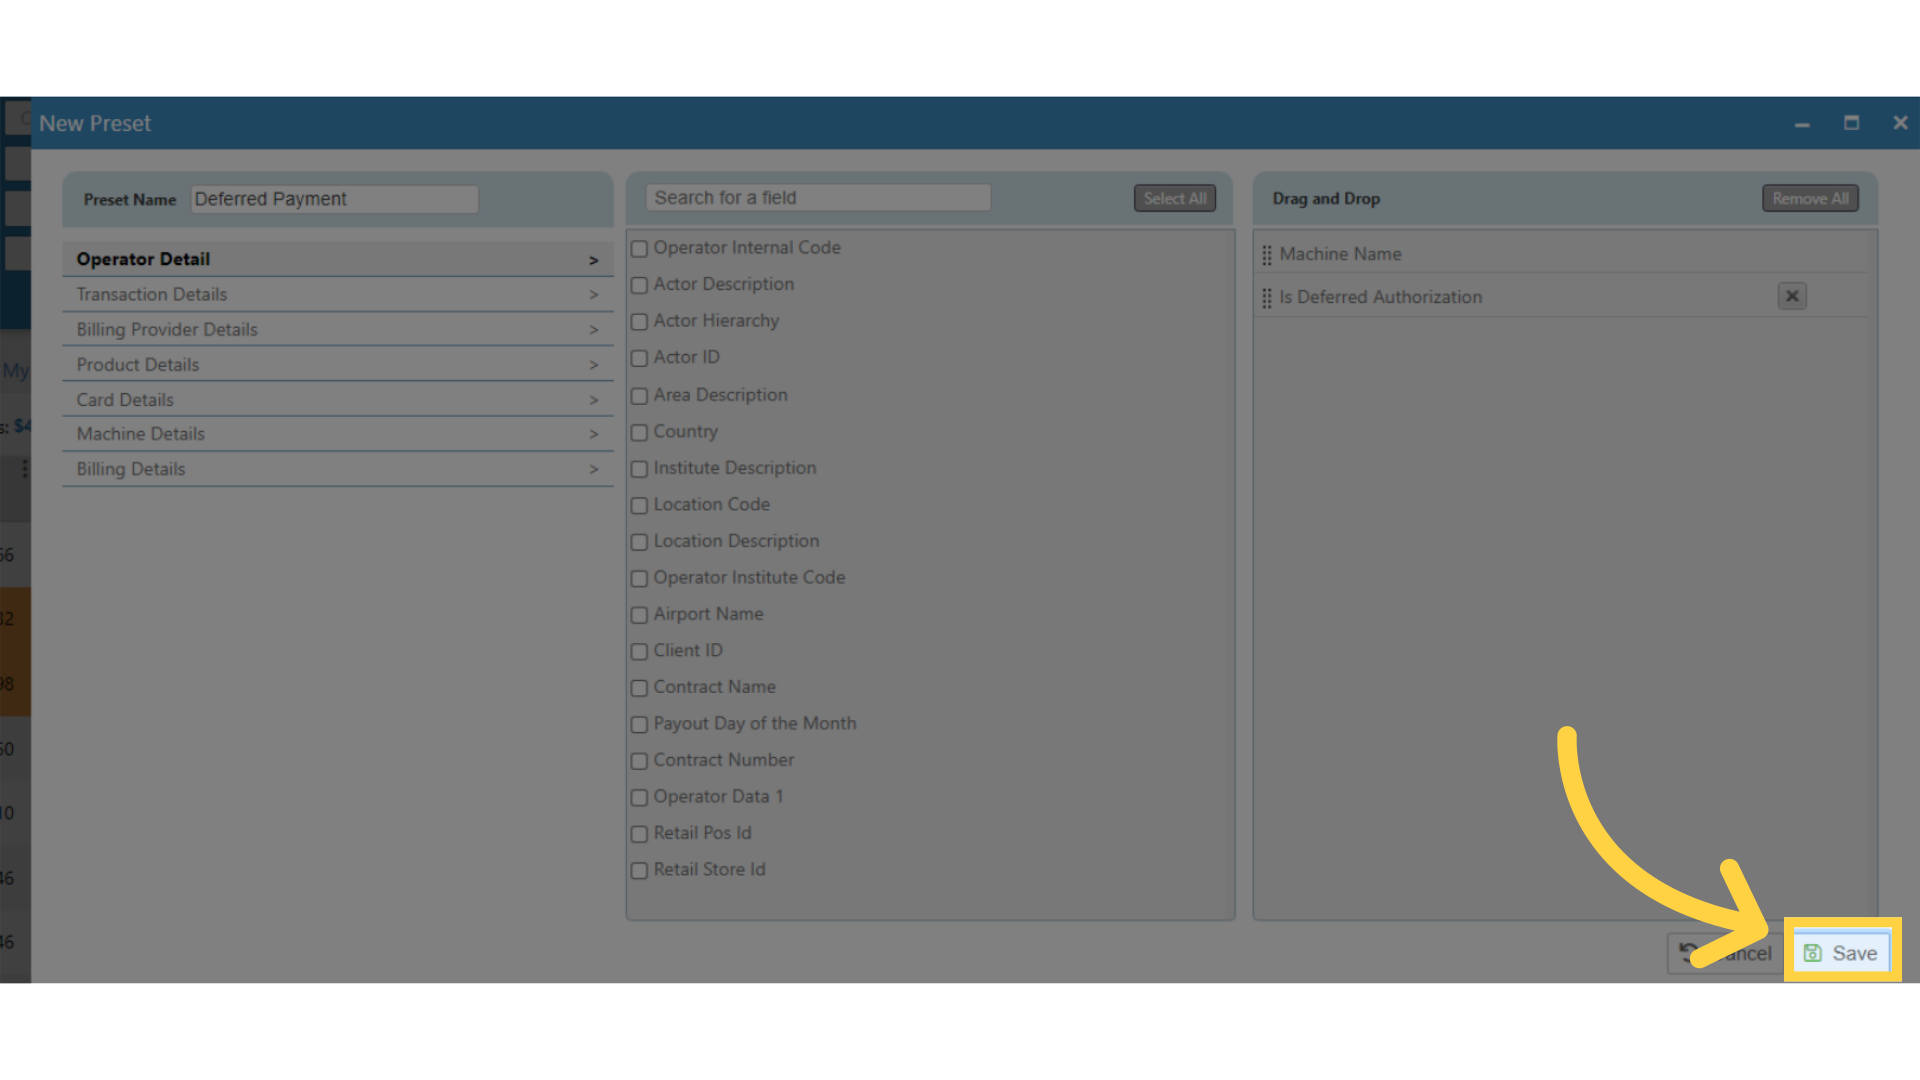
Click save
Image Attached
Click on save to save your changes.
We hope this guide was able to walk you through the process, we ask you to please help us help you by leaving feedback!
Thank you!
Did you find this article helpful?