Change Default Code for Technician Mode | Machine Level
1
Video Guide
2
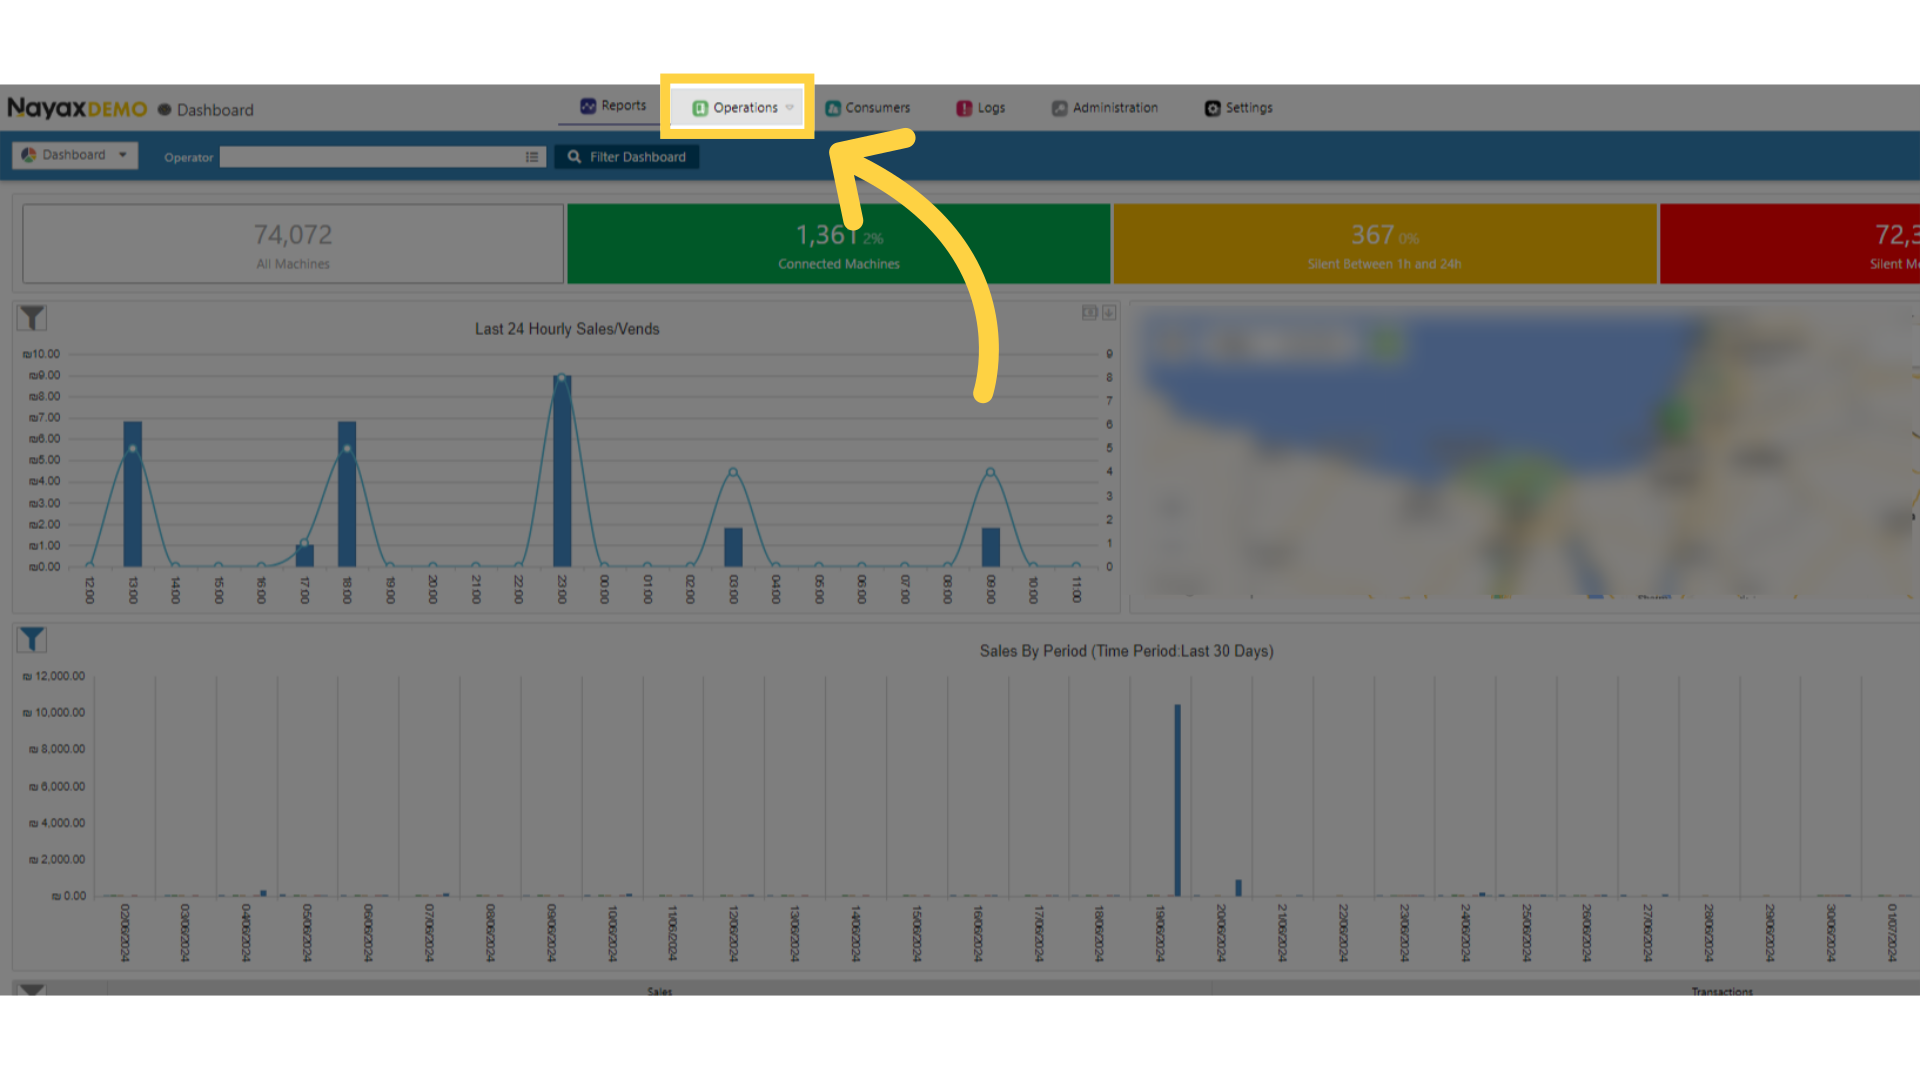
On the dashboard of your Nayax Core management suite click on the Operations tab
Image Attached
On the dashboard of your Nayax Core management suite click on the Operations tab.
3
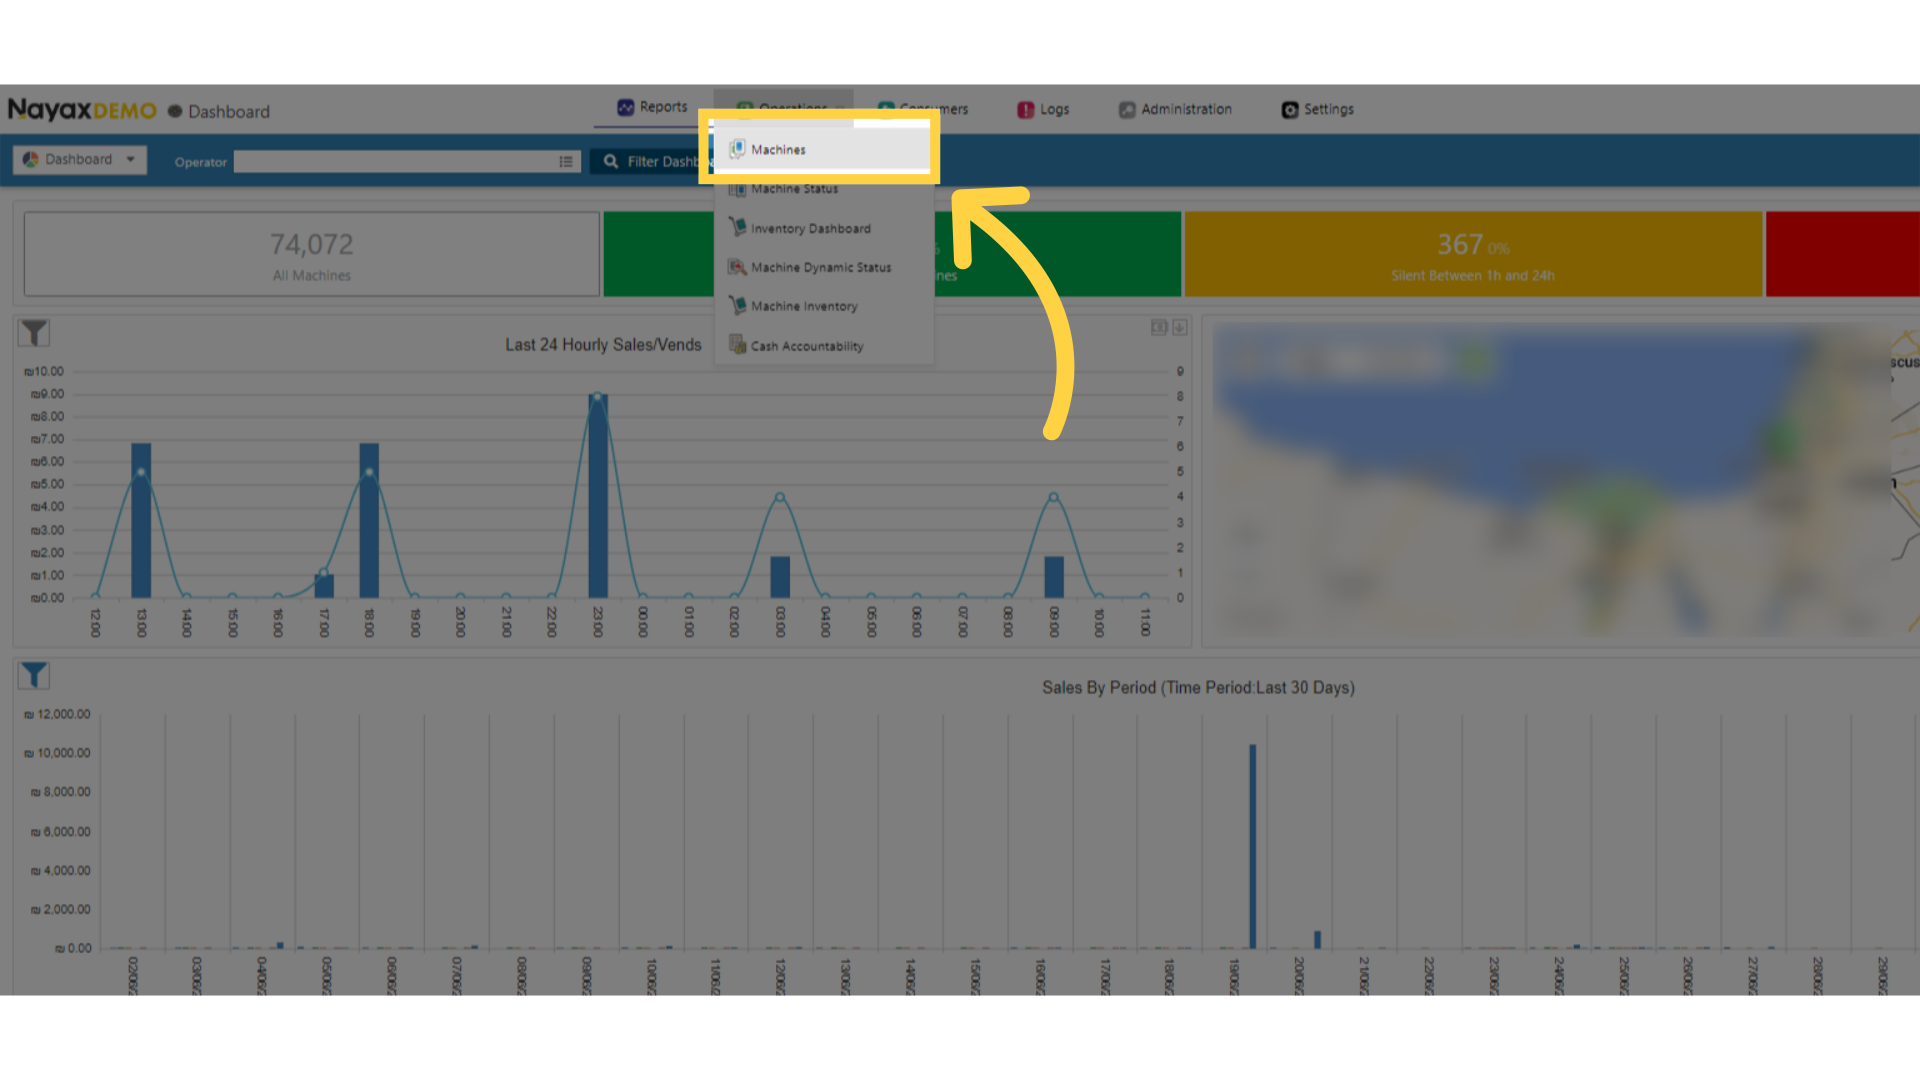
Select the Machines Tab from the Drop Down Menu
Image Attached
Click Machines tab
4
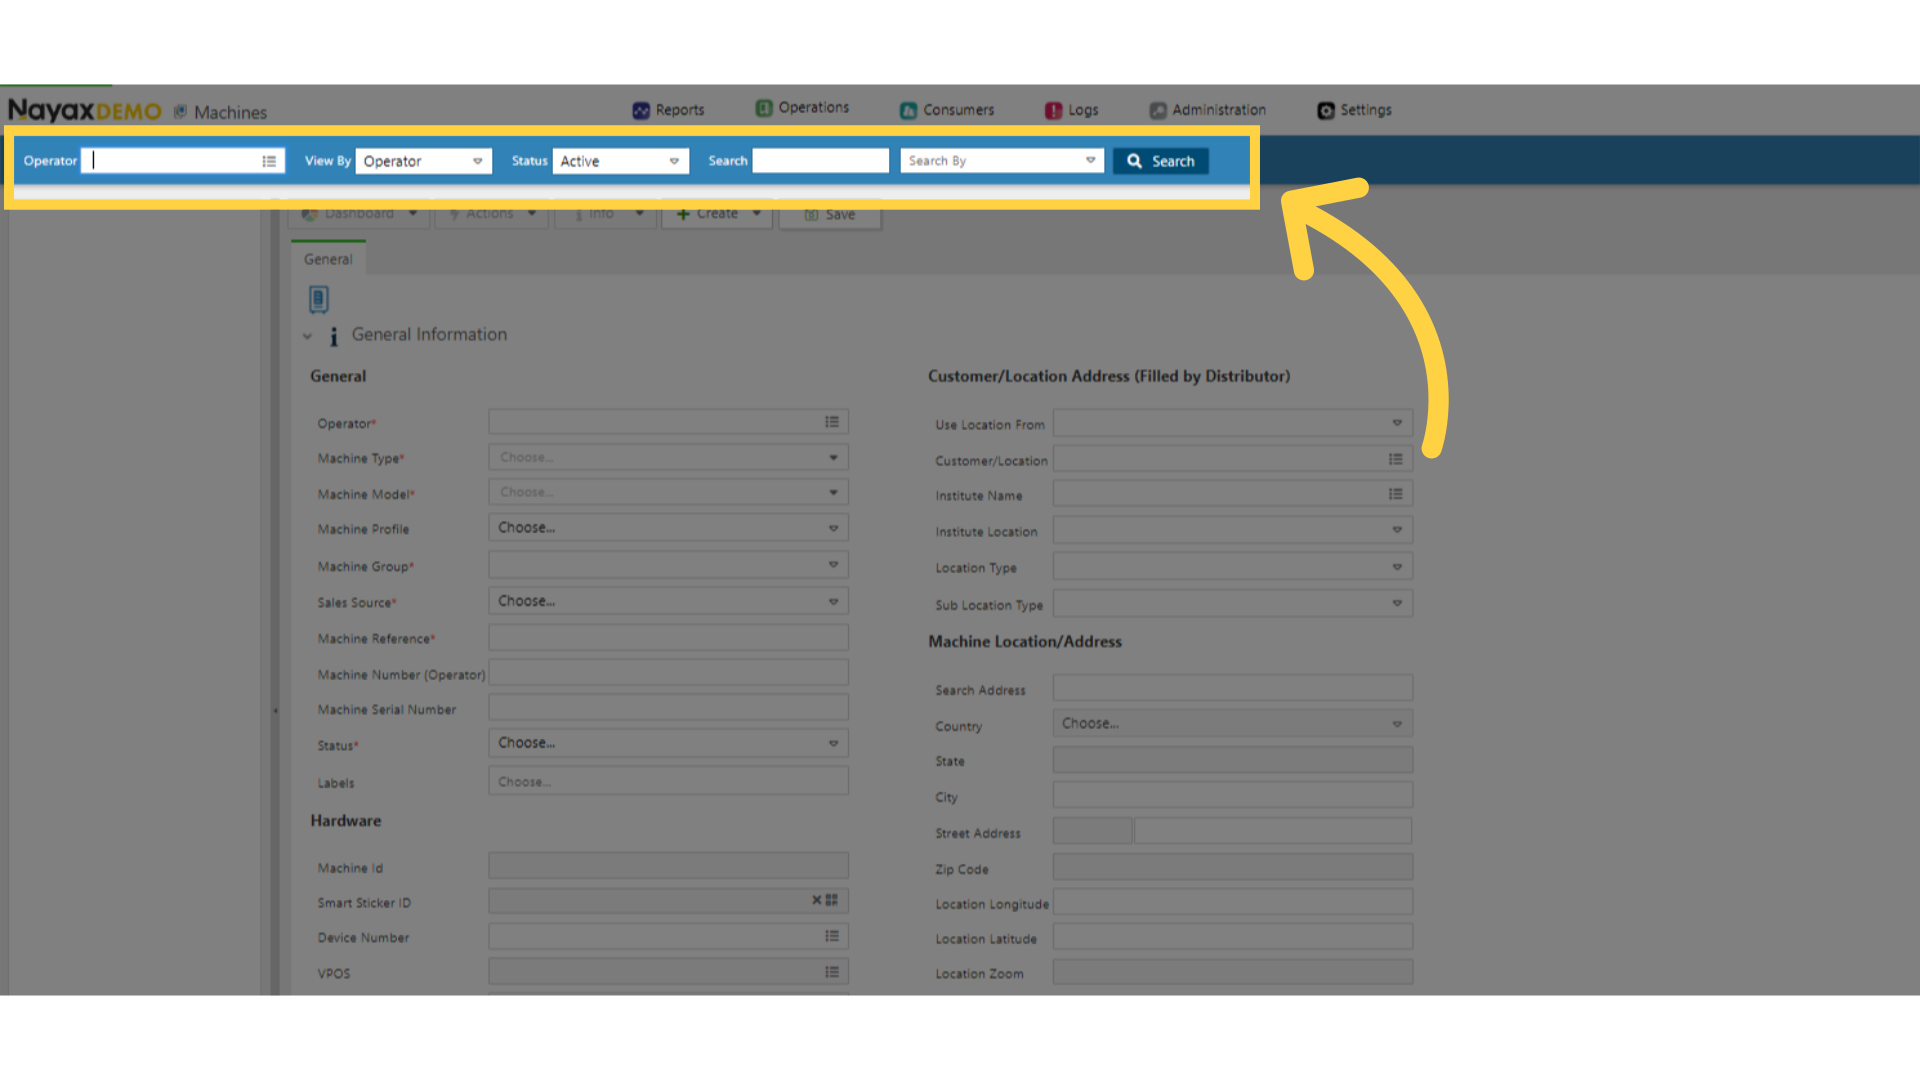
Fill in the Search Fields
Image Attached
Type in the field your operators name or Machine ID in the search field.
5
Click Search
Image AttachedClick search.
6
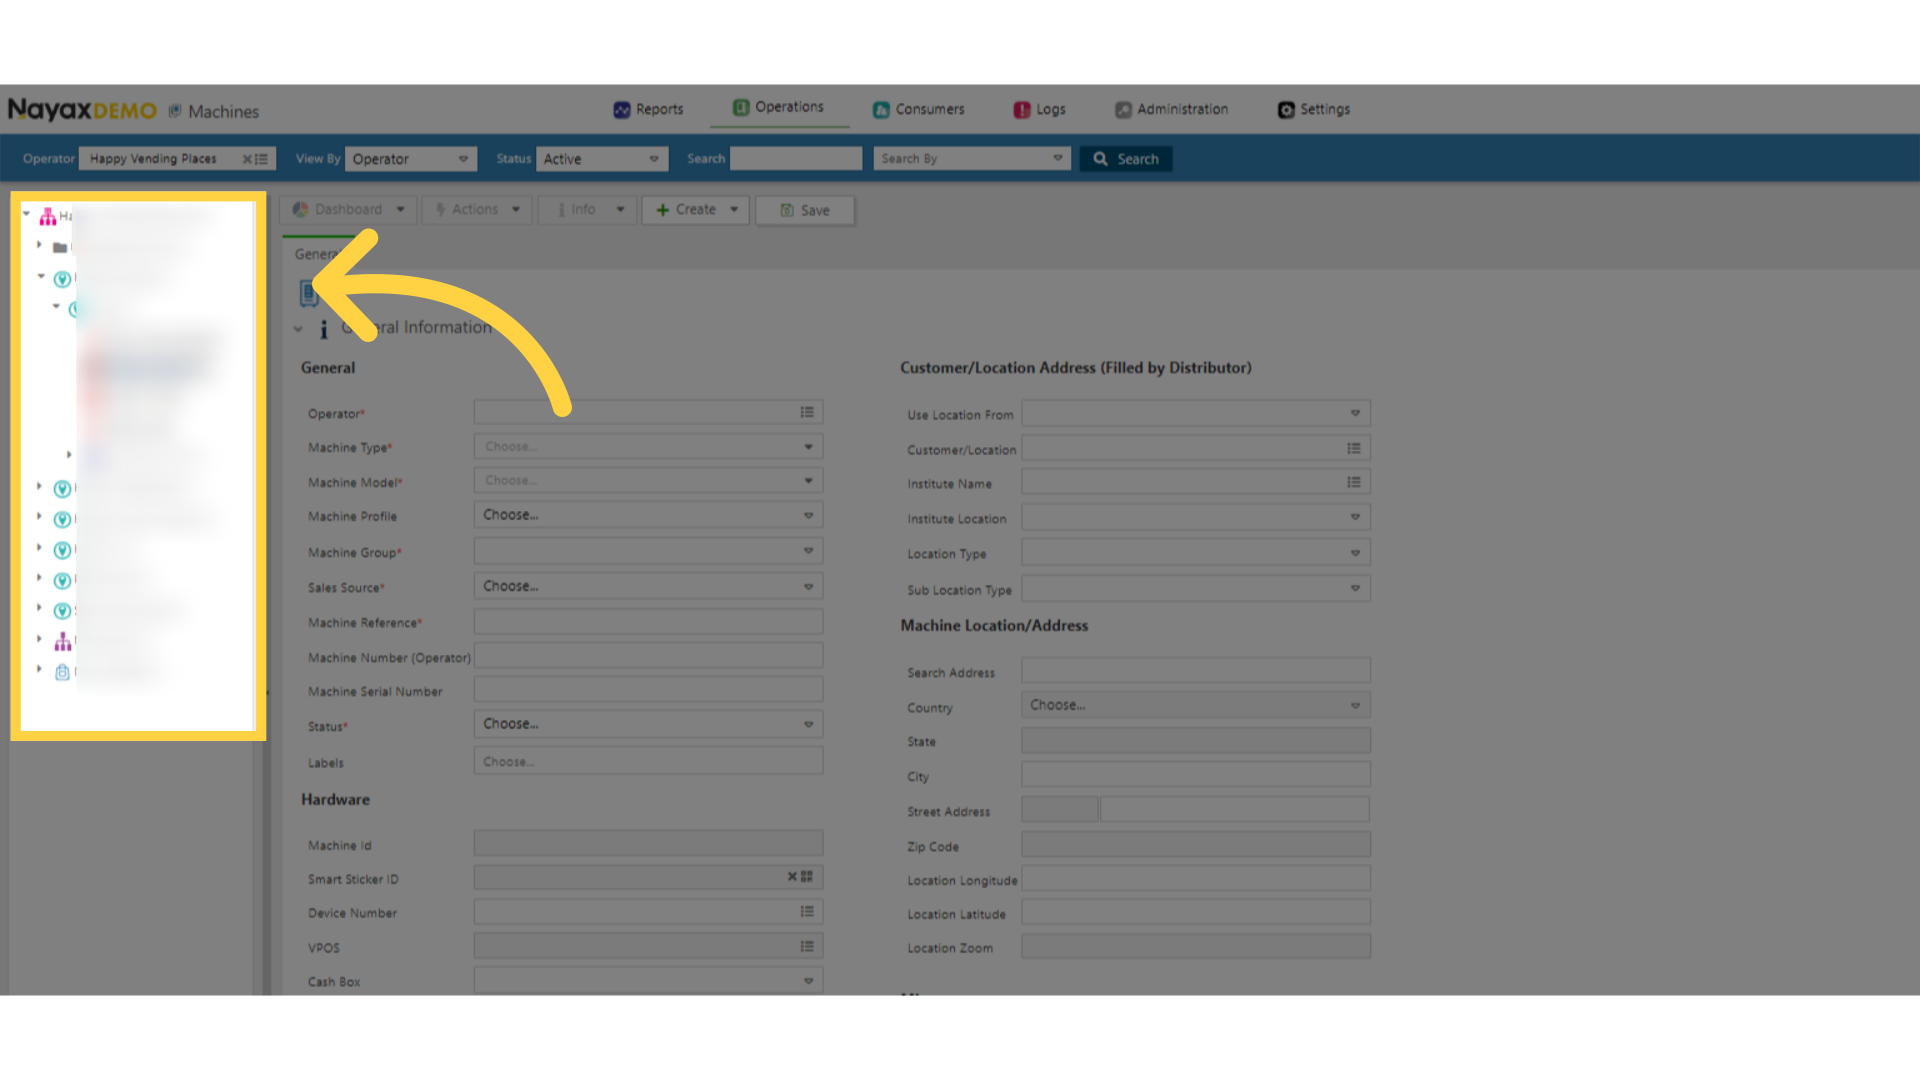
Locate your Machine
Image Attached
In the hierarchy sidebar, locate your machine that you wish to change the technician default code for.

7
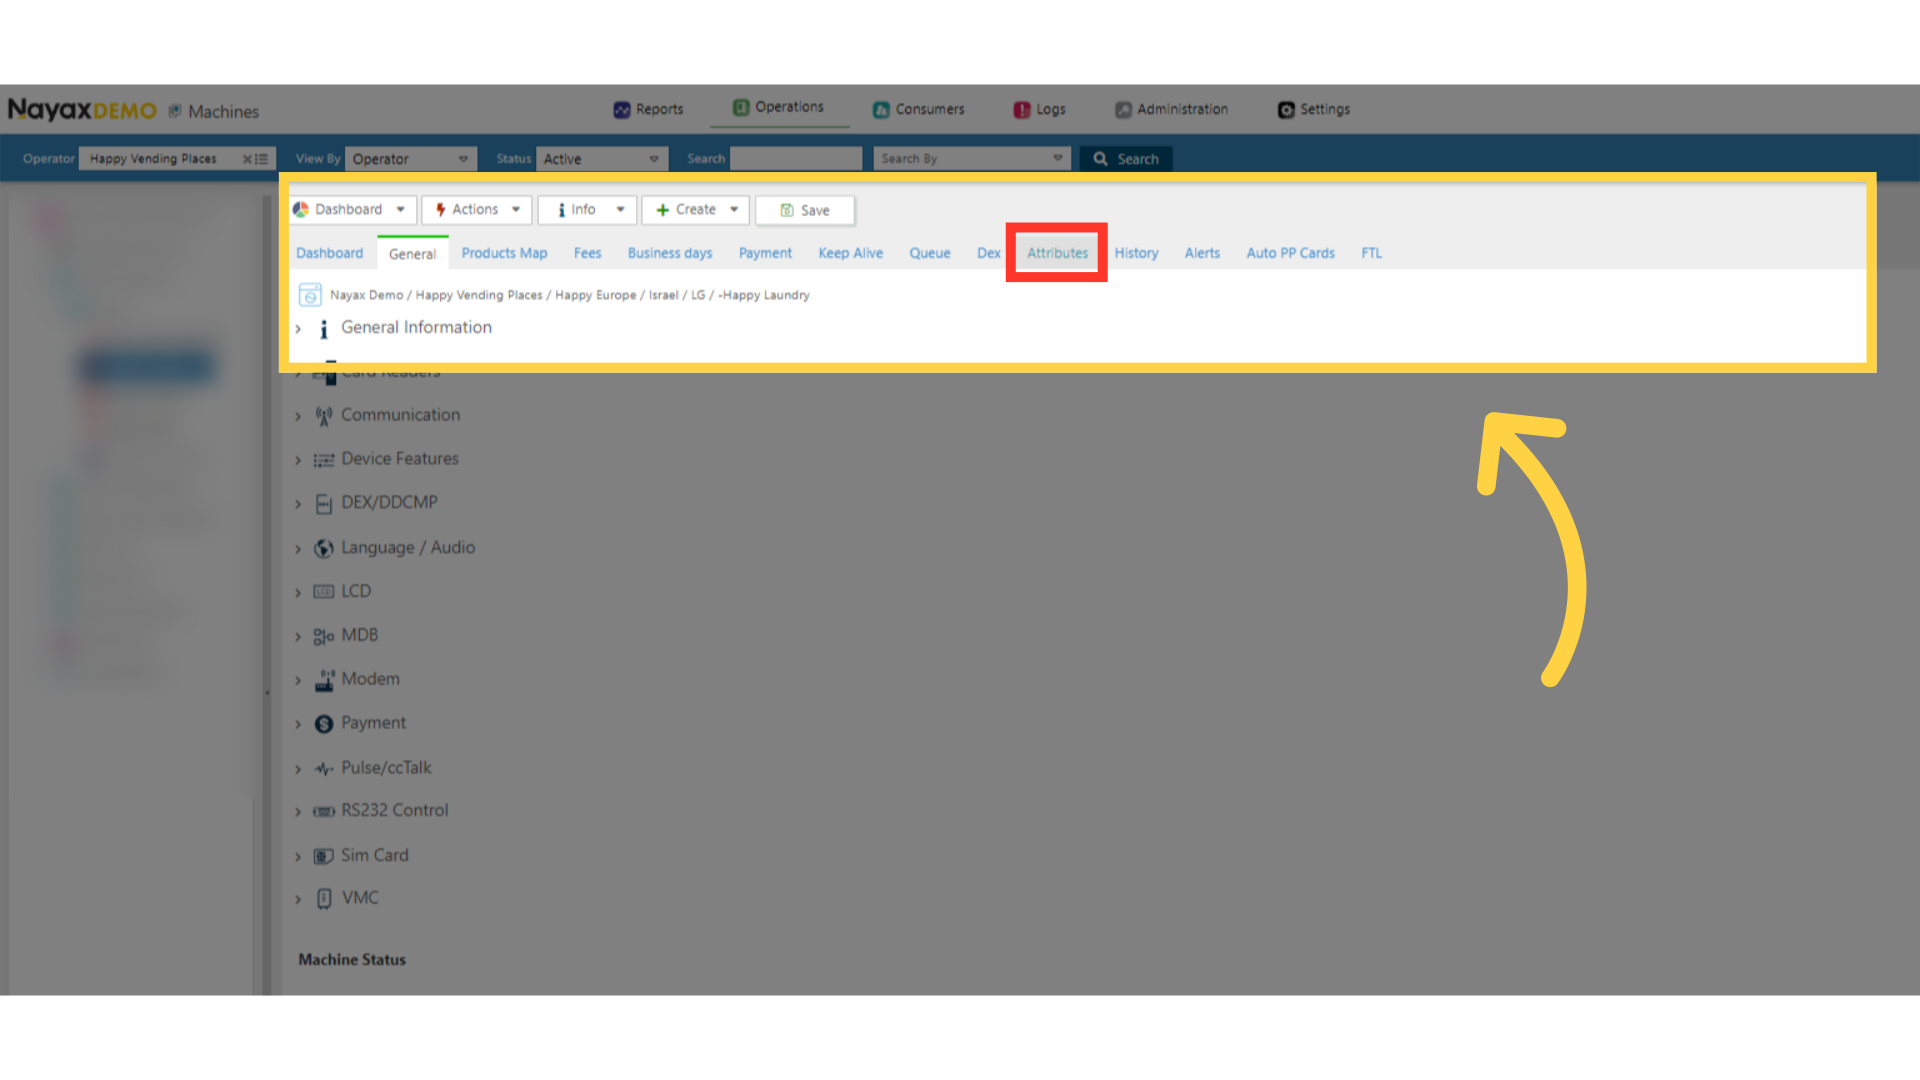
Select the Attributes tab in the Main Screen
Image Attached
Select the Attributes tab in the Main Screen as highlighted in RED in the visual.
8
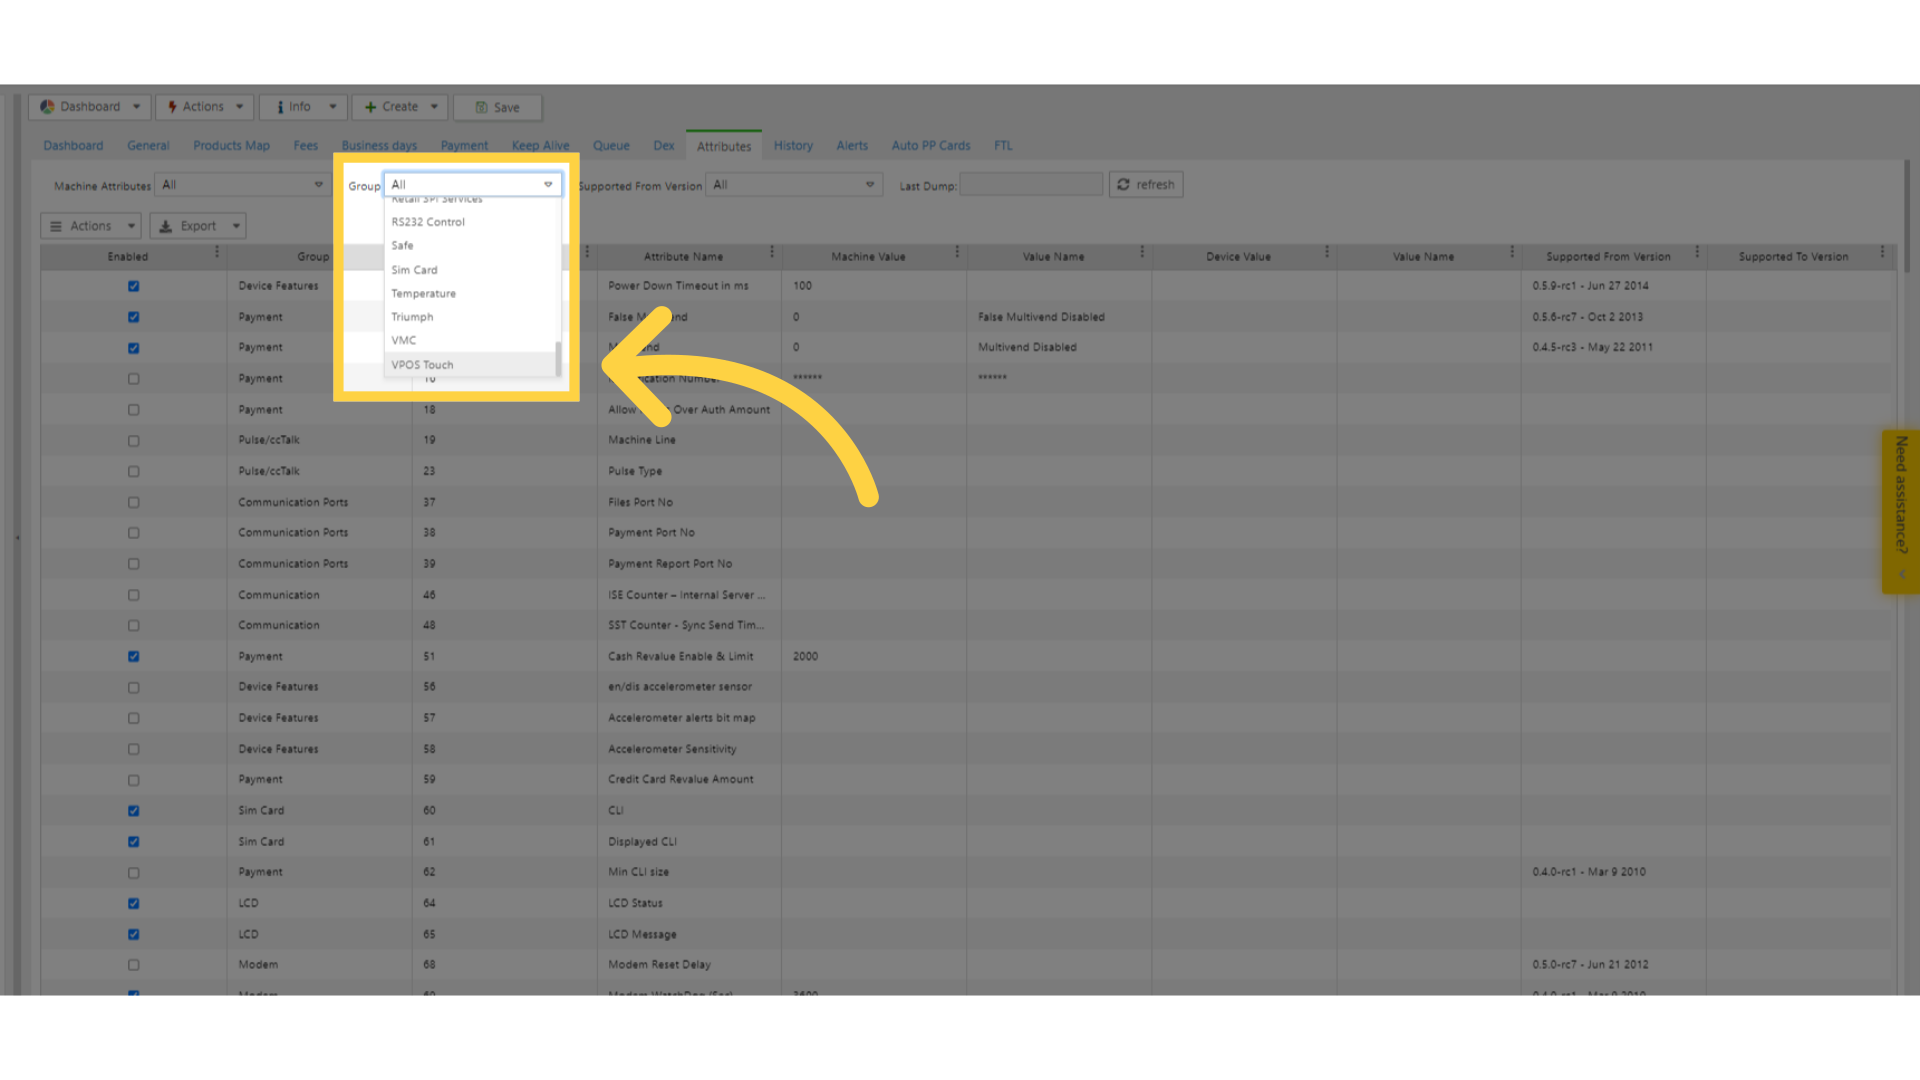
Filter the Group category for VPOS Touch
Image Attached
Click on the Groups field to open the drop down menu and scroll and select VPOS Touch.
9
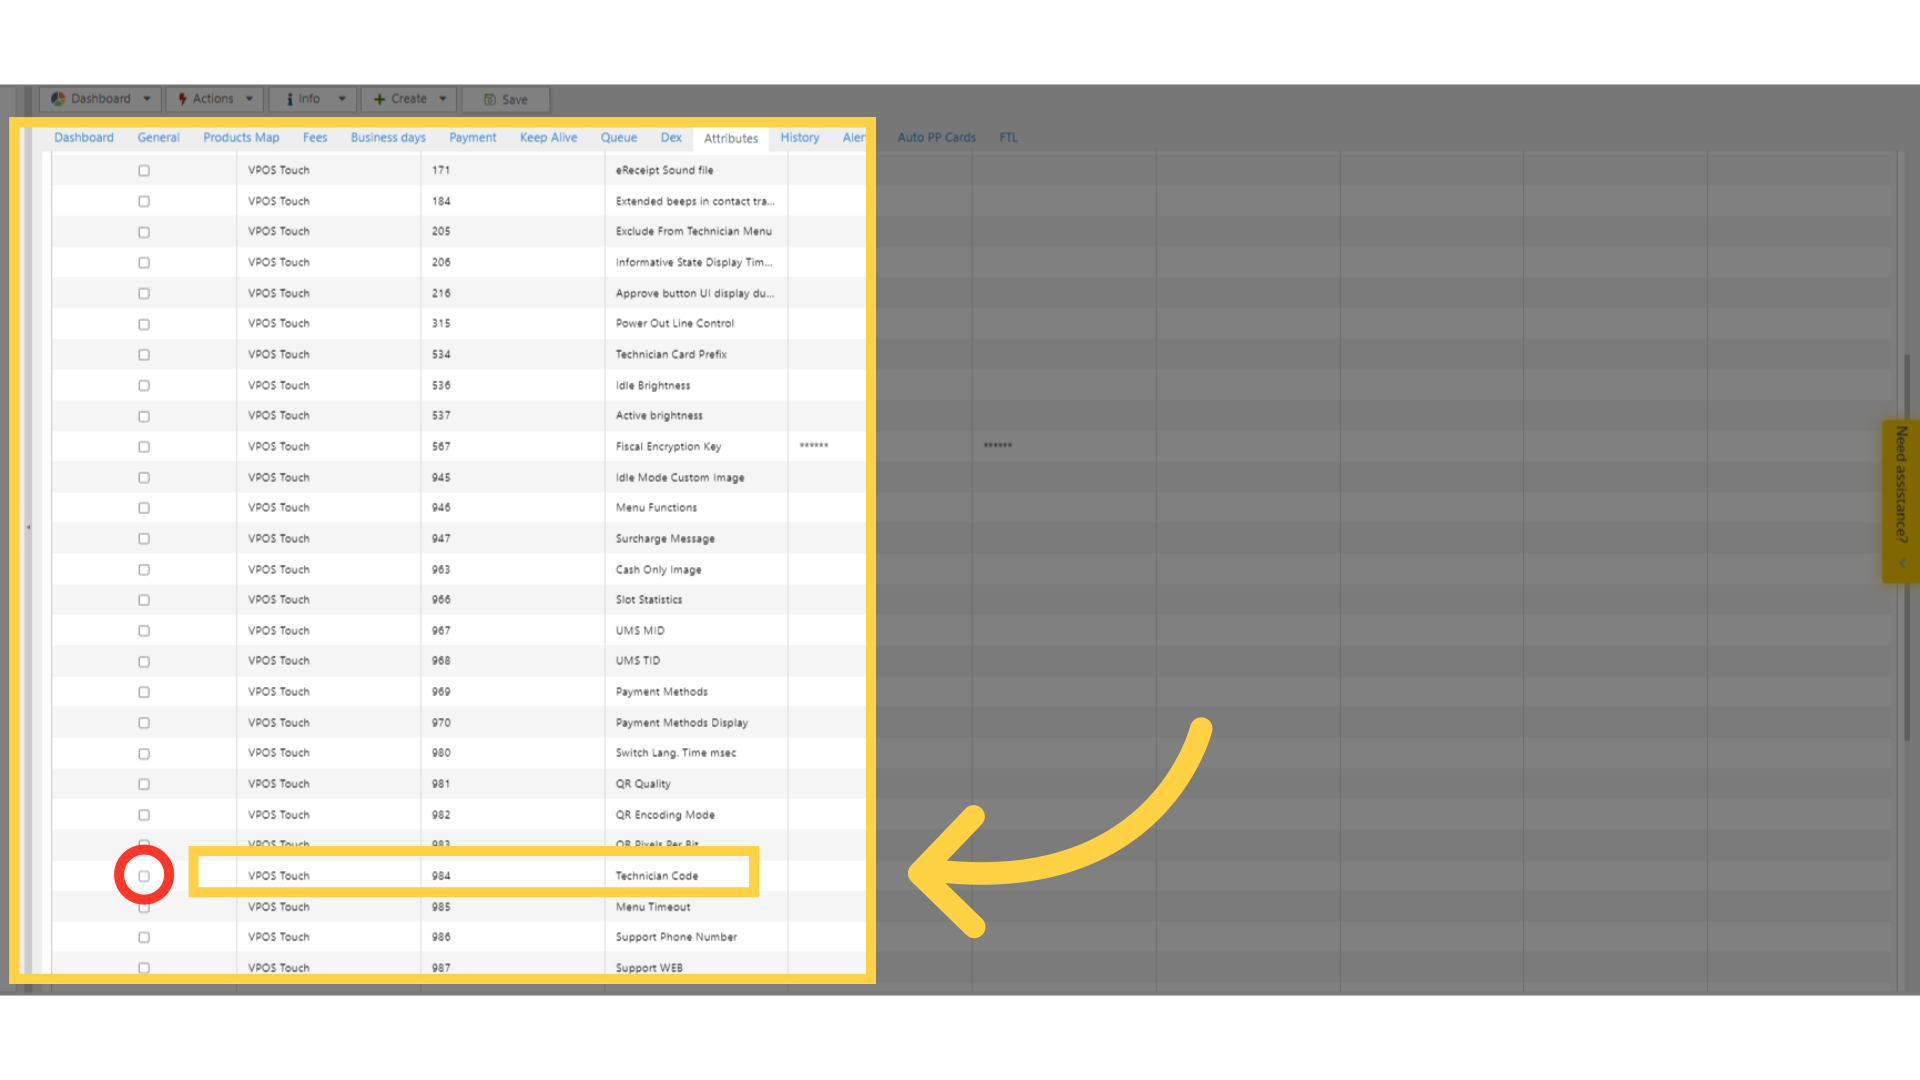
Scroll down to Enable the Technician Code Attribute
Image AttachedScroll down and locate the attribute ID number 984 labeled Technician Code and click on the checkbox as highlighted in RED in the visual.
10
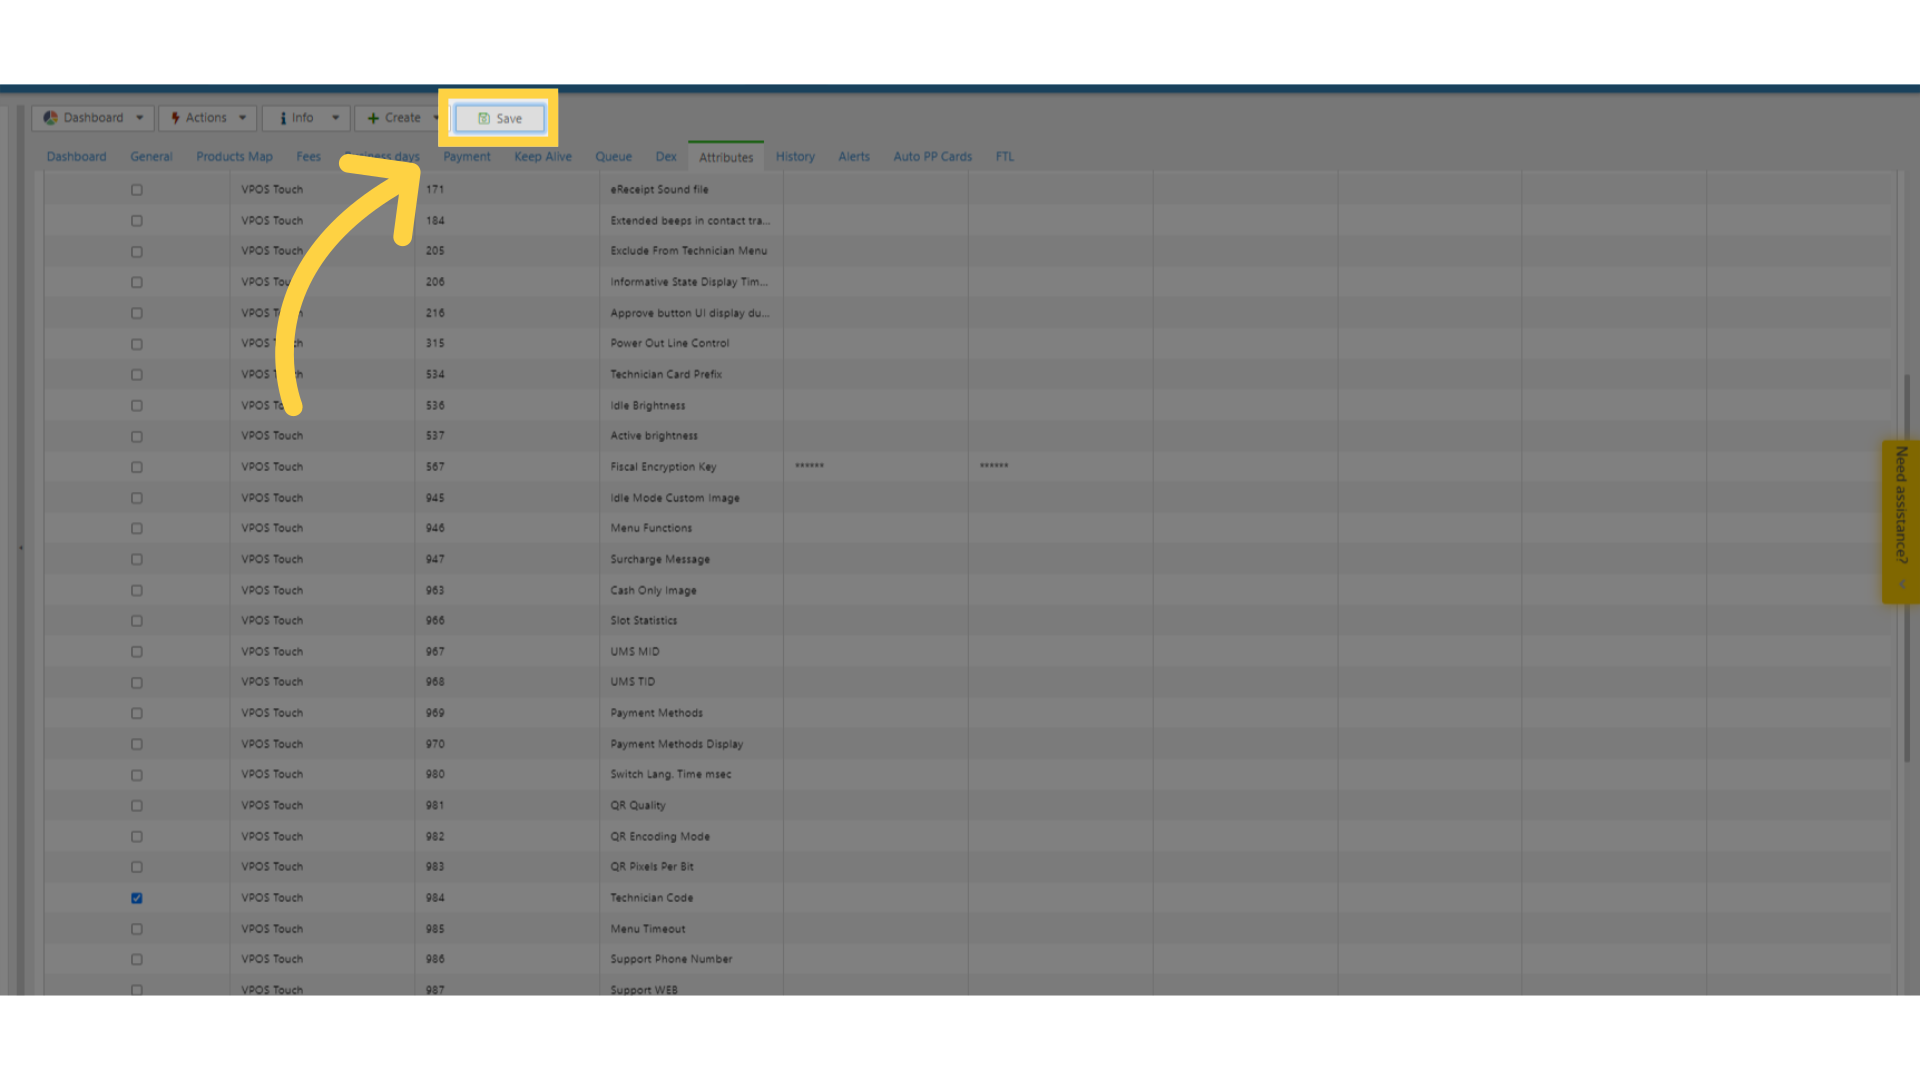
Click on Save
Image Attached
Click the Save button to save your progress.
11
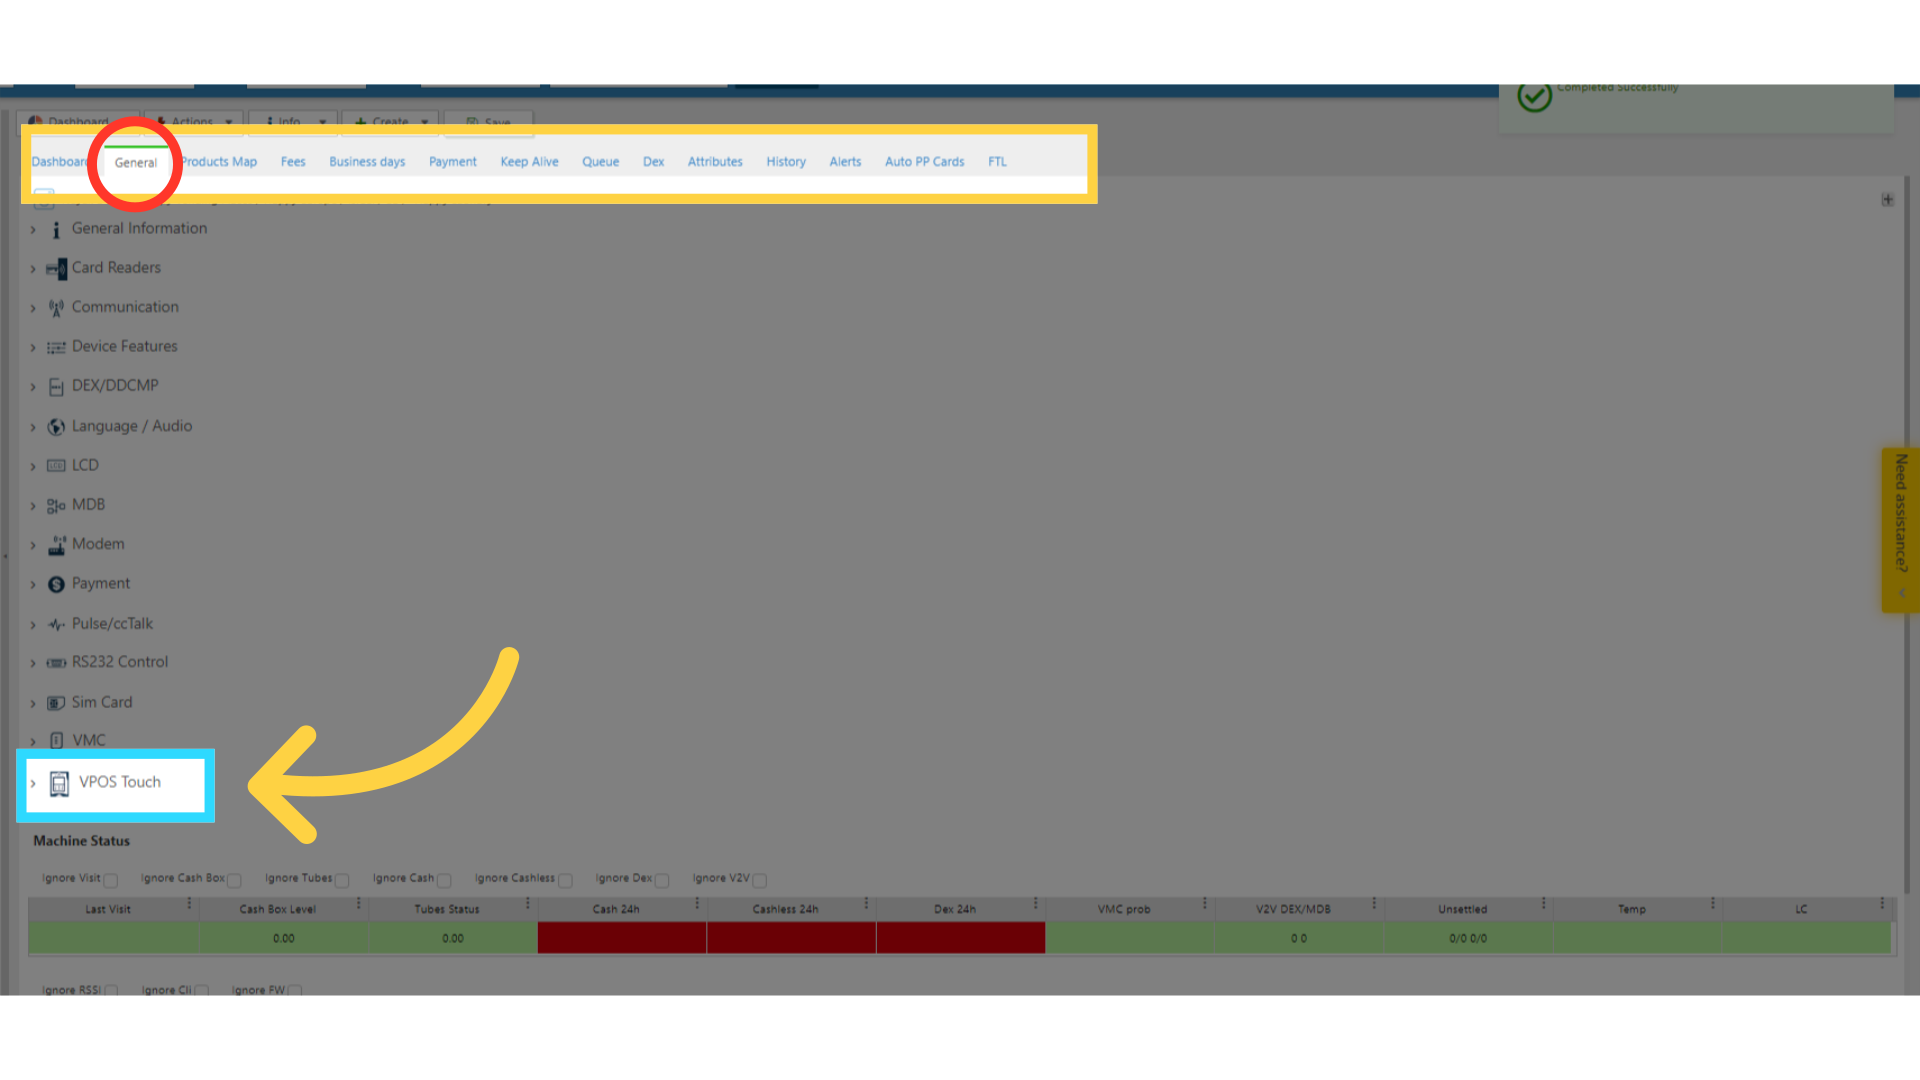
Go to the General Tab
Image AttachedGo back to the General tab as highlighted in RED and then scroll down click on VPOS Touch option as highlighted in BLUE on the visual.
12
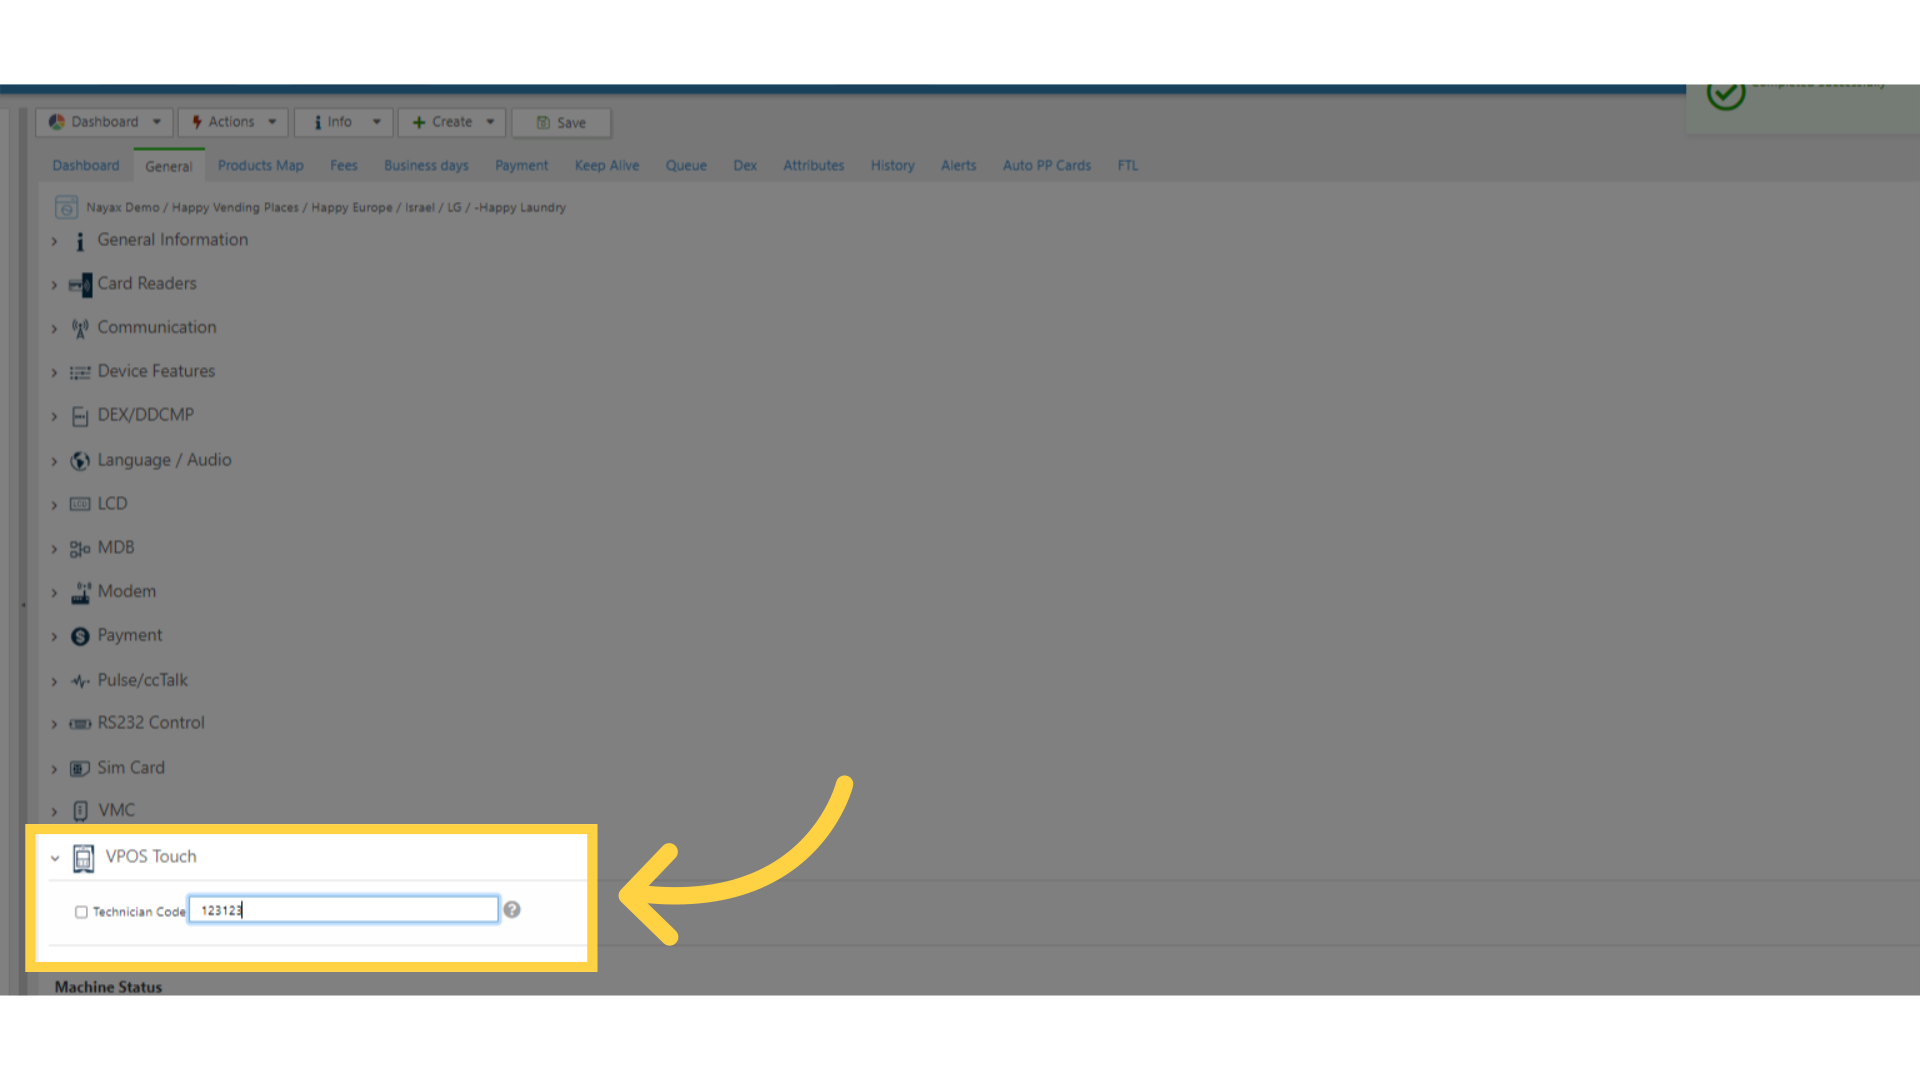
Change the Technician Code
Image AttachedIn the pop up field, the default code is 123123 you can set your own code within Technician Code attribute for your specific machine.
Don't forget to keep note of your new code!
13
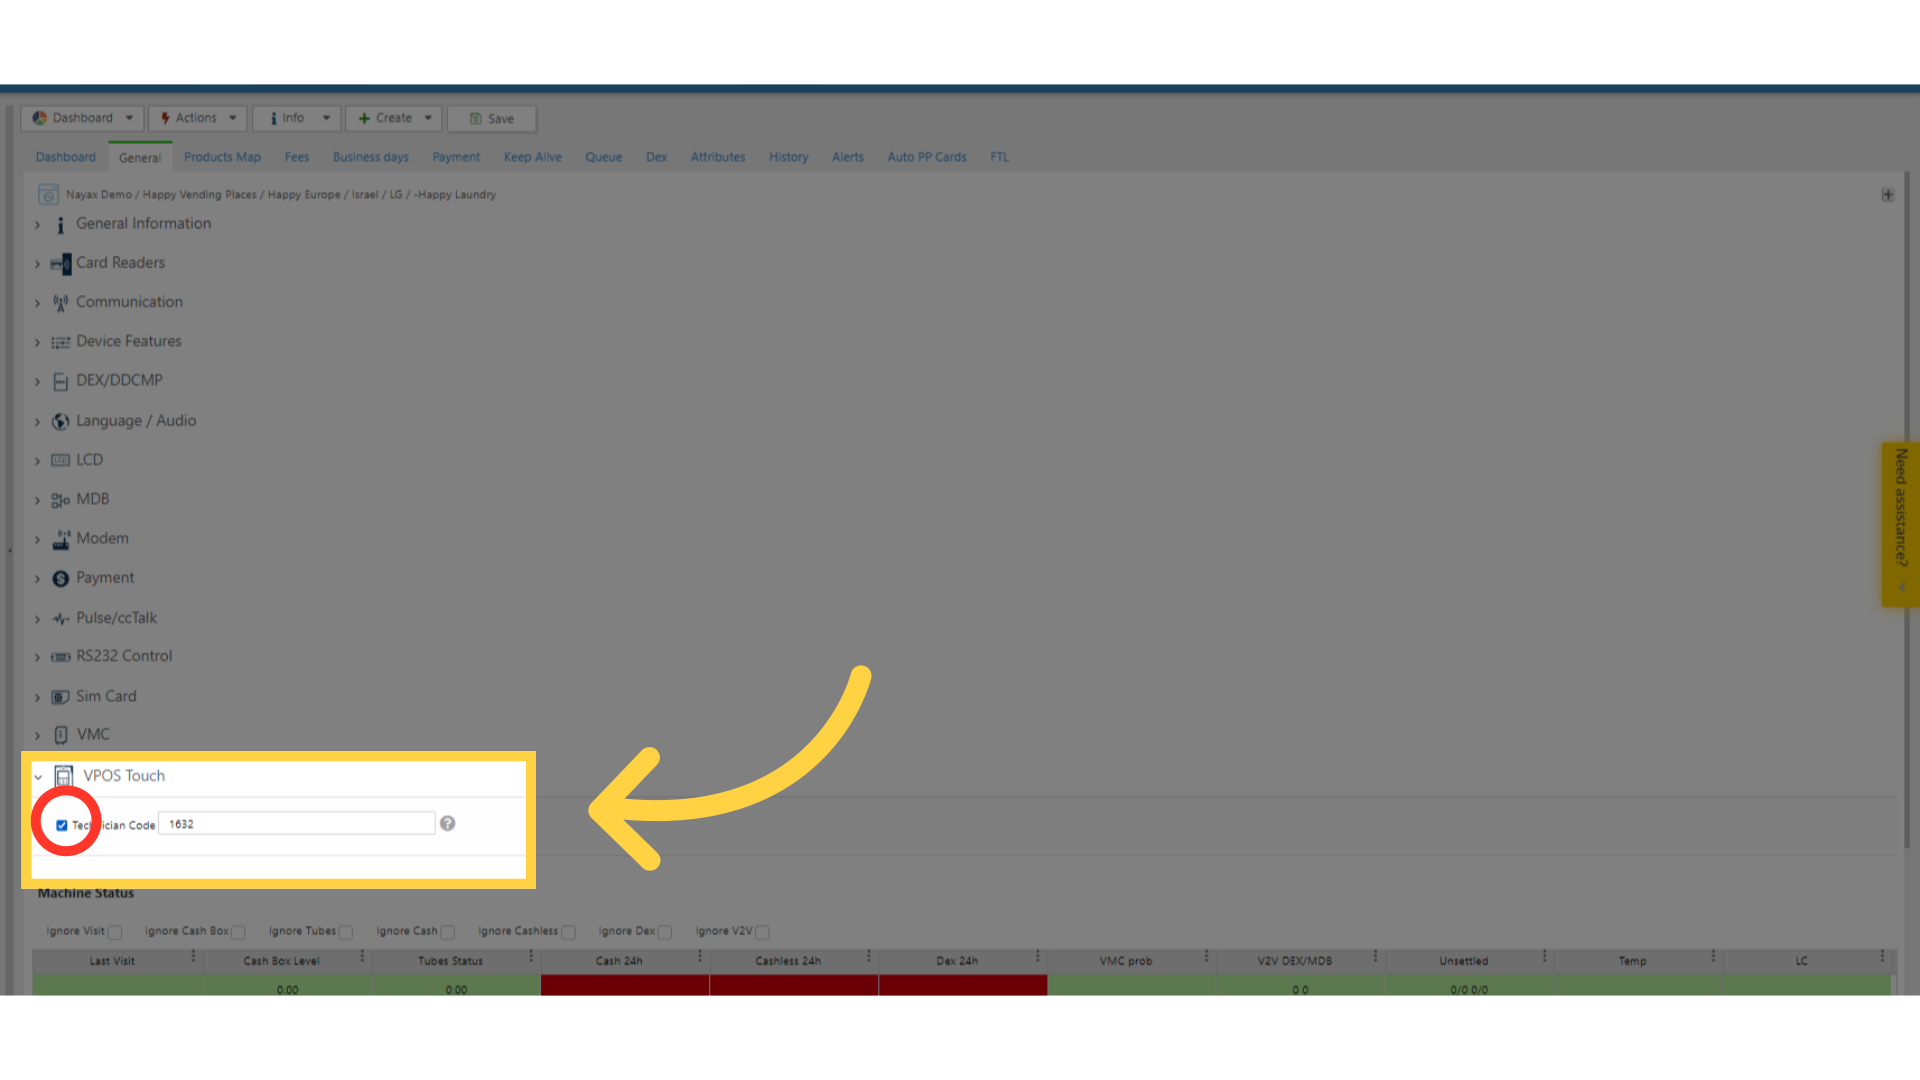
Click the Checkbox
Image Attached
Tick the box next to Technician Code attribute as highlighted in RED in the visual.
14
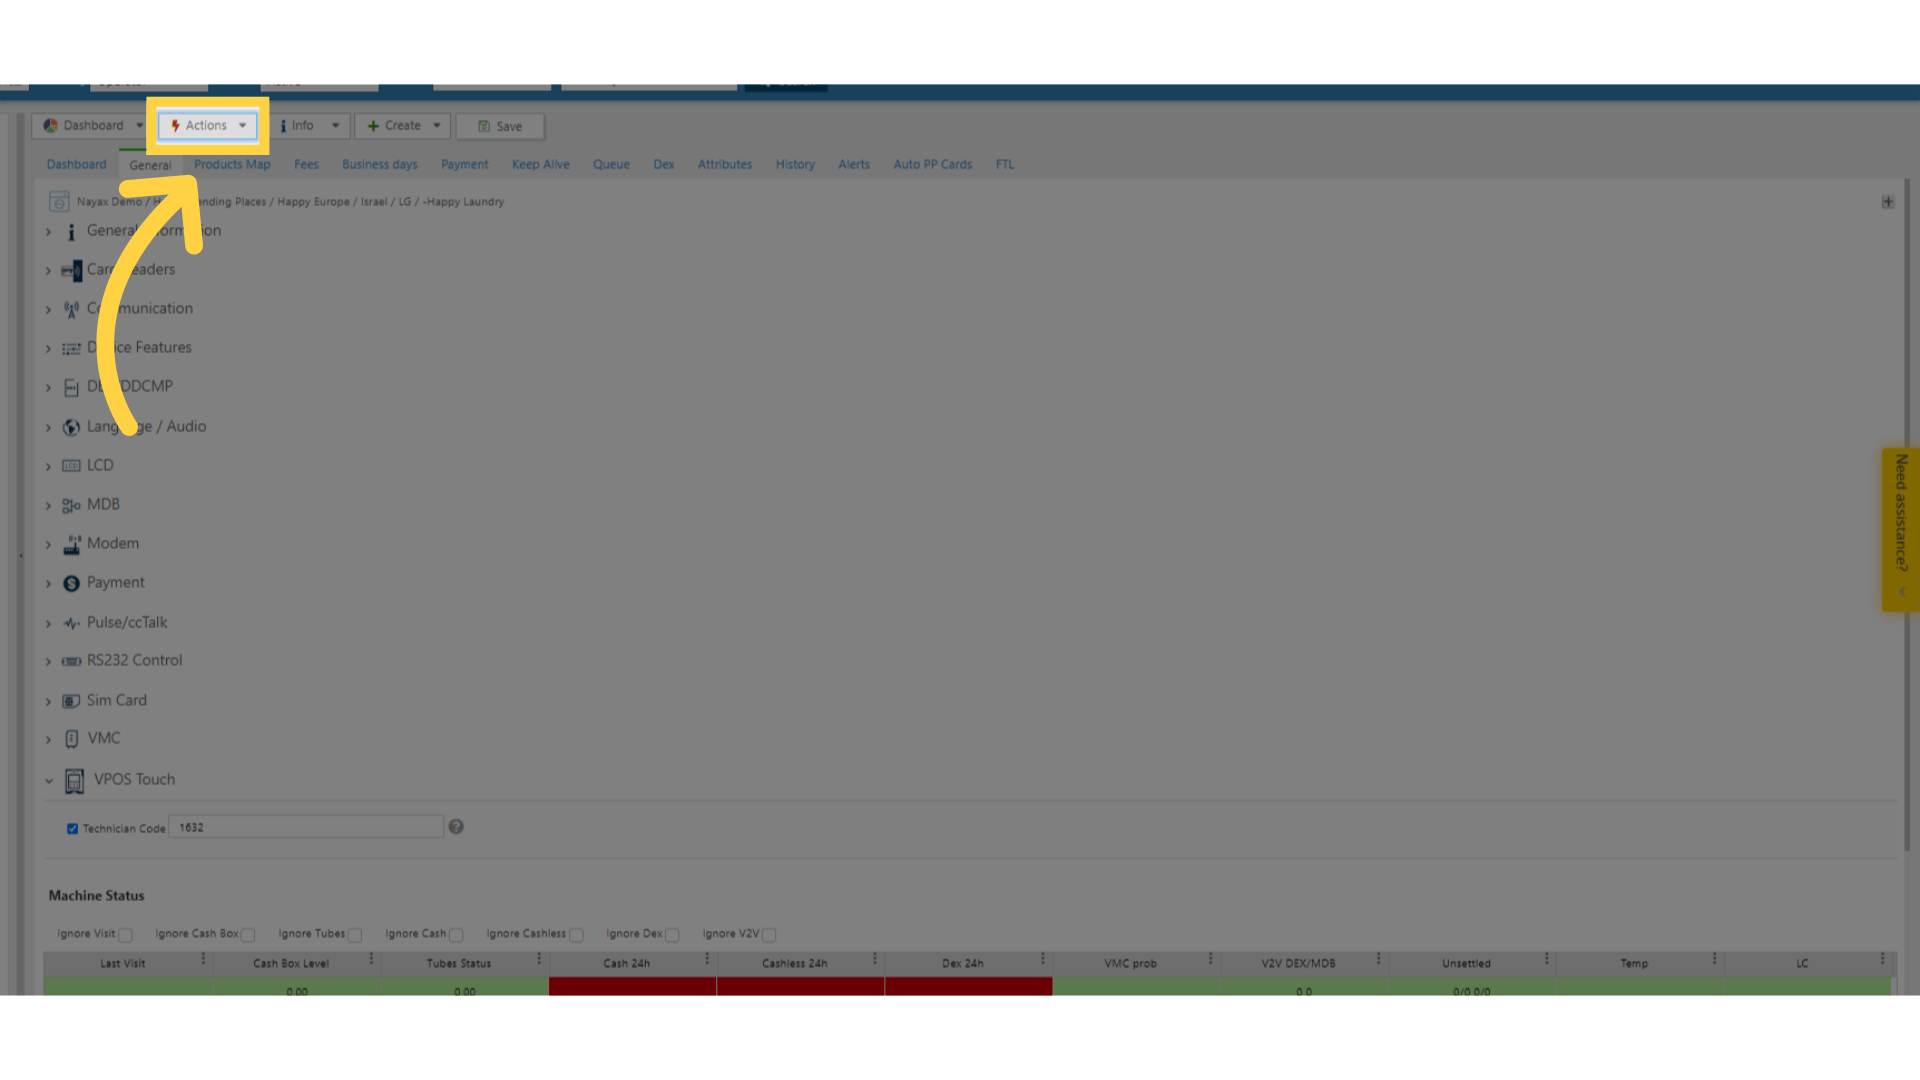
Click Actions Tab
Image Attached
Go to Actions on the top of the screen.
15
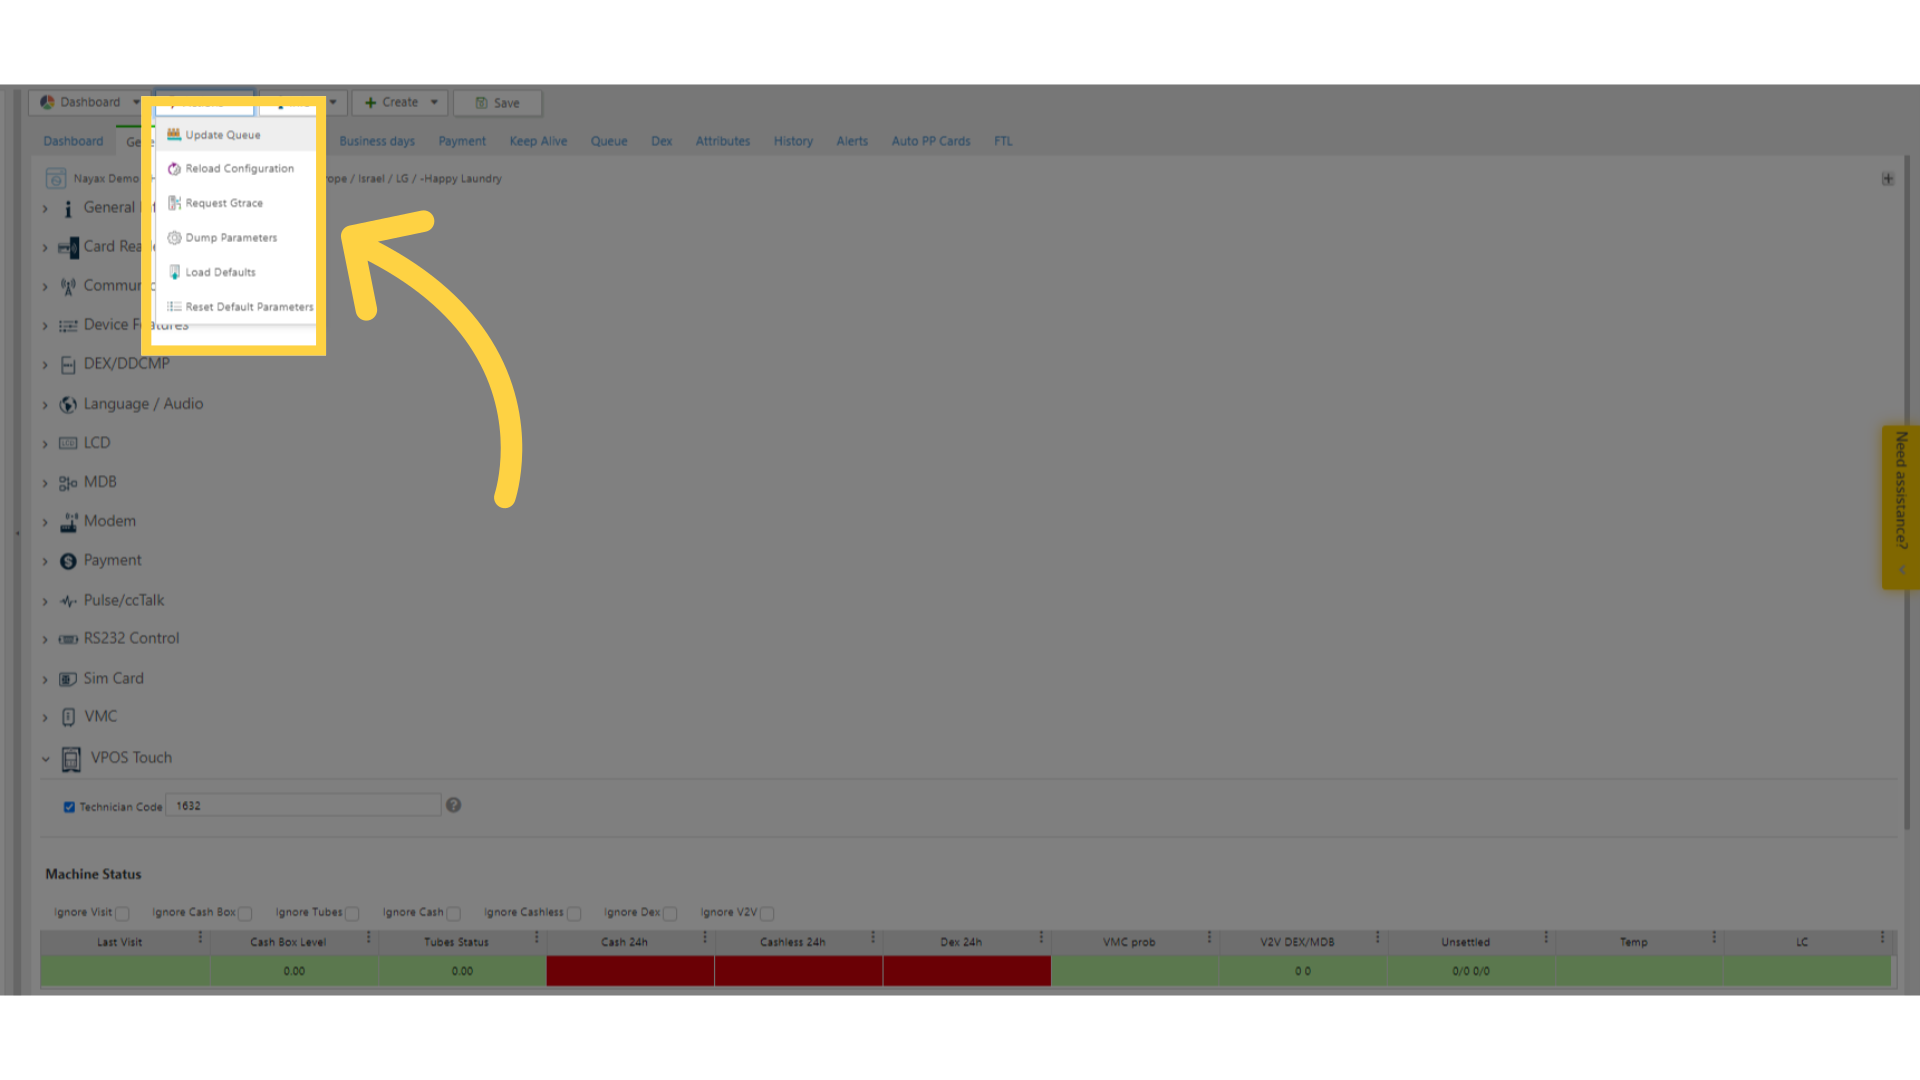
Click Update Queue
Image Attached
To save your progress, click the Update Queue Tab.
Please note, this change may cause your device to restart.
Thank you!
Did you find this article helpful?