How to Add/Link a POS to a Store Location | Retail Core
Video guide
This is the link between Nayax Core to Retail Core.
On the dashboard of your Retail Core management suite click the Company tab
Image Attached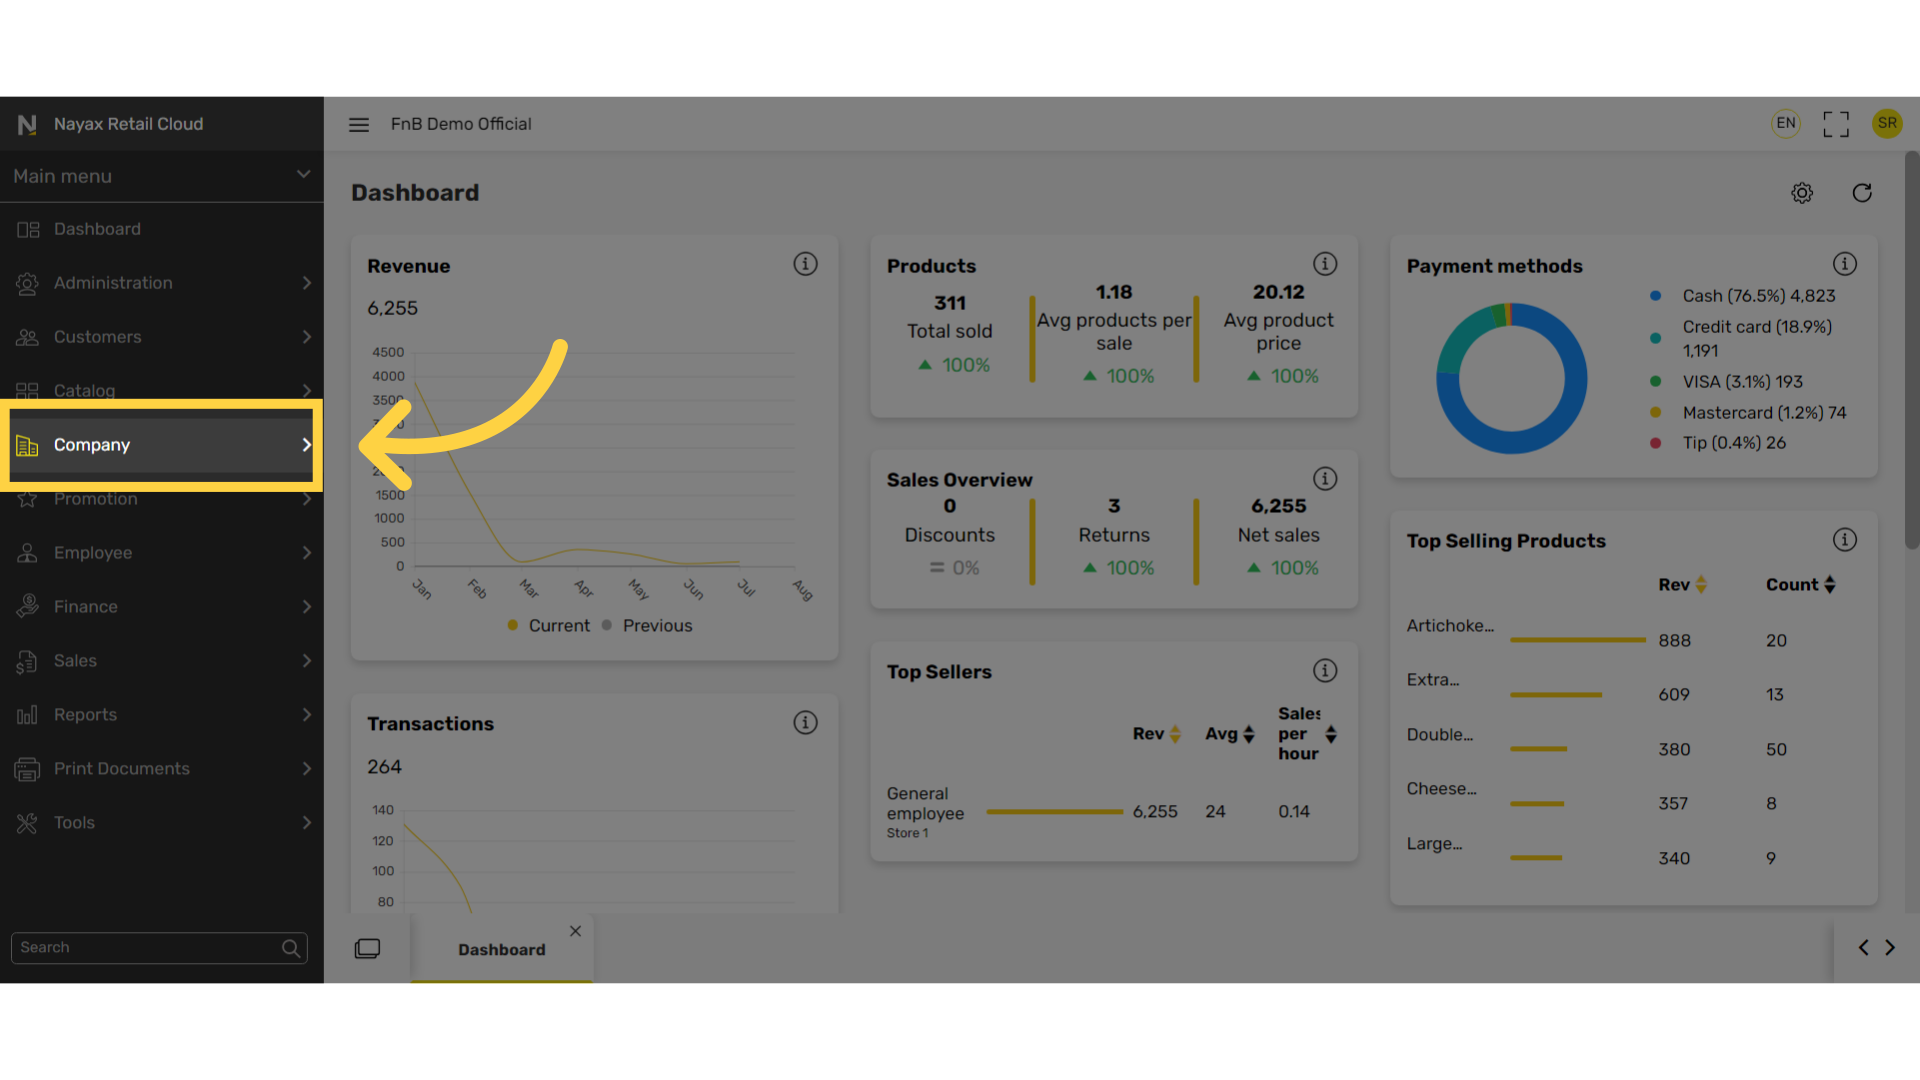
In the sub-menu, click on Locations
Image Attached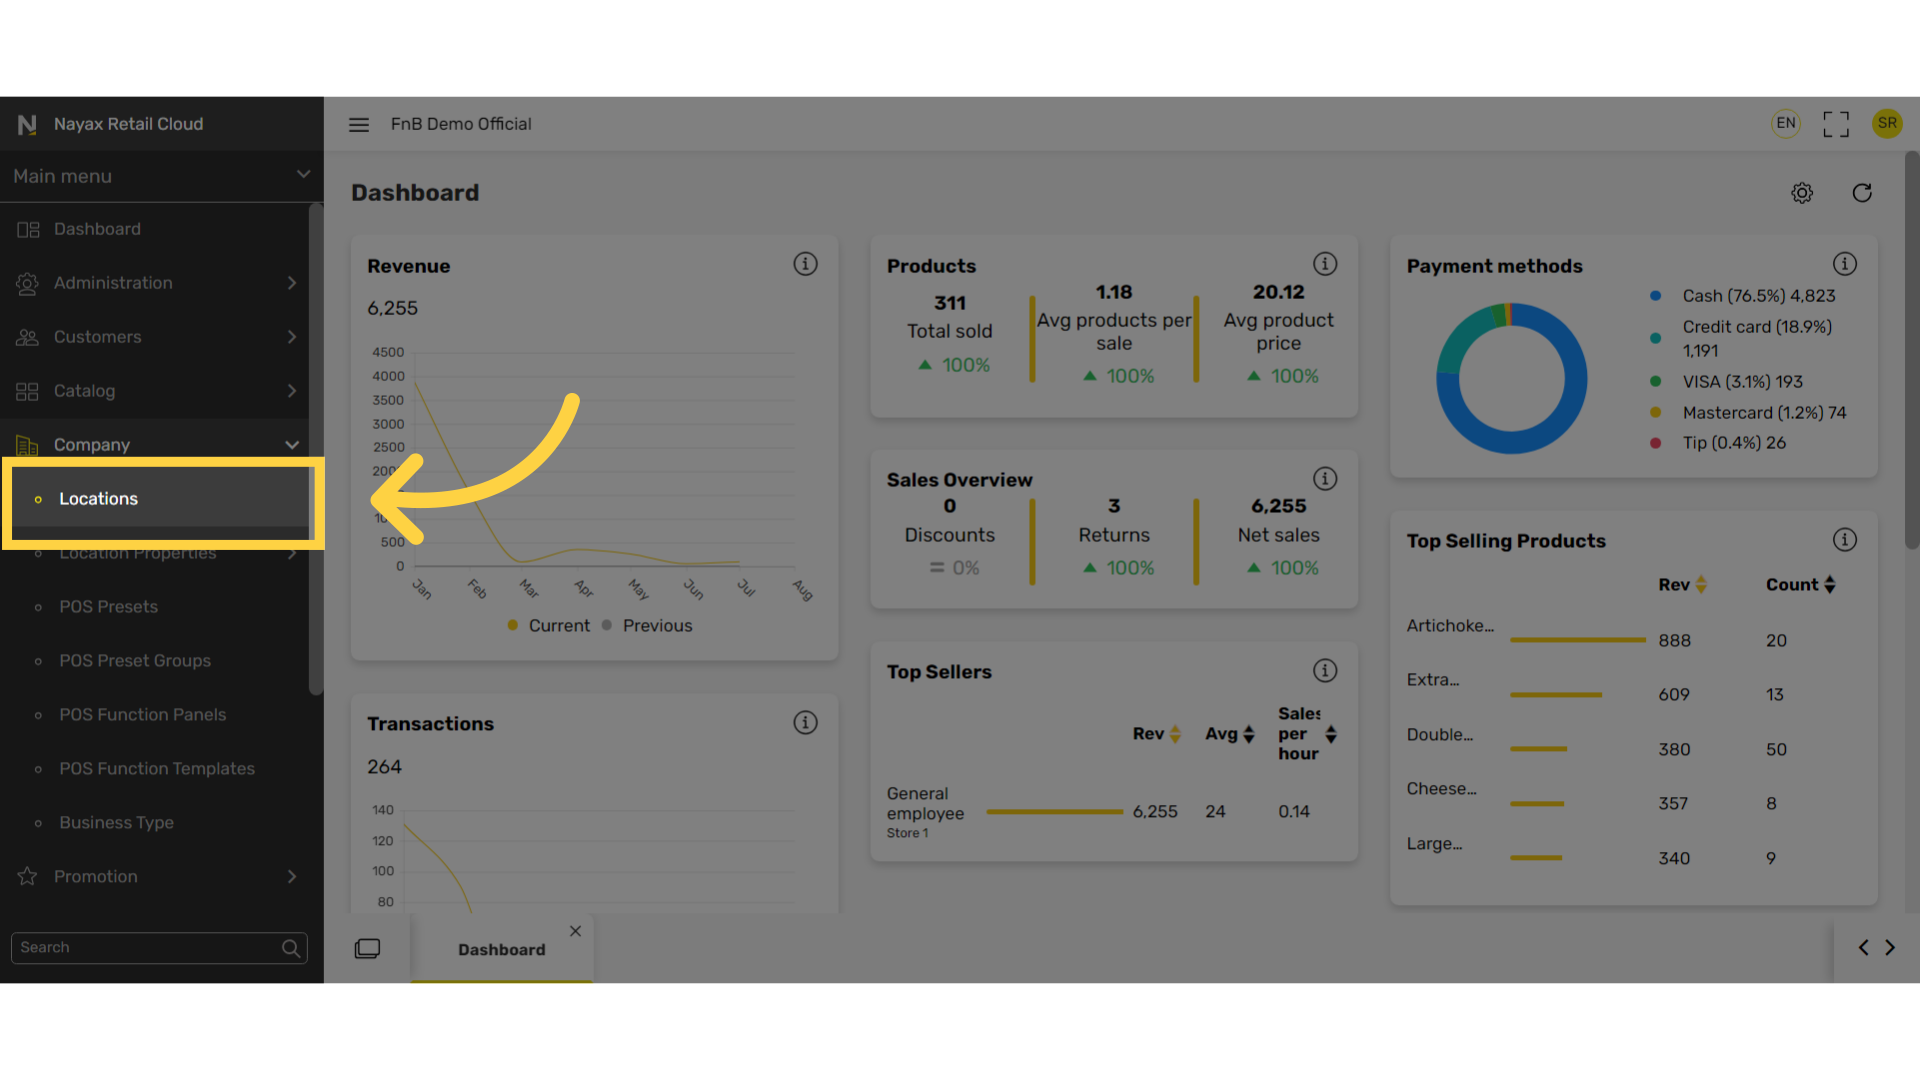
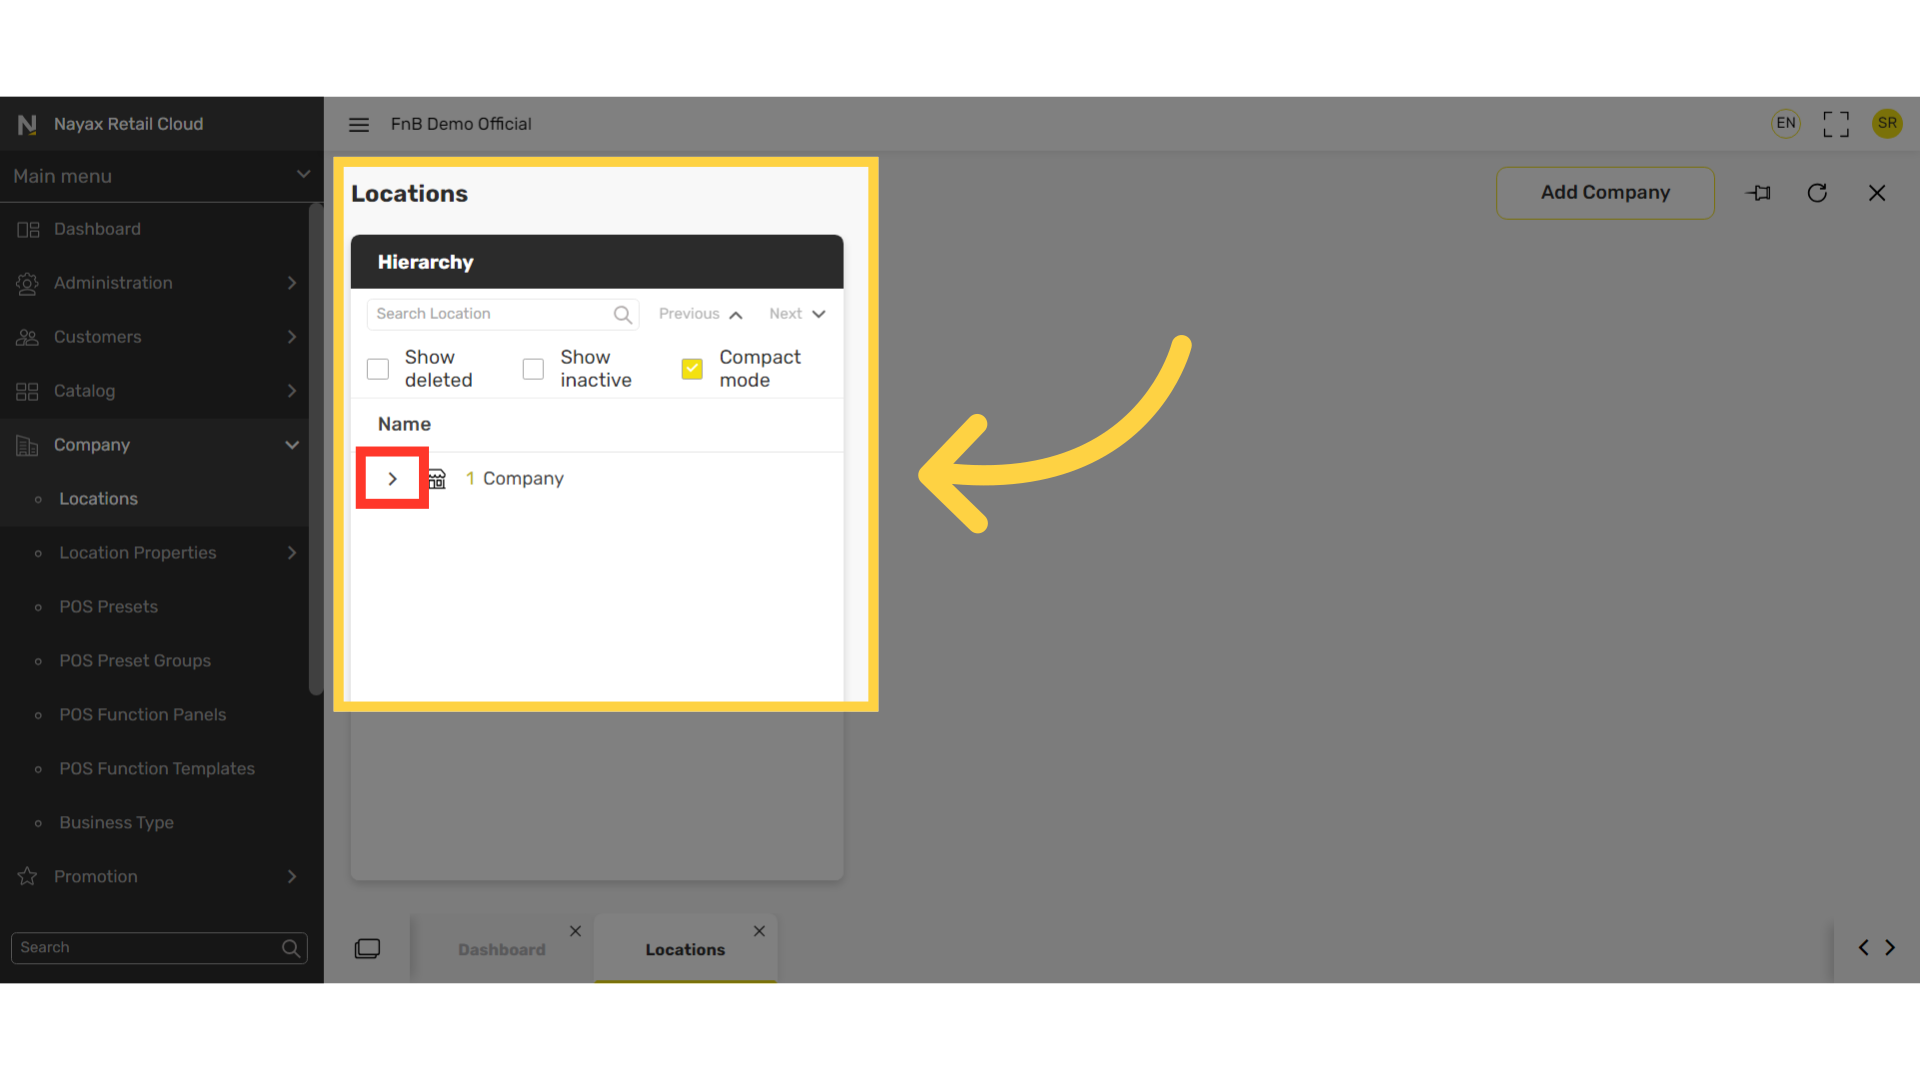
Click on the arrow of the company you need to add a POS
Image AttachedClick on the arrow as highlighted in RED on the visual of the company you need to add a POS to and a list of stores will appear below.
Click on the store you wish to add/link a POS to.
Image Attached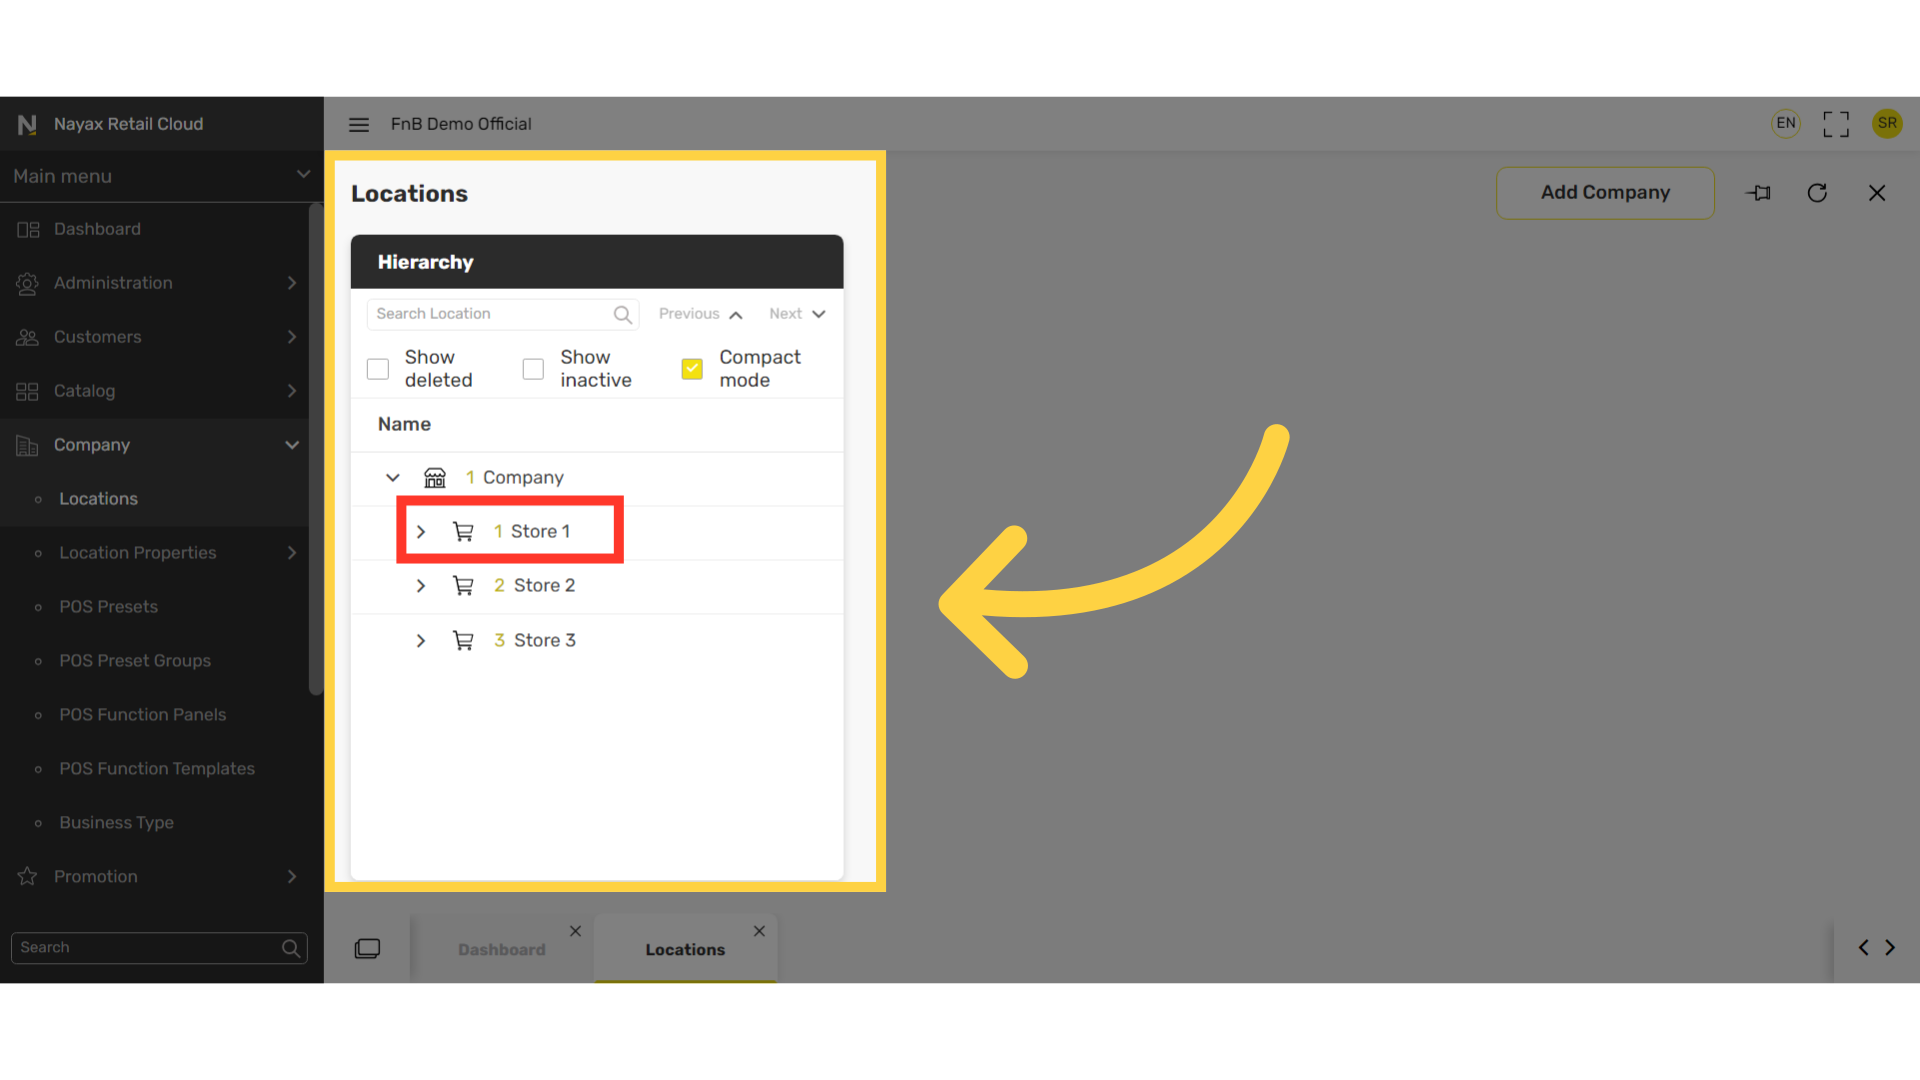
Click on Add POS.
Image Attached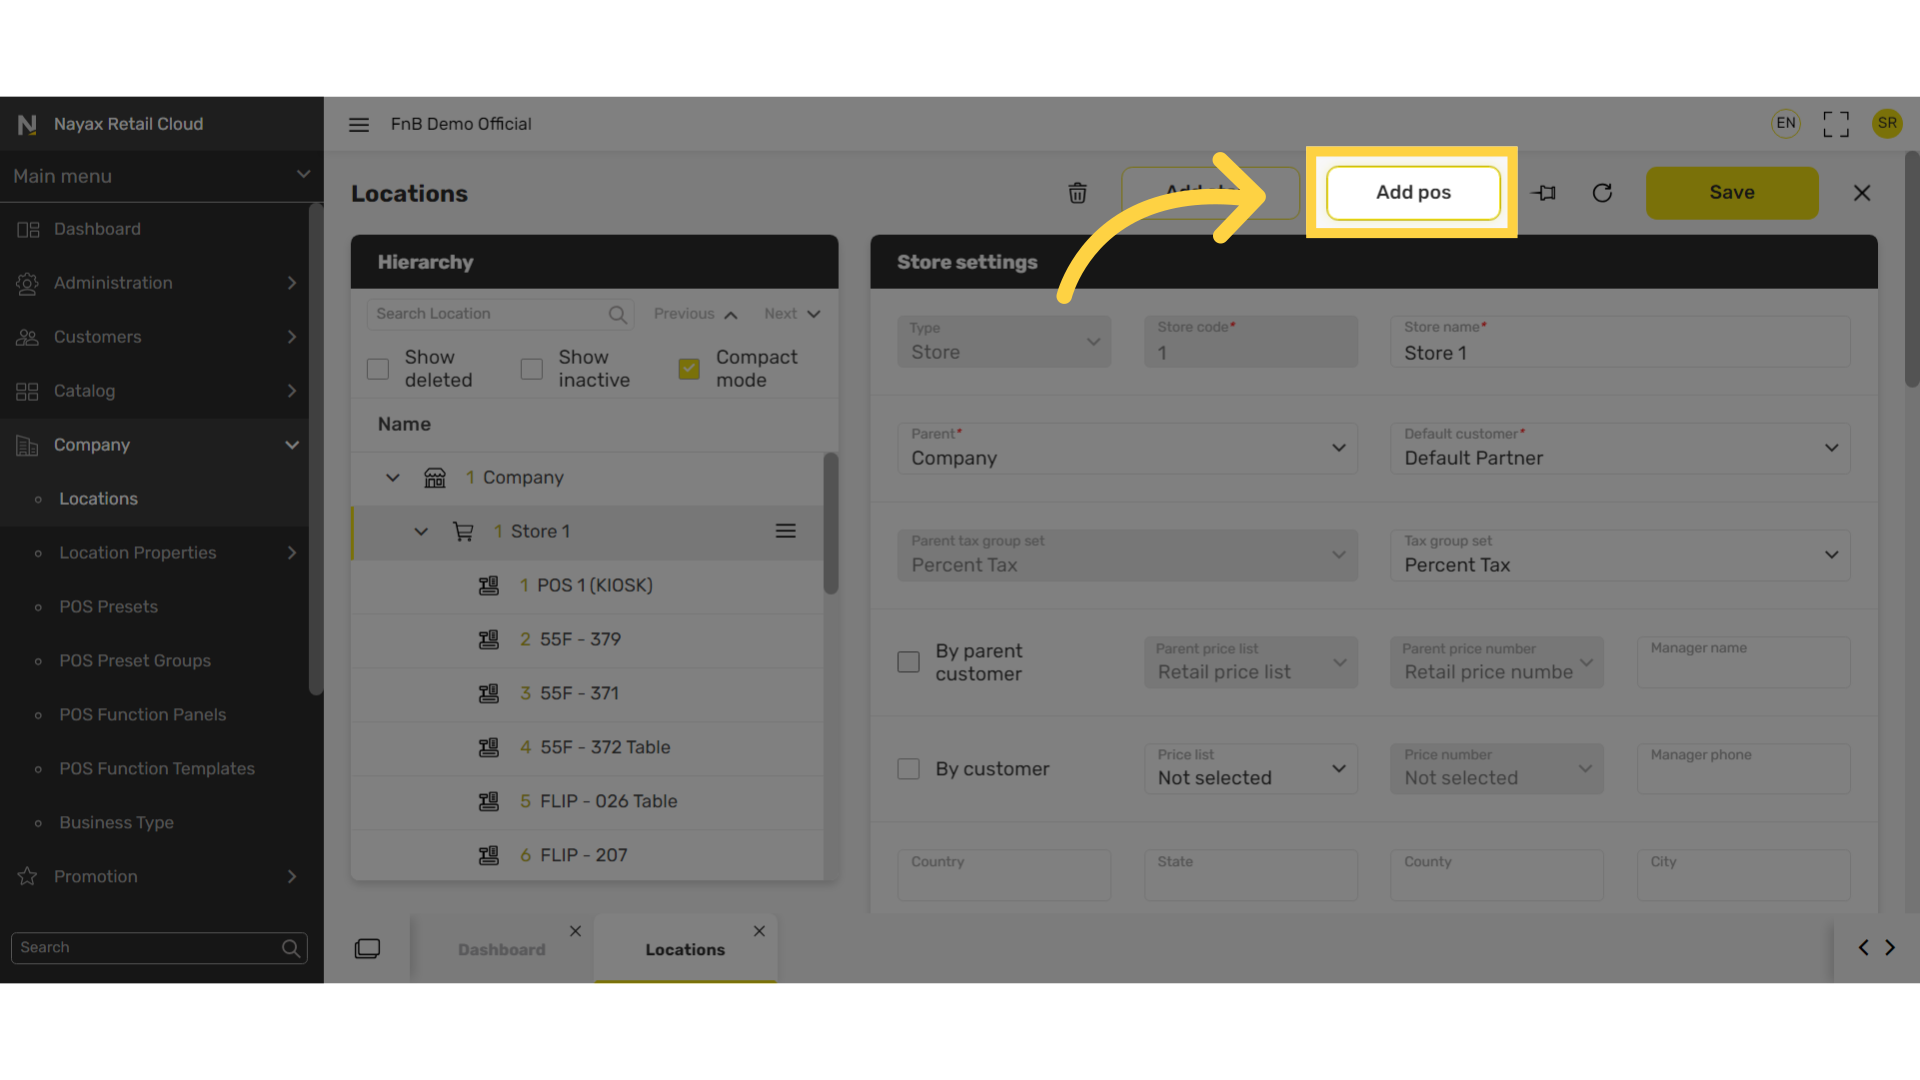
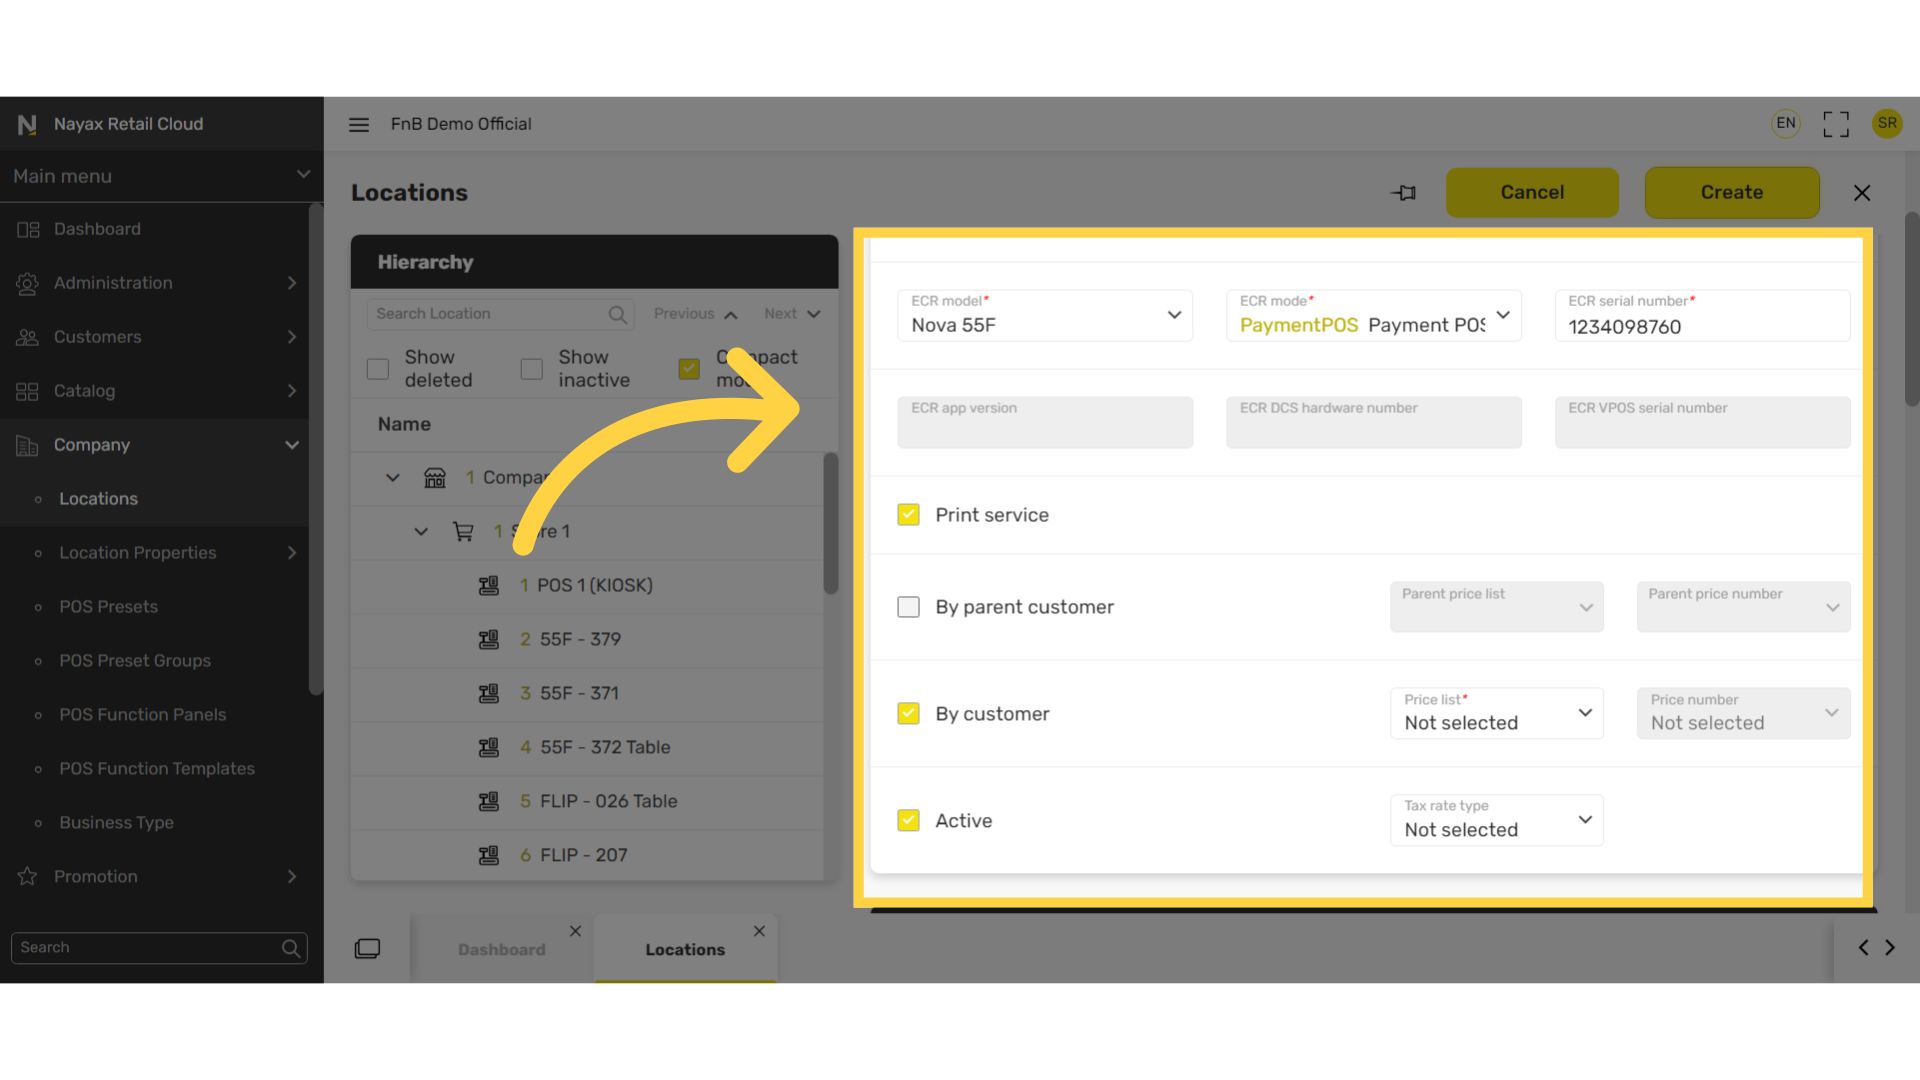
Fill in the following fields:
Image Attached|
POS Code |
Code of POS |
|
Pos Name |
Name of POS |
|
POS Type |
Type of POS – select ECR Retail One – a cash register device ECR – This applies to nova devices, nova market, and kiosk. When selecting ECR fill in the additional fields. |
|
*ECR Model |
Type of ECR device in your possession |
|
*ECR Mode |
Mode of POS – Choose one. Common POS - Self-service POS - |
|
*ECR serial number |
Serial number of the device which is located at the bottom after pressing the three lines to open the menu. |
|
Print service |
If the device has a printer |
|
By parent customer |
This is automatically selected to follow the company's price list.
|
|
By customer |
Select this if you want the store to follow the price list of each customer group created.
|
|
Active |
To activate the POS. |
Click Create.
Image Attached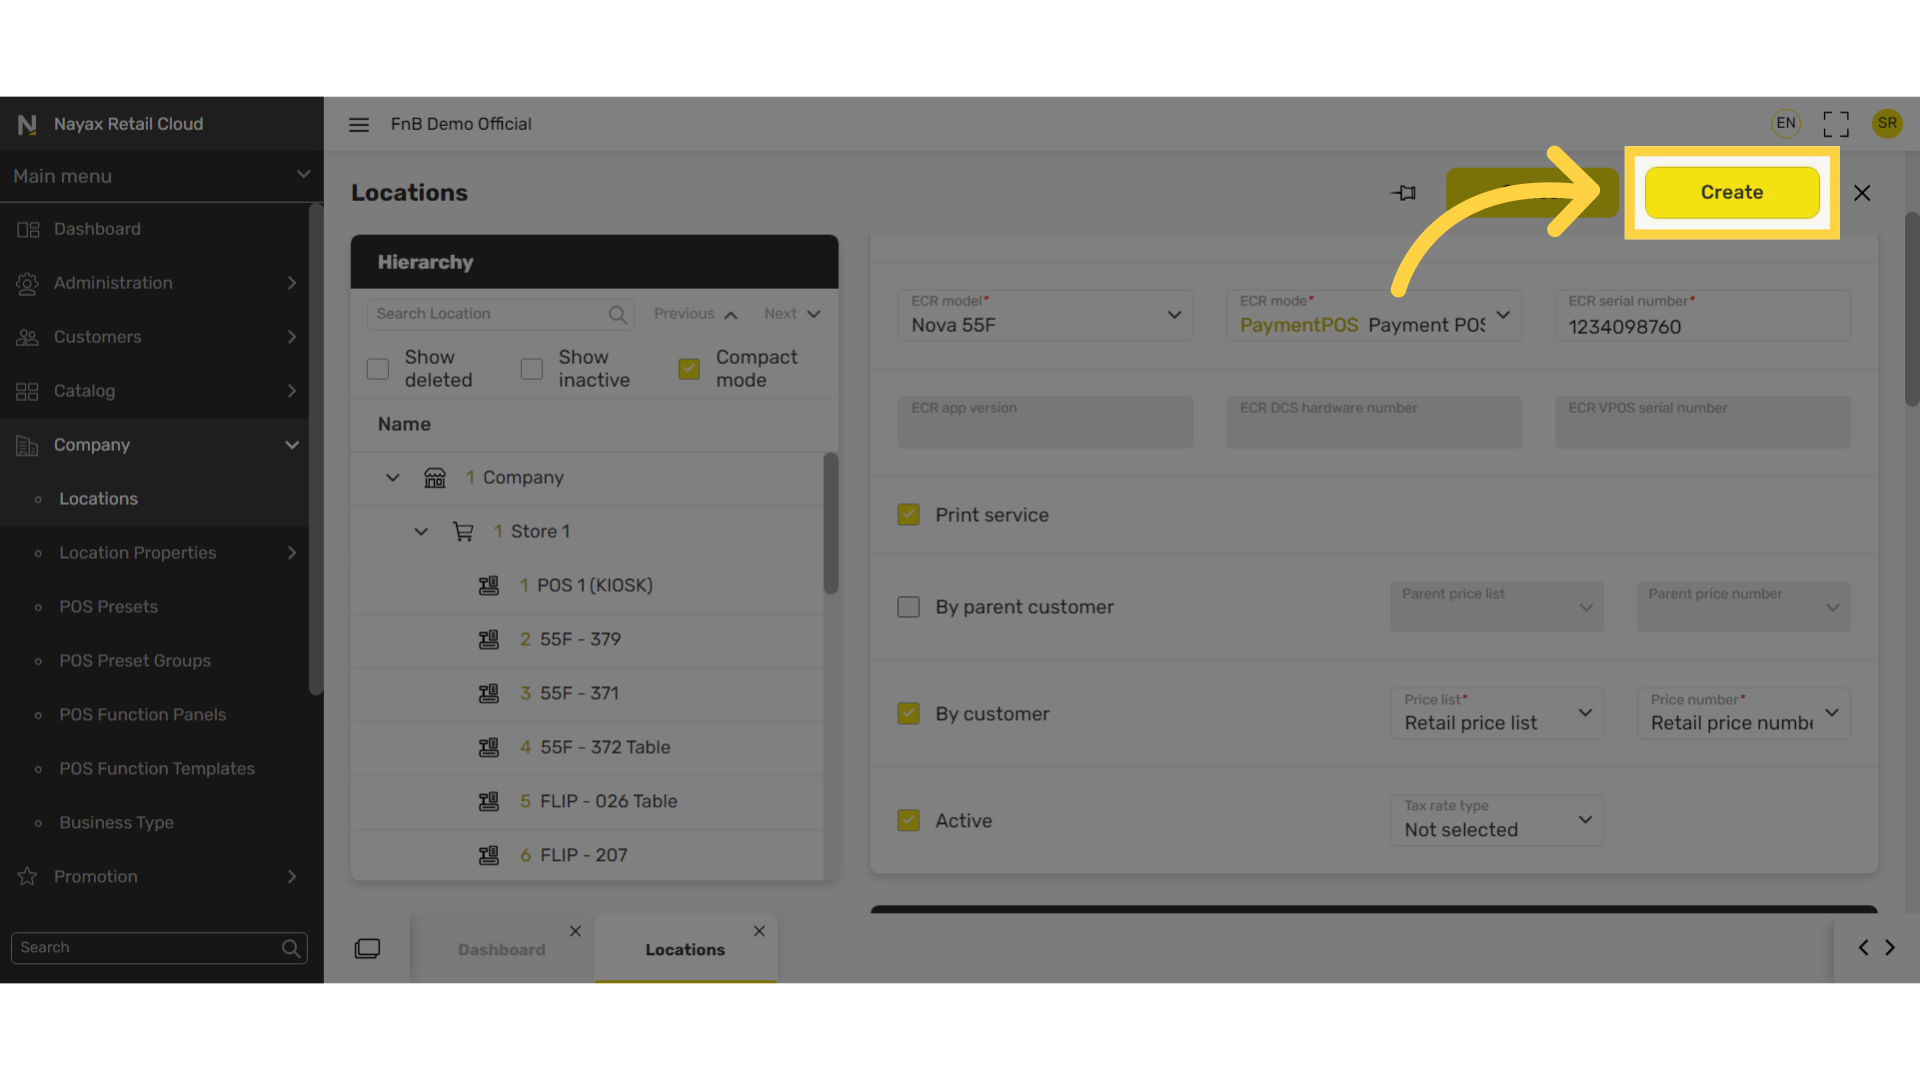
Click Save.
Image Attached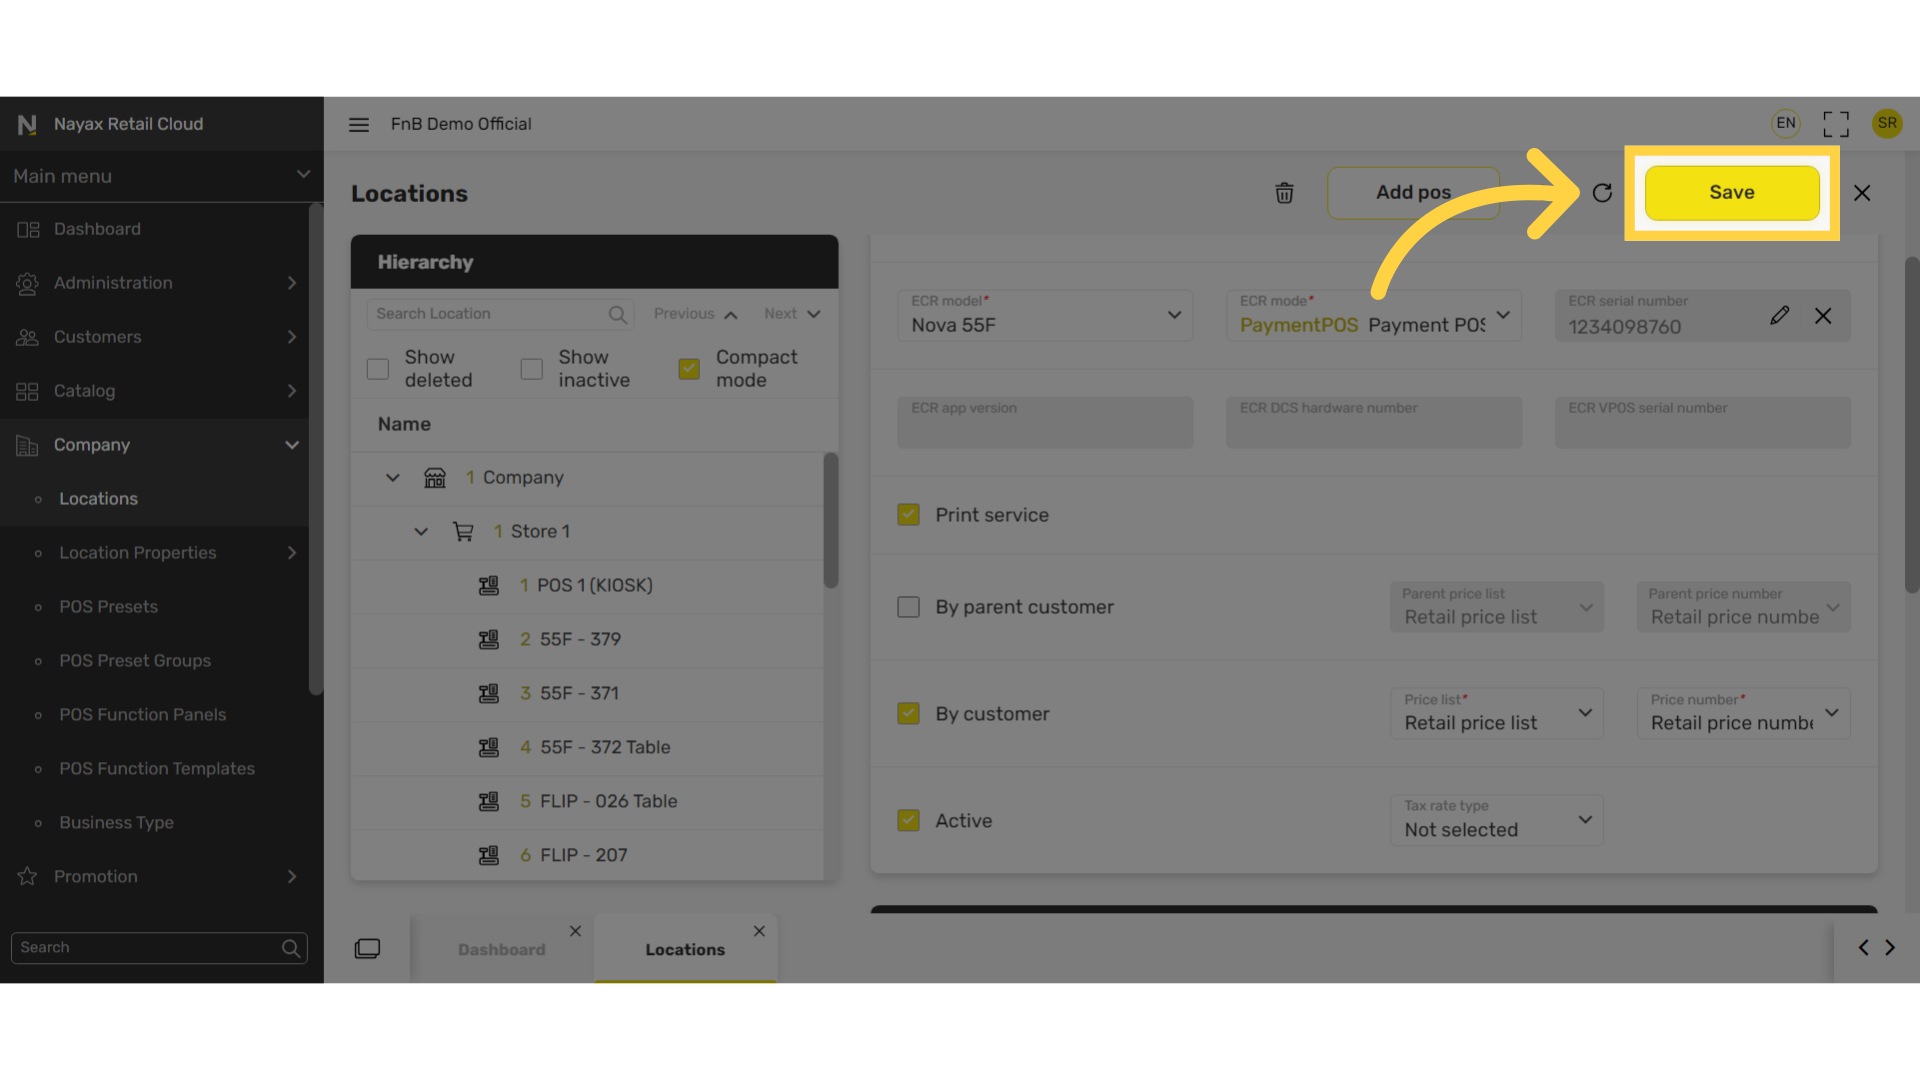
Thank you!
Did you find this article helpful?